
Noticing cracks or chips in your foundation’s protective coating? You’re probably wondering if you can simply apply fresh parging over the old layer instead of starting from scratch. The short answer is yes, you can parge over existing parging, but only if the old material is structurally sound and properly prepared. Attempting to cover compromised parging leads to premature failure, wasted money, and repeated repairs.
Parging is a thin cement-based coating applied to concrete or masonry foundations to protect against moisture infiltration and freeze-thaw damage. When the existing layer shows minor surface wear but remains firmly bonded to the wall, adding a new coat can restore both protection and appearance. However, widespread cracking, hollow-sounding areas, or visible moisture damage signal that complete removal is necessary.
This guide walks you through the assessment process, common failure causes, proper preparation techniques, and professional application methods. You’ll learn exactly when parging over old material makes sense and when it doesn’t, helping you make an informed decision that protects your foundation for decades. Let’s start by examining how to evaluate your existing parging condition.
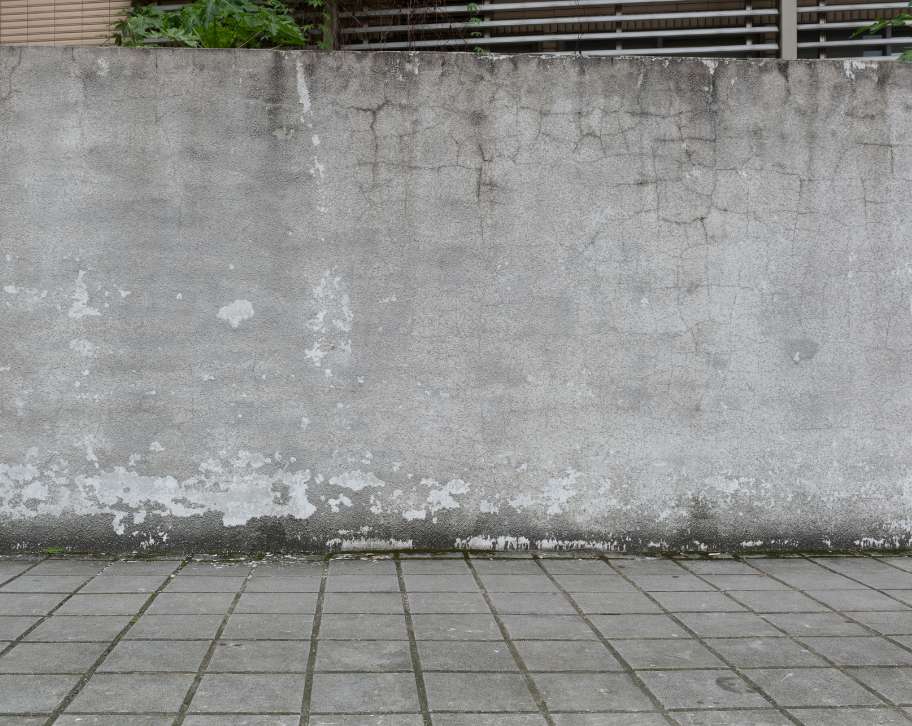
Applying new parging directly over an existing layer is possible when the old coating remains structurally sound and firmly adhered to the foundation. The decision hinges entirely on the current condition of the material. A thorough assessment determines whether the substrate can support additional weight or requires complete removal.
Parging serves three primary functions for foundation walls. It creates a weather-resistant barrier that prevents moisture penetration into porous concrete or block. It improves structural durability by acting as a sacrificial layer that absorbs freeze-thaw damage before it reaches the foundation itself. It also provides a clean, uniform appearance that improves curb appeal for residential and commercial properties.
Before adding new material, inspect the existing parging carefully. Look for signs of a healthy foundation coating that can accept a fresh layer:
Minor surface cracks less than 1/8 inch wide
Slight weathering or fading
Small areas of cosmetic wear
These typically indicate the underlying bond remains intact. When you tap the wall with your knuckles, a solid sound confirms the parging is still firmly attached to the substrate.
Several warning signs indicate complete removal is necessary instead of layering over old material:
Widespread cracking patterns across multiple sections suggest systemic failure rather than isolated damage
Hollow sounds when tapping the wall reveal delamination where the parging has separated from the foundation
Visible moisture damage including white powdery deposits (efflorescence), dark staining, or mold growth
Bulging or bowing sections that protrude from the wall surface
Loose or crumbling material that flakes away when touched
Water infiltration is particularly concerning. If you notice interior dampness, basement moisture, or exterior discoloration corresponding to parged areas, the coating has failed in its primary protective function. Covering compromised material with a new layer only masks the problem temporarily while allowing continued deterioration beneath.
A professional evaluation provides the most accurate assessment. Experienced contractors use specialized techniques to identify hidden delamination and measure remaining adhesion strength. They also examine drainage patterns, foundation movement, and other factors that may have contributed to the original failure.
Understanding why parging deteriorates helps prevent the same problems from recurring after repairs. Most failures stem from installation errors or environmental factors that compromise the material’s protective function. Identifying these causes allows property owners to address root issues rather than repeatedly patching symptoms.
Parging failure typically results from one or more of the following conditions:
Inadequate surface preparation is the single most common cause of premature failure. When dirt, dust, loose mortar, or environmental contaminants remain on the foundation before application, they create an invisible barrier between the wall and new cement. The parging appears to bond initially but separates within months as thermal expansion and moisture cycles stress the weak interface. Proper cleaning removes all debris and creates the textured profile necessary for mechanical adhesion.
Absence of a bonding agent leaves new parging without a chemical bridge to the old substrate. Concrete naturally forms a weak bond to fully cured surfaces because the hydration process that creates strength requires moisture exchange. A liquid bonding agent penetrates porous surfaces and creates a sticky interface that fuses old and new materials into a single unit. Skipping this step guarantees reduced adhesion strength and shortened lifespan.
Poor quality materials cannot withstand the environmental stresses that foundations endure. Generic concrete mixes lack the specific additives required for parging applications. Air-entraining agents create microscopic bubbles that provide expansion space when water freezes, preventing the explosive forces that cause spalling. Acrylic polymers improve flexibility and adhesion. Using standard concrete mix instead of specialized parging cement results in brittle coatings that crack and delaminate rapidly.
Improper mix ratios produce material that is either too weak or too dense. Excessive water content weakens the cement matrix, reducing compressive strength and creating a porous surface vulnerable to moisture penetration. Insufficient water prevents complete hydration, leaving unreacted cement particles that contribute no strength. Too much sand creates a crumbly mixture with poor cohesion. The correct ratio of one part Portland cement to two or three parts clean sand provides optimal strength and workability.
Unsuitable curing temperatures disrupt the chemical hydration process that gives cement its strength. Applying parging when ambient temperatures fall below 40°F causes water in the mix to freeze before hydration completes. Ice crystals expand and shatter the developing cement matrix, resulting in immediate structural failure. Temperatures above 86°F cause surface moisture to evaporate too quickly, halting hydration and creating a weak, dusty surface layer. The ideal application window is 50°F to 80°F with moderate humidity.
Masking underlying structural issues guarantees repeated failure regardless of application quality. If the foundation itself is cracked, settling, or experiencing ongoing movement, any parging applied over it will crack in the same pattern. Water infiltration from failed drainage systems or missing waterproofing membranes saturates the substrate and causes freeze-thaw damage from within. Loose mortar joints between concrete blocks provide no stable base for parging adhesion.
Preventing these failures requires a systematic approach that addresses each potential weakness:
Identify and repair foundation problems before applying any coating
Ensure proper drainage directs water away from walls
Use climate-appropriate materials formulated for freeze-thaw resistance
Follow manufacturer specifications for mixing ratios and application techniques
Schedule work during favorable weather conditions
Protect newly applied parging during the critical curing period
The investment in proper preparation and quality materials pays dividends through decades of reliable performance. Cutting corners to save time or money inevitably leads to premature failure and higher long-term costs.
Successful parging over existing material requires careful surface preparation and appropriate material selection. The preparation phase determines whether the new coating bonds permanently or fails within the first freeze-thaw cycle. Different foundation types demand specific approaches to achieve optimal results.
Begin by mechanically removing all loose, crumbling, or degraded parging using a hammer and screwdriver or masonry chisel. Tap gently around cracks and damaged areas to identify sections that have lost adhesion. Remove these completely rather than attempting to build over unstable material. Use a stiff wire brush to aggressively roughen the remaining surface, creating a textured profile that provides mechanical grip for the new layer.
Thoroughly clean the foundation wall to remove all dust, dirt, and debris. Power washing is highly effective for large areas, while scrubbing with a stiff brush and garden hose works for smaller repairs. Pay particular attention to corners, edges, and areas near grade where soil contamination accumulates. The goal is a completely clean surface free of any substance that could interfere with bonding.
Achieve a saturated surface dry (SSD) moisture condition before applying new material. This means the substrate is thoroughly damp but has no standing water or visible surface moisture. Spray the wall with a fine mist and allow it to absorb for 15 to 30 minutes. The dampness prevents the old concrete from drawing water out of the new parging mix, which would weaken the bond and prevent proper curing.
Repair loose mortar joints between concrete blocks before parging. Chisel out deteriorated mortar to a depth of at least half an inch and repoint with fresh mortar. Allow the repointing to cure for at least 24 hours before applying parging. This creates a stable, uniform substrate that won’t shift or settle beneath the new coating.
Use a specialized concrete parging mix designed specifically for foundation coating applications. These formulations include air-entraining agents that create microscopic expansion space for freezing water, preventing the explosive forces that cause spalling in harsh climates. They also contain acrylic polymers that improve flexibility and adhesion compared to standard concrete mixes.
Select a commercial-grade liquid concrete adhesive (bonding agent) rather than relying on mechanical adhesion alone. Apply this product directly to the prepared, damp surface using an old paintbrush. For improved bonding, add a small amount of the liquid adhesive directly to the dry parging mix before adding water. This creates a chemical bridge between old and new materials that significantly improves long-term adhesion.
|
Substrate Type |
Key Preparation Steps |
|---|---|
|
Concrete/Existing Parging |
Aggressively remove loose material, thoroughly clean, dampen to SSD condition, apply bonding agent |
|
Painted Block |
Aggressively power wash or mechanically strip loose paint, attach wire lath/mesh with masonry screws, apply bonding agent |
|
Wood/Plywood |
Apply a waterproof barrier, install stucco wire mesh, apply a scratch coat, then the finish coat |
Painted block foundations require special attention because paint acts as a bond-breaker. Power wash aggressively to remove as much loose paint as possible, or mechanically strip it using a wire wheel or scraper. For heavily painted surfaces where complete removal is impractical, install galvanized wire mesh or metal lath directly to the block using masonry screws spaced 12 to 16 inches apart. This provides a mechanical framework for the parging to grip, bypassing the painted surface entirely.
Wood or plywood substrates demand a completely different approach. Install a waterproof membrane over the entire wood surface to prevent moisture from causing rot. Next, attach stucco wire mesh securely to the waterproofing using appropriate fasteners. Apply a base scratch coat of mortar, pressing it firmly into the wire mesh to ensure complete embedment. Allow this to cure, then roughen the surface with a wire brush before applying the final finish coat.
The preparation phase determines success or failure more than any other factor in the parging process. Rushing through these steps to save time guarantees premature failure and costly repairs.
Proper application technique and controlled curing conditions transform quality materials and thorough preparation into a durable, long-lasting protective coating. The mixing, application, and curing phases each require precision and attention to environmental factors that affect the final result.
Mix the parging cement in a clean pail, combining the dry material with water and a small amount of liquid bonding agent. Add water gradually while stirring to achieve a smooth, peanut-butter-like consistency. The mixture should hold its shape on the trowel without slumping or sliding off, but remain workable enough to spread smoothly. Too much water creates a soupy mix that slides down vertical surfaces. Too little water produces a crumbly mixture that won’t adhere properly.
Load a small amount of mixed parging onto a finishing trowel using a separate loading trowel. Press the material firmly against the prepared foundation wall, forcing it into the pores and textured surface of the substrate. Use smooth, sweeping motions to spread the material evenly. Maintain consistent pressure to ensure complete contact with the wall and eliminate air pockets that create weak spots.
For minor repairs and resurfacing over sound existing parging, a single thin coat between 1/8 inch and 1/4 inch thick is sufficient. This provides adequate protection without adding excessive weight or creating adhesion problems. Apply the material in smooth, even strokes, feathering the edges to blend seamlessly with surrounding areas.
Deeper repairs or leveling of uneven surfaces require multiple thin coats rather than one thick application. Apply a rough scratch coat, pressing it firmly into the substrate. Before it fully hardens, roughen the surface using a stiff wire brush or the edge of the trowel, creating horizontal grooves that provide mechanical grip for the next layer. Allow this base coat to cure for at least 24 hours before applying subsequent layers.
Immediately after applying the final coat, use a slightly damp masonry sponge to feather the edges and create texture that matches the surrounding parging. Lightly rub the sponge over the wet cement in swirling or stippling motions, replicating the existing finish. Be careful not to use a soaking wet sponge, as excess water dilutes the surface cement and creates a weak, dusty layer. The sponge should be barely damp, just enough to smooth and texture without adding moisture.
Curing is not simply drying. It is a chemical hydration process where water reacts with cement to form crystalline structures that give concrete its strength. This process requires sustained moisture and controlled temperatures to proceed correctly. Rushing or interrupting curing produces weak, brittle material vulnerable to cracking and delamination.
Maintain an ideal temperature window of 50°F to 80°F during application and for at least 48 hours afterward. Temperatures below 40°F cause water in the mix to freeze before hydration completes, resulting in immediate structural failure. Temperatures above 85°F cause surface moisture to evaporate too quickly, halting the hydration process and creating a weak surface layer. Monitor weather forecasts carefully and schedule parging work during stable, moderate conditions.
Keep the newly parged area continuously wet for a minimum of three days after application. Use a garden hose with a fine mist nozzle to gently spray the surface multiple times per day. The goal is to maintain visible surface moisture without creating runoff or pooling water. In hot, dry, or windy conditions, increase misting frequency to prevent premature drying. In cool, humid weather, less frequent misting may be sufficient.
The curing timeline progresses through distinct stages:
Initial setting occurs within the first few hours, when the parging becomes firm to the touch but remains vulnerable to damage
Final setting happens between 24 hours and several days, marking the point where the cement is fully hardened and can withstand light contact
Full structural strength develops over several weeks as hydration continues deep within the material
Protect newly applied parging from direct, intense sunlight during the curing period. Sunlight accelerates surface drying and creates temperature differentials that cause shrinkage cracks. If working in full sun is unavoidable, hang shade cloth or tarps to diffuse direct rays while maintaining air circulation.
Understanding and controlling these application and curing variables separates professional results that last decades from amateur attempts that fail within months. The chemical processes involved are unforgiving, rewarding careful technique with exceptional durability and punishing shortcuts with premature failure.
For a professional evaluation of your foundation’s parging needs, contact Atlantic Brick and Stone. With over 15 years of experience in Fredericton’s unique climate, we provide expert assessments and lasting solutions, backed by up to a 25-year warranty on workmanship. Our detailed approach ensures your foundation receives the right care for optimal protection.
Deciding whether to parge over existing material requires honest assessment of the substrate’s condition. Sound, well-bonded parging can accept a fresh coat that restores protection and appearance. Compromised material demands complete removal to prevent repeated failures and escalating costs.
Success depends on thorough surface preparation, climate-appropriate materials, precise application technique, and controlled curing conditions. Each step builds on the previous one, creating a protective system that withstands decades of freeze-thaw cycles and moisture exposure. Shortcuts at any stage compromise the entire installation.
For foundations showing widespread cracking, delamination, or moisture damage, professional evaluation identifies underlying causes and recommends appropriate responses. Addressing root problems rather than masking symptoms with new parging protects your investment and prevents costly structural repairs later.
When properly executed, parging serves as a sacrificial protective layer that absorbs environmental stress so your foundation doesn’t have to. That protection is worth the investment in quality materials, careful preparation, and expert application.
Well-installed and properly maintained parging typically lasts for 30 to 50 years. Its lifespan depends significantly on initial surface preparation, material quality, application techniques, and local climate conditions, particularly severe freeze-thaw cycles. Regular inspection helps address minor issues before they worsen.
Parging is a thin coat of mortar applied to concrete or masonry foundation walls, primarily for protection and aesthetics. Stucco is a decorative, protective coating applied to exterior walls of buildings, often over lath, and can be cement-based or synthetic. While similar in composition, their primary applications differ.
Yes, a concrete block foundation can be parged. It is a common and recommended practice to protect the blocks from moisture penetration and create a finished look. Proper surface preparation, including repointing loose mortar joints and applying a bonding agent, is necessary for successful adhesion.
The best parging mix typically consists of 1 part Portland cement to 2-3 parts clean, coarse sand. For cold climates like Atlantic Canada, incorporating air-entraining agents and acrylic polymers is beneficial. These additives improve flexibility, adhesion, and resistance to freeze-thaw cycles.
Parging is generally applied in a thin coat, typically between 1/8 inch (3mm) and 1/4 inch (6mm) thick. For deeper repairs or leveling uneven surfaces, multiple thin coats are preferred, with a scratch coat applied initially, roughened, and then followed by subsequent layers for optimal adhesion.
GET STARTED
Create stunning structures with our residential and commercial masonry services in Fredericton. From meticulous designs to the completed build, our process is professional and rewarding, and we can’t wait to build your dream with you.
Atlantic Brick and Stone, one of the best masonry contractors in Fredericton, NB
Contact
8 Muskie Street, Lower Kingsclear, New Brunswick E3E 0E7, Canada