You spend weeks planning your patio, selecting the perfect spot and imagining summer evenings with loved ones. You pour the concrete yourself to save money. Six months later, spider cracks spread across the surface and water pools near your foundation.
This happens frequently across Fredericton and New Brunswick. Pouring concrete is precise science demanding attention to detail. Atlantic Canada’s harsh climate doesn’t forgive shortcuts. Our freeze-thaw cycles, heavy snowfall, and temperature swings test every concrete surface.
Whether planning a driveway, patio, or foundation, understanding proper concrete techniques means the difference between surfaces lasting decades and those failing within a year. The process involves critical steps many overlook: proper site preparation, accurate formwork, correct reinforcement, choosing the right mix, and adequate curing.
This guide teaches professional techniques guaranteeing your concrete slab withstands New Brunswick’s challenging climate. We’ll cover each phase from excavation to sealing, highlighting common mistakes and how to avoid them. Atlantic Brick and Stone has spent over 15 years perfecting concrete installation for our region’s challenges.
A concrete slab is a flat, horizontal surface made from cement, sand, gravel, and water that forms the foundation for residential and commercial structures. Once cured, concrete provides exceptional compressive strength, ideal for bearing loads and creating durable surfaces that last decades.
For residential properties, concrete slabs serve multiple purposes:
Patios provide outdoor living spaces
Walkways create safe, stable paths
Driveways handle vehicle traffic
Garage floors support equipment and tools
Shed foundations offer level bases that prevent settling
Each application requires specific considerations for thickness, reinforcement, and finishing.
Commercial properties use concrete for warehouse floors that withstand forklift traffic, loading docks bearing thousands of pounds daily, and hardscapes handling foot traffic. These applications typically require thicker slabs, stronger reinforcement, and more powerful mix designs than residential projects.
The distinction between structural and non-structural slabs is important. Structural slabs, like building foundations, must meet engineering requirements and building codes. Non-structural slabs, like patios or walkways, primarily resist settling and surface wear. Understanding this difference determines appropriate thickness, reinforcement, and concrete strength.
Atlantic Canada’s climate demands higher standards than milder regions. Freeze-thaw cycles—where water penetrates concrete, freezes, expands, and causes damage—can destroy poorly installed slabs within one winter. This makes air-entrainment, proper drainage, and adequate thickness essential requirements.
Most residential slabs require a minimum thickness of four inches for light traffic like patios and walkways. Driveways handling vehicles should be five to six inches thick. Atlantic Brick and Stone evaluates expected loads, drainage, climate risks, and subgrade conditions to determine optimal thickness for each project. While four inches suffices for light traffic, reinforcement or thicker alternatives significantly reduce future cracking and maintenance.
Successful concrete slabs begin with proper site preparation. This phase determines whether your slab lasts decades or cracks within the first year.
Before excavating, contact local utility companies to locate underground lines. Gas, electrical, water, and telecommunications cables often run beneath undisturbed ground. Hitting these lines causes expensive repairs and safety hazards. In New Brunswick, utility location services are typically free.
Choose naturally level, stable ground whenever possible. Avoid areas with standing water, soft soil, or recent fill. Your slab should never direct water toward building foundations.
Calculate proper excavation depth carefully. For a standard four-inch slab over four-inch gravel, dig approximately eight inches deep. Mark the perimeter with spray paint or stakes and string.
Once marked, remove all organic matter completely. Grass, roots, topsoil, and vegetation decompose beneath slabs, creating voids that cause settling and cracking. Strip down to mineral soil or clay subgrade for reliable foundation.
The subgrade—the soil at your excavation bottom—must be firm and unyielding. Use a plate compactor to thoroughly compact exposed soil, creating a stable platform that won’t shift under concrete weight.
Install gravel base with equal attention to detail. Spread crushed stone in two-inch layers, compacting each layer individually. The gravel serves multiple purposes:
Prevents moisture from wicking into concrete
Creates excellent drainage beneath the slab
Distributes loads evenly
Atlantic Brick and Stone’s expertise in soil preparation prevents the shifting and uneven settling that leads to cracks. New Brunswick’s clay-heavy soils and seasonal frost heave require extra attention to drainage and base stability.
Establish proper drainage slope as your final preparation step. Water must flow away from buildings at one-eighth to one-quarter inch per foot. Use a line level to mark the high point against your house and the low point at the slab’s outer edge. In Fredericton’s climate, good drainage is essential protection against ice buildup and water damage.
Formwork is the precision mold shaping your concrete slab’s dimensions, thickness, elevation, and slope, determining professional results versus an uneven slab.
Begin with batterboards—wooden frames positioned outside slab corners. Stretch mason’s lines between them to define the perimeter. Measure diagonals to confirm square corners; equal diagonals verify true 90-degree angles.
Calculate drainage slope precisely. For a 12-foot slab with quarter-inch-per-foot slope, the outer edge should sit three inches lower than the foundation edge. Use a string level to mark elevation differences, preventing water infiltration.
Drive wooden stakes every two feet along layout lines. Use 2×4 lumber stakes driven deep enough to resist movement, with tops slightly below planned form height.
Position straight 2×4 lumber against elevation marks, level at the high end while sloping toward drainage. Fasten forms using duplex nails—double-headed fasteners enabling easy removal after concrete cures.
For runs exceeding one board length, join boards end-to-end. Strengthen connections with plywood gusset strips nailed across the exterior, adding stakes flanking joints for stability.
Where new concrete meets existing structures, install expansion joint material. This half-inch compressible strip permits independent movement between concrete masses, preventing cracks. The expansion joint establishes controlled separation protecting both surfaces.
After securing forms, trim stake tops flush with or below form boards. Protruding stakes obstruct your screed board during leveling.
Apply a release agent to form interiors. Commercial products work best, though vegetable oil suffices for residential applications. Avoid motor oil—it contaminates soil and provides inferior release. Release agents prevent concrete adhesion to wood, ensuring clean edges.
Atlantic Brick and Stone guarantees precision concrete placement through expert formwork installation. Professional formwork eliminates mistakes compromising drainage and producing substandard slabs.
Concrete has exceptional compressive strength but poor tensile strength. Temperature changes, ground movement, and loads create tensile stresses that crack unreinforced concrete. Reinforcement provides the tensile strength concrete lacks.
Two reinforcement types dominate residential slabs: welded wire mesh and rebar. Wire mesh works well for patios and walkways. Rebar offers stronger reinforcement for driveways and garage floors, with number three or four rebar spaced 12 to 18 inches apart.
The most critical aspect is positioning. Reinforcement at the bottom provides zero benefit. Steel must sit in the middle third of the slab’s thickness. For a four-inch slab, position reinforcement approximately two inches above the gravel base.
Proper positioning requires supports. Wire mesh chairs elevate mesh to the correct height. For rebar, use rebar chairs or concrete block supports. Walk across your reinforcement before pouring to verify it doesn’t sink. Reinforcement that settles during the pour serves no structural purpose.
Maintain clearance from form edges to prevent rust problems. Leave a two-inch gap between steel and the perimeter. Steel too close to edges rusts when moisture penetrates, causing concrete to spall.
Overlap wire mesh sections by at least four inches and secure with tie wire. Cut mesh with bolt cutters or an angle grinder, smoothing sharp edges.
Atlantic Brick and Stone installs reinforced mesh to strengthen slab integrity and reduce cracking. Our experience with New Brunswick’s freeze-thaw cycles shows proper reinforcement placement dramatically extends slab life. We’ve repaired countless slabs where bottom-positioned reinforcement provided no resistance to cracking.
Heavy-load applications like commercial driveways require engineered reinforcement designs. Atlantic Brick and Stone evaluates each project’s requirements, providing reinforcement that matches your slab’s demands.
Reinforcement’s role in resisting temperature-related expansion and contraction is critical in our climate. Properly positioned reinforcement holds cracks closed, preventing water infiltration and maintaining structural integrity even when minor cracks develop.
Your concrete mix directly determines slab strength, durability, and lifespan. Proportions and additives vary significantly based on application and climate.
Standard concrete mix provides balanced performance with one part cement, two parts sand, three parts gravel, and water. It delivers adequate strength for patios and walkways, though Atlantic Canada’s climate may require modifications.
High-strength concrete mix increases cement content and may include fly ash or silica fume. These mixes achieve higher compressive strengths essential for foundations, driveways, and commercial applications where loads or durability demands justify the cost.
Fast-setting concrete mix contains accelerating additives that speed curing. While convenient for tight timelines, these mixes are harder to work with due to shortened working time. Standard or high-strength mixes typically provide better results.
For Atlantic Canadian exterior applications, minimum compressive strength should reach 32 megapascals (MPa) to withstand freeze-thaw cycles, de-icing salt exposure, and mechanical wear.
Air-entrainment is essential for exterior concrete in freeze-thaw climates. Air-entraining admixtures create microscopic bubbles that provide expansion space when water freezes, preventing internal damage. Proper air-entrainment (five to eight percent) dramatically increases freeze-thaw resistance.
Slump and workability determine proper consistency. Too-dry concrete becomes difficult to work and may contain voids. Too-wet concrete is easy to place but significantly weaker. Aim for three to four inches slump for residential slabs.
Never add excess water. Too much water creates porous structure prone to dusting, scaling, and reduced strength. If more workability is needed, request plasticizing admixtures instead.
The “dry pour” method—placing dry bagged concrete and spraying it with water—creates uneven hydration and weak zones. For structural applications, mix concrete properly using a mixer or order ready-mix delivery.
Atlantic Brick and Stone uses high-quality materials and proper mixing to achieve necessary strength. New Brunswick’s climate demands concrete exceeding minimum standards. Investing in proper air-entrainment, adequate cement content, and correct water ratios extends slab life and reduces maintenance.
Ready-mix delivery versus on-site mixing depends on project scale. For slabs larger than 100 square feet, ready-mix provides consistent quality. For smaller projects or difficult access, on-site mixing offers flexibility. Always order 10 percent extra.
Once concrete arrives, you’re working against chemistry. Hydration begins immediately, giving you a limited window to place, level, and finish your slab. Efficient execution prevents cold joints and ensures uniform strength.
Stage tools beforehand. Arrange shovels, rakes, screed boards, bull floats, hand floats, edgers, and groovers in order of use. Position wheelbarrows and brief helpers. Concrete trucks won’t wait.
Build temporary ramps for wheelbarrow access. Lay sturdy planks from ground level over forms without shifting them. Even slight movement creates permanent irregularities in your slab’s edges and elevation.
Proper concrete placement techniques begin at one corner, typically farthest from the truck. Dump concrete against forms and spread it toward the centre. Work systematically, maintaining consistent depth slightly above form height. Don’t drop concrete from heights exceeding three feet—this causes segregation.
Use come-along rakes to pull and spread material efficiently. Push concrete into corners and edges. Tap forms with a hammer to vibrate concrete into tight spots and release trapped air. Avoid overworking concrete.
The screeding process levels concrete to match your forms’ elevation. Position a straight 2×4 across the forms with a helper. Pull the screed toward you while moving it side-to-side in a sawing motion. Shovel extra concrete into low spots.
Make a second pass tilting the board slightly backward for a flatter surface. Check for low spots by sighting across the slab at a low angle. Fill depressions and screed again.
Bull floating immediately after screeding smooths the surface and brings fines to the top while pushing large aggregate down. Hold the bull float’s leading edge tilted slightly up as you push. Pull it back with the blade flat. Bull float until bleed water appears.
Atlantic Brick and Stone’s precision concrete placement provides smooth, durable finishes through attention to these critical details. Our crews understand that the first 30 to 60 minutes determines the slab’s final quality.
After bull floating, stop working and wait for bleed water to evaporate. Working concrete while bleed water remains traps water beneath the surface, creating a weak layer that will scale later. Depending on conditions, bleed water may disappear in 30 minutes or several hours.
For larger pours requiring multiple loads, timing becomes critical to avoid cold joints. Plan so each section is placed, screeded, and floated before the previous section sets. Maintain continuous workflow and adequate crew size to keep pace with concrete delivery.
Proper finishing determines how your slab looks and performs. Good timing and technique create surfaces that resist wear, shed water, and provide safe traction through New Brunswick’s challenging seasons.
Timing is critical. Wait for bleed water to disappear before finishing. Working too early causes surfaces that scale, dust, and deteriorate prematurely.
When you trowel while bleed water remains, you trap water beneath a thin surface layer. This prevents bonding and causes delamination—the surface separates and scales off in freeze-thaw conditions.
Edging techniques create rounded, chip-resistant perimeters. Run an edger along all exposed edges. The curved bottom resists chipping better than sharp 90-degree edges. Edge once after floating and again after final finishing.
Control joints manage inevitable cracking. Run a groover across the slab every eight to 10 feet, creating grooves one-quarter the slab’s thickness deep. These create intentional weak planes where cracks form in straight lines rather than randomly.
Control joints work because concrete shrinks as it cures. When stress exceeds tensile strength, cracks form at the weakest points—which you’ve intentionally created in straight lines.
Surface texture options serve aesthetic and functional purposes. For outdoor applications in Atlantic Canada, texture is essential for safety.
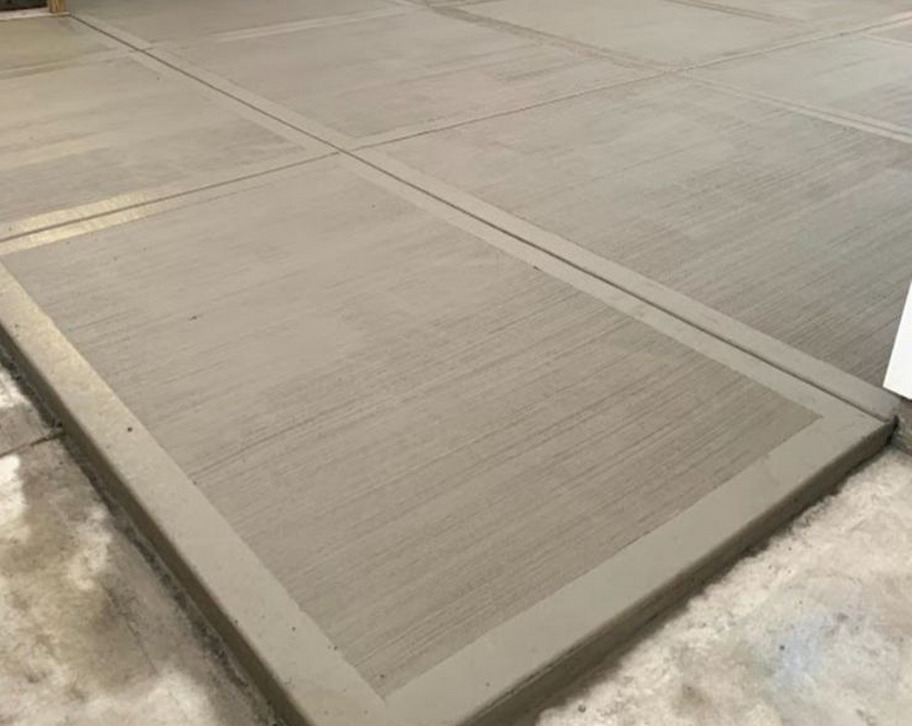
Broom finish is standard for outdoor slabs. After final floating, pull a stiff-bristle broom across the surface. This creates fine ridges providing excellent traction when wet or icy. Pull perpendicular to traffic direction for maximum slip resistance.
Smooth trowel finish suits interior applications like garage floors where easy cleaning matters more than slip resistance. Use a steel trowel held nearly flat, applying firm pressure in sweeping arcs. Multiple passes create increasingly smooth, dense surfaces.
Atlantic Brick and Stone’s finishing combines beauty with functionality. We create consistent textures, crisp edges, and uniform surfaces that improve property appearance while providing decades of reliable performance.
Proper tool techniques require practice. Edgers should move smoothly without digging in. Groovers need straight guides. Brooms should be clean and damp with firm bristles. Steel trowels must be clean and rust-free to avoid staining.
Final inspection before curing identifies issues you can still address. Check that:
Edges are uniform
Control joints are straight and properly spaced
Surface texture is consistent
No bleed water remains
Low spots are addressed
Once concrete hardens, corrections become impossible.
Curing is the most misunderstood phase of concrete installation. Concrete doesn’t “dry” to gain strength—it hydrates through a chemical reaction between cement and water. This process requires moisture and time.
Concrete that dries too quickly never reaches full strength potential. Rapid drying causes shrinkage cracking as the surface contracts faster than the interior, creating stresses the immature concrete cannot withstand.
Cement hydration continues for weeks with adequate moisture. During the first seven days, concrete develops approximately 70 percent of its final strength, reaching roughly 90 percent by 28 days. Concrete that dries prematurely stops hydrating and never achieves its design strength.
The minimum curing period for residential slabs is three to seven days of continuous moisture retention. Keep concrete surfaces wet or covered to prevent moisture loss.
Plastic sheeting provides reliable moisture retention. Cover the slab immediately after finishing with clear or white plastic sheeting. Weight the edges to prevent wind from drying the concrete underneath.
Wet burlap offers continuous moisture when kept damp. Lay burlap over the slab and soak it thoroughly several times daily. Never let burlap dry completely, as this causes surface staining and uneven curing.
Commercial liquid curing compounds spray onto fresh concrete, forming a membrane that seals moisture inside. These work well for large projects or when plastic sheeting isn’t practical.
Atlantic Brick and Stone maintains moist conditions for at least seven days, extending curing periods for projects requiring maximum strength.
Special considerations for cold weather are critical in New Brunswick’s climate. Concrete must stay above 10 degrees Celsius during curing for proper hydration. Use insulating blankets to trap hydration heat while providing insulation against freezing temperatures.
Concrete that freezes within the first 24 to 48 hours can lose up to 50 percent of its potential strength permanently. If overnight freezing is forecast, delay your pour or arrange adequate protection.
Wait at least 48 to 72 hours before removing form boards from residential slabs. Edges remain fragile during early curing and can chip if forms are removed too soon.
Protect the slab from foot traffic and heavy loads during curing. Light foot traffic may be acceptable after 48 hours, but avoid heavy furniture, vehicles, or construction equipment for at least seven days.
Full strength requires 28 days for complete hydration. While concrete may seem hard after several days, it continues gaining strength for weeks.
Proper curing prevents cracking by developing higher tensile strength and better resisting stresses. Atlantic Brick and Stone’s 1-year concrete warranty reflects our confidence in proper curing procedures.
Proper maintenance extends lifespan, preserves appearance, and prevents costly repairs. In Fredericton’s harsh climate, maintenance is essential.
Sealing cured concrete after 28 days protects against moisture, stains, and freeze-thaw damage. Quality sealers create barriers that repel water and extend concrete life.
Atlantic Brick and Stone recommends applying commercial-grade sealers every two to three years:
Acrylic sealers provide good protection at reasonable cost
Penetrating sealers soak into concrete without surface film
Epoxy sealers offer maximum protection but cost more
Sealed concrete resists moisture penetration that causes freeze-thaw damage and prevents stains from penetrating surfaces.
Regular inspections identify minor issues before they worsen. Walk your concrete each spring and fall, checking for:
Small cracks
Surface scaling
Drainage issues
Edge deterioration
Catching hairline cracks early allows simple repair. Ignoring cracks permits water infiltration, causing widening and structural damage.
Address cracks promptly. Clean thoroughly and fill narrow cracks with flexible concrete caulk. Wider cracks require routing and proper concrete patching compound.
Proper cleaning preserves surfaces without damage. Sweep regularly to remove abrasive dirt. Use pressure washers at 1500 to 2000 PSI, holding nozzles at an angle. Avoid harsh chemicals.
De-icing salt alternatives protect concrete from sodium chloride’s corrosive effects. Traditional rock salt damages concrete through freeze-thaw cycles and chemical reactions. Use sand or kitty litter for traction, or choose calcium magnesium acetate if salt is necessary.
Drainage maintenance prevents water pooling and ice buildup. Keep control joints clear and verify proper slope. Redirect downspouts away from concrete. Standing water accelerates deterioration.
Atlantic Brick and Stone’s concrete repair services extend lifespan when damage exceeds routine maintenance, from crack filling to comprehensive resurfacing.
Atlantic Brick and Stone’s 1-year warranty covers major cracking, scaling, spalling, or pop-outs from defects in materials or workmanship, emphasizing the importance of proper maintenance.
A long-term investment perspective factors costs over decades. Properly maintained concrete lasts 30 to 50 years or more. Investing in quality installation and regular sealing pays dividends through extended life and reduced repairs. Cheap installation that fails within five years costs far more than doing it right initially.
Learning from others’ mistakes saves you time, money, and frustration. Certain errors appear repeatedly in failed concrete installations, yet they’re entirely preventable with proper knowledge and attention to detail.
Poor base preparation causes most first-year settling and cracking. Inadequately compacted gravel compresses under concrete weight and traffic, creating voids that make slabs sag and crack. Prevent this by thoroughly compacting subgrade and gravel base in two-inch layers using a plate compactor for projects beyond small walkways. Proper compaction equipment costs far less than replacing failed concrete.
This creates weak surfaces that deteriorate quickly. Working concrete while bleed water remains traps moisture beneath the finishing layer, preventing proper bonding. During freeze-thaw cycles, the weak surface scales off in sheets. Prevention is simple: wait for all bleed water to evaporate before finishing. Watch for the wet sheen to disappear completely.
All concrete cracks due to shrinkage and temperature changes. Without control joints, cracks form randomly across your slab, creating an unsightly appearance and allowing water infiltration. To prevent this, cut control joints every eight to 10 feet in both directions, creating planned weak points where cracks form in straight, controlled lines hidden at the bottom of the grooves.
Water is concrete’s enemy. Every gallon beyond what’s needed for hydration dilutes cement paste, creating porous, weak concrete that dusts and cracks. Excess water reduces final strength and causes excessive shrinkage during curing. Resist adding water for easier spreading. If concrete seems too stiff, request plasticizing admixtures from your ready-mix supplier instead of adding water on-site.
Steel at the slab’s bottom offers minimal structural benefit. Reinforcement resists tensile forces that concrete can’t handle, which occur in the slab’s middle and upper portions during bending and temperature stress. Bottom reinforcement sits in the compression zone where concrete is already strong. Proper supports (chairs) must hold reinforcement at mid-depth during the pour.
Concrete that dries too quickly stops hydrating prematurely, reaching only 50 to 70 percent of potential strength. This dramatically increases cracking risk as the surface shrinks while the moist interior resists. Prevent this by covering fresh concrete immediately after finishing and keeping it moist for at least seven days.
This leads to water pooling, ice buildup, and accelerated deterioration. Slabs without proper slope direct water toward buildings rather than away, causing foundation problems, basement leaks, and concentrated freeze-thaw damage. Prevention requires careful planning and execution of proper slope (one-eighth to one-quarter inch per foot away from structures) during formwork and screeding.
This creates uneven hydration and weak spots. Dry pour involves dumping bagged concrete into forms and spraying with water. Water distribution becomes uneven—some areas get too much (becoming weak), others stay too dry and never cure. The slab develops weak zones, voids, and unpredictable characteristics. Never use dry pour for structural applications. Mix concrete properly or order ready-mix.
DIY without professional experience risks improper base preparation, wrong materials, and premature failure through cumulative errors. Mistakes—inadequate compaction, improper reinforcement, poor mix selection, rushed curing—compound together. The slab may look acceptable initially but fails within years when proper installation would last decades.
Atlantic Brick and Stone’s specialized contractors provide consistent leveling, proper techniques, and structural integrity through experience and professional standards. Our crews have poured hundreds of slabs under varying conditions, understanding local soil types, climate challenges, and code requirements. We own proper equipment and use proven techniques refined through years of practice, eliminating the trial-and-error that plagues DIY projects and confirming your investment delivers expected performance and longevity.
Over 15 years of local experience in Fredericton and New Brunswick. We understand regional soil behavior, local climate challenges, and proven techniques for our environment.
Our comprehensive project approach manages everything from soil preparation to finishing. Single-source responsibility eliminates coordination headaches and finger-pointing. We evaluate site conditions, develop solutions, execute proper installation, and stand behind results.
Atlantic Brick and Stone‘s industry-leading 1-year concrete warranty covers major cracking, scaling, spalling, or pop-outs due to defective materials or workmanship. This demonstrates our confidence in quality. DIY projects carry no such assurance.
Understanding specific climate risks and subgrade issues allows us to customize installations for local conditions. We’ve worked with Fredericton’s clay soils, unpredictable spring weather, and Atlantic Canada drainage challenges. This experience informs decisions about excavation depth, base materials, reinforcement, mix design, and curing procedures.
Installing durable concrete slabs in Atlantic Canada requires attention to site preparation, formwork, reinforcement, mix selection, pouring, finishing, and curing. Shortcuts lead to cracking, settling, or failure.
New Brunswick’s harsh climate—freeze-thaw cycles, heavy snow, temperature extremes, and moisture—demands higher standards. Air-entrained concrete, proper drainage, adequate thickness, correct reinforcement, and thorough curing are essential.
Local expertise matters in Fredericton. Understanding regional soil types, frost depths, drainage, and weather patterns enables informed decisions. Generic advice from warmer climates often fails here.
Atlantic Brick and Stone brings over 15 years of experience from hundreds of installations. Our comprehensive approach delivers slabs that last, backed by five-star reviews.
Our 1-year concrete warranty covers major cracking (exceeding one-quarter inch), scaling, spalling, and pop-outs, reflecting our confidence in quality workmanship.
Whether planning a patio, driveway, garage floor, or commercial installation, we offer professional consultation tailored to your site, goals, and budget. Our repair services extend existing concrete life when replacement isn’t needed.
Request a quote, schedule a site visit, or speak with past clients to verify our quality. Visit completed projects to see our craftsmanship firsthand.
We’re building a legacy of trust throughout Fredericton and New Brunswick. Each slab represents our commitment to quality—concrete that remains a source of pride for decades.
GET STARTED
Create stunning structures with our residential and commercial masonry services in Fredericton. From meticulous designs to the completed build, our process is professional and rewarding, and we can’t wait to build your dream with you.
Atlantic Brick and Stone, one of the best masonry contractors in Fredericton, NB
Contact
8 Muskie Street, Lower Kingsclear, New Brunswick E3E 0E7, Canada