Uncategorized

Signs Your Chimney Roof Flashing is Leaking
Uncategorized

Top Signs Your Chimney Roof Flashing is Leaking and What to Do

Top Signs Your Chimney Roof Flashing is Leaking and What to Do A leaky chimney can cause significant damage to your home if not addressed promptly. While chimneys play an important role in keeping you warm and cozy during the cold winter months by allowing you to safely use a fireplace or wood stove, they can also unwittingly invite unwanted moisture and pests into living spaces if not properly maintained. As the connection point between your roof and chimney, flashing is essential to keeping water out and preventing damage. However, failures and leaks in flashing often go unnoticed until more serious issues emerge. In this comprehensive guide, we’ll explore the top signs that your chimney roof flashing may be leaking water into your home. We’ll also discuss the steps you should take to get your chimney professionally assessed and any necessary repairs completed. Keep reading to learn how to protect your home and your wallet from costly damage that could be caused by a preventable chimney leak. What is Chimney Roof Flashing? Chimney roof flashing refers to the critical weatherproof materials and components used to create a secure seal between a chimney structure and the surrounding roof. It is typically constructed using corrosion-resistant metals like galvanized steel or copper, specifically chosen for their strength and durability in defending against water intrusion over many years. The core purpose of installing chimney roof flashing is to effectively direct any water that has flowed down the angled roof surfaces safely around the vertical chimney structure. Properly installed flashing prevents moisture from infiltrating at the junction where the roof meets the chimney, which could potentially cause interior damage to a home over an extended period if left unaddressed. Possibility and Implications of Leaking Flashing If chimney flashing that was improperly installed to begin with or has deteriorated to the point of failure allows water to breach its protections, it creates an avenue for rain and melted snow to gain access into wall and attic cavities inside the home. What may start as a minuscule leak has the potential to progressively worsen into serious structural issues or indoor air quality problems for homeowners if the root cause is not identified and repaired conclusively. That is why regular maintenance and prompt repair of any leaks that are found is vital. Signs Your Chimney Roof Flashing is Leaking Water Stains or Damage on Ceilings or Walls Near the Chimney The telltale signs of discoloration, warping, or buckling of ceiling or wall surfaces located directly underneath the chimney provide visible evidence that moisture has been entering through gaps and seeping inward over an extended period. Appearance of Moisture or Dampness in the Attic Visible signs of pooled or beaded water, or yellowish stains left by evaporating condensation that can be spotted in exposed wood framing members surrounding the chimney chase area, are red flags indicating an infiltration problem. Visible Rust or Damage to the Flashing Itself Oxidation and physical deterioration seen corroding chimney flashings constructed of metal is a clear sign the protective seal has failed and allowed water to breach, requiring repairs or replacement of compromised materials. Damaged Roof Shingles Around the Chimney Cracked, cupped, or missing roof shingles observed near where the roof meets the chimney point to potential avenues for rain or melted snow to be entering the home’s exterior envelope at its weakest points. Leaks Appear or Worsen During or After Rainfall If dampness issues or active dripping seems tied directly to periods of precipitation, this links the source of the moisture directly to unfinished exterior work like failed chimney flashings or openings allowing water infiltration. Reasons for Chimney Roof Flashing Leaks Improper Installation Mistakes made during the original setting and sealing of flashings, such as incorrect overlaps of flashing pieces, poor caulking practices, or missing counterflashing components, enable easy paths for water to intrude where it shouldn’t. Aging and Wearing Out of Materials The natural fatigue and degradation that can occur to chimney flashing materials like thin metal sheets after 10-15 years of sun exposure and the strain of warming and cooling cycles means once-secure seals may fail if not proactively maintained. Weather Conditions and Environmental Factors Over the long run, extremes like harsh storms with high winds or in climates experiencing persistent freezing and thawing can prematurely damage previously intact seals that were perhaps marginally installed to begin with. Structural Issues with the Roof or Chimney Pre-existing defects such as cracks in masonry units, neglected re-pointing of deteriorating mortar, or substandard chimney crown work can concentrate leaks if flashings are relied upon solely for protection. The Possible Consequences of Neglecting a Leaking Chimney If wet sheathing and framing members are allowed to soak unchecked, it may seriously jeopardize the integrity of wood components providing building stability. Damp indoor environments create perfect breeding grounds for musty odors and mold growth that can cause health issues for occupants. The airborne spores released by unchecked mold proliferation have the potential to circulate throughout the entire home, posing respiratory health hazards. What to Do if Your Chimney Roof Flashing is Leaking Getting a Professional Evaluation It’s highly recommended to consult specialized chimney experts by hiring a mason contractor to thoroughly inspect all areas potentially involved for definitive diagnosis of any issues. Repairing the Flashing Common repairs involve repointing brickwork, injecting new sealant into gaps, or splicing/replacing damaged sections of flashing material to restore watertight integrity. Replacing the Flashing For severely worn flashing materials nearing the end of their usable lifespan, complete removal and replacement of chimney flashing may prove most effective for a long-term solution. Regular Maintenance and Checks Ongoing upkeep like routinely cleaning out debris and inspecting sealant joints a few times per decade can catch small problems before they escalate, preventing unnecessary costs down the road. How to Avoid Flashing Leaks? Scheduling a qualified examination of the entire chimney and adjacent roof areas every few years (recommended 2-5 years) helps monitor any sign of deterioration or vent blockages. Ensuring new chimneys are constructed

Risks of Neglecting Chimney Mortar Maintenance
Uncategorized

The Risks of Neglecting Chimney Mortar Maintenance

The Risks of Neglecting Chimney Mortar Maintenance As the seasons change and the weather starts to cool down, many homeowners are getting ready to light up their fireplaces and furnaces. But before you do, have you thought about the condition of your chimney? The mortar that holds the masonry structure together can deteriorate over time, and neglecting maintenance can lead to serious safety risks. In this article, we’ll explore the risks of neglecting chimney mortar maintenance and provide tips on how to keep your chimney in good condition. Chimney Mortar: A Hidden Helper Often overlooked but always on duty, chimney mortar is like the masonry glue holding chimney bricks in place. This sandy cement and lime mixture secures that bricks stay solidly positioned. Along with the spaces between, it forms a protective shield warding off rain, snow, and other outside threats like pests too. Mortar silently guards the chimney allowing it to stand strong and do its job nicely. Beyond just connecting bricks together, mortar serves an important role. It acts as a barrier preventing external intruders from entering your home. During heavy storms, it ensures you stay cozy indoors without tracking in wetness or worse. Plus, by jamming in bricks tight, mortar allows chimneys to last a lifetime safely. With the right care, its powers remain for many decades, so keep eyes peeled for early signs of wear before they worsen. Types of Chimney Mortar Damage Common Cracks from Nature’s Way Nature’s powerful forces can also damage your chimney. When snow or rain seeps into the gaps between the bricks and then freezes, it expands and puts pressure on the mortar. Over time, this can cause cracks or breaks. If left unfixed, these cracks will get worse and put stress on the structure of your chimney. Spalling’s Scraping Harm Spalling is a term that might sound foreign but is a common issue many homeowners face. It refers to the breaking off or flaking of brick or mortar surfaces. This not only affects the aesthetic appeal of your chimney but also its structural integrity. Spalling can be a result of moisture penetration or the freeze-thaw cycle, and if left unchecked, can lead to potential hazards. Usual Wear Over Years Everything gets older and starts to show its age eventually, and your chimney’s mortar is no exception. Constant exposure to elements like rain, snow, and sunshine can start to wear it down. Little by little, tiny gaps or cracks can form, and if you don’t catch them early, they can turn into bigger, more expensive problems. The Dangers of Ignoring Chimney Mortar Upkeep Fire Danger from Neglect One serious risk of not caring for chimney mortar is the possibility of fires. Cracks can let heat escape, potentially igniting flammable materials nearby. Additionally, creosote from wood burning can accumulate in splits, which can lead to chimney fires without regular cleaning. Effects of Untreated Damage A chimney is not just a stack of bricks; it’s a structure that keeps everything safe and working properly. If mortar damage is not repaired, it can weaken the chimney. Cracks can spread and eventually cause structural failure, endangering people and property inside and outside the home. Health Risks with Poor Upkeep Beyond structural risks, damage can also allow harmful gases to escape into your home. Carbon monoxide, an odorless and colorless gas, can accumulate and cause serious health risks. Proper chimney care helps ensure the well-being of everyone in the household. Periodic Review and Maintenance Chimney Mortar Should be Inspected Frequently Your chimney, like any investment, needs regular attention. To maintain safety and longevity, inspect it at least annually before winter. Regular inspections can catch potential problems early, preventing them from becoming costly repairs. Homeowner Contributions While professional inspections are essential, homeowners can contribute as well. Routine tasks like cleaning out ashes, using dry wood, and checking bricks for changes can help the chimney remain secure and extend its lifespan. Professional Inspections are Best DIY is useful for many things, but chimneys require real expertise. Chimney contractors have the tools and knowledge to detect issues untrained eyes might miss. They can offer solutions and repairs to keep your chimney in top shape. Professional Repair and Maintenance Process Tuckpointing Method Tuckpointing is a masonry process that involves repairing mortar joints in brick walls. This involves removing old, damaged mortar and replacing it with fresh mortar, which restores both the visual appeal and structural integrity of the wall. Chimney Repointing Chimney repointing is a delicate process. Old mortar is removed to a certain depth, and fresh mortar is added. When done correctly, it ensures the chimney remains secure and functions properly. Skilled craftsmanship is essential to create a tight bond with the new mortar. Additional Treatment Options if Necessary Depending on the extent of damage, additional treatments may be needed. This could include sealing the chimney to prevent water intrusion or applying water repellents to protect against moisture damage. Preemptive Steps to Avoid Chimney Mortar Damage Stop Water Damage Water is a primary culprit behind chimney mortar damage. Installing chimney caps or using sealants can prevent water from entering the chimney. Proper drainage around the chimney base can also prevent water accumulation. Using the Right Fuel and Repair Materials The type of fuel you burn in your fireplace affects your chimney. Using dry, seasoned wood reduces creosote buildup, which is a major fire hazard. Ensuring the right type of mortar is used during repairs can also extend the life of the chimney. Clean Regularly for Safety Regular cleanings prevent the buildup of soot, creosote, and other debris in the chimney, reducing the risk of fires and ensuring efficient operation. It’s recommended to have your chimney cleaned at least once a year, ideally before winter. Your Best Chimney Repair Pro in Fredericton Atlantic Brick and Stone is the top choice for chimney repairs around Fredericton. With many years of experience and a skilled team, we offer the best chimney maintenance in town. Our crew is highly knowledgeable about masonry

How Can Masonry Restoration Address Building Damage and Wear
Uncategorized

How Can Masonry Restoration Address Building Damage and Wear?

How Can Masonry Restoration Address Building Damage and Wear? Brick, stone and concrete are durable building materials, but even the strongest masonry is susceptible to damage over time due to weathering and general wear and tear. Left unchecked, small cracks or stains can worsen and potentially compromise the integrity and structure of walls, foundations and other architectural elements. Through masonry restoration, many issues stemming from aging and damage can be addressed before requiring major repairs or rebuilding. This article explores the masonry restoration process and how it can help extend the life of commercial buildings and homes by mitigating current problems and slowing future deterioration. What is Masonry Restoration? Masonry restoration is more than just a quick fix; it’s about reviving and preserving the essence of a structure. It involves meticulously repairing and restoring old masonry work to its original or even better condition. This process can be likened to art restoration, where experts carefully bring back the vibrancy and details of old paintings. Similarly, masonry restoration involves removing damaged materials, replacing them with new ones, and ensuring that the restored section integrates seamlessly with the original, preserving its historical and aesthetic value. Common Masonry Materials Masonry is versatile, with a range of materials suited for various applications. Bricks, known for their durability and aesthetic appeal, are commonly used for walls and pathways. Building stones like marble, granite, and limestone are prized for their natural beauty and are often used in grand structures and monuments. Concrete blocks provide strength and are used in modern buildings, while adobe, a sun-dried brick, has been a staple in ancient architecture, especially in arid regions. Each material has unique properties, making them suitable for different architectural styles and purposes. Common Causes of Masonry Deterioration Buildings age as years go by, like all living things. This natural aging can cause problems. Water damage may soak into brick and stone walls, making them weak. Other troubles come from ground shifting, building wrongly, or just time passing by itself. Things man does near structures too can add strains, like vibrations from new construction beside old buildings. Mother Nature also affects buildings lots. Places changing between cold and warm often crack brick and stone where water went inside walls. Places wet a long time from much rain cause inner wetting, mold growth, and a sunk base. Sun and wind plus dirt in air all wear down outside walls over long days too. How Masonry Restoration Addresses Building Damage Masonry restoration is a blend of science and art. Techniques like repointing are commonly used, where old, deteriorating mortar joints are carefully removed and replaced with fresh mortar. This not only enhances the appearance but also strengthens the structure. Another prevalent method involves the replacement of damaged bricks. Here, care is taken to ensure that the new bricks match the original in size, color, and texture, ensuring a seamless blend. For structures with historical significance, experts might employ specialized techniques to preserve their authenticity. Different damages require tailored restoration approaches. For instance, water damage might necessitate addressing the moisture source, repairing the affected sections, and applying sealants to prevent future seepage. Structural damages, on the other hand, might require more intensive interventions. This could involve reinforcing the building’s structural integrity using steel reinforcements or even underpinning to strengthen the foundation. In cases of aesthetic damages, restoration might focus on cleaning, repointing, and replacing damaged sections to restore the building’s visual appeal. Benefits of Masonry Restoration Masonry restoration offers a number of benefits. Aesthetically, it rejuvenates the building, making it look as good as new. But beyond the visual appeal, restoration enhances the building’s structural integrity, ensuring safety for its occupants. It also acts as a preventive measure, addressing minor issues before they escalate into significant problems. This proactive approach can save owners a considerable amount in potential future repairs. Moreover, a well-maintained building can significantly increase property value, making restoration a wise investment. Cost-effectiveness While masonry restoration might seem like a hefty investment upfront, it’s a cost-saving measure in the long run. Addressing damages early on prevents more extensive, and consequently, more expensive masonry repairs down the line. Moreover, restoration can enhance the lifespan of the building, delaying the need for potential reconstruction. When you factor in the increased property value and the potential savings from averted future damages, masonry restoration proves to be a financially sound decision. Sustainability Aspects of Masonry Restoration In today’s eco-conscious world, sustainability is paramount. Masonry restoration aligns with this ethos. Instead of tearing down and rebuilding, restoration focuses on reusing and reviving existing materials. This approach reduces the demand for new resources, minimizes waste, and cuts down on the environmental impact associated with construction activities. By choosing to restore, building owners are making an environmentally responsible choice. When to Opt for Masonry Restoration Guidance on the Right Time for Initiating Restoration Timely intervention is key to effective masonry restoration. Regular inspections can help identify signs of wear and tear. When you notice deteriorating mortar joints, bricks that are loose or have shifted, or water seepage, it’s a clear indication that restoration is in order. Other signs include efflorescence (a white, powdery substance on bricks), visible cracks, or gaps in the masonry work. Addressing these issues promptly can prevent them from escalating into more significant problems. Common Signs Indicating the Need for Masonry Restoration While some signs of masonry wear are evident, others might be subtle. Crumbling mortar, loose bricks, and efflorescence are clear indicators. However, other signs like internal dampness, mold growth, or even a sudden increase in heating bills (due to gaps allowing drafts) can also hint at masonry issues. Regular inspections, both visual and professional, can help identify these signs early, ensuring timely intervention. Hiring the Right Masonry Restoration Professional The success of a masonry restoration project hinges on the expertise of the professionals involved. When selecting a masonry restoration expert, it’s essential to consider their experience, especially with projects similar to yours. Certifications can attest to their skills and training.

Perfect Commercial Walkway
Uncategorized

Designing the Perfect Commercial Walkway – Tips and Best Practice

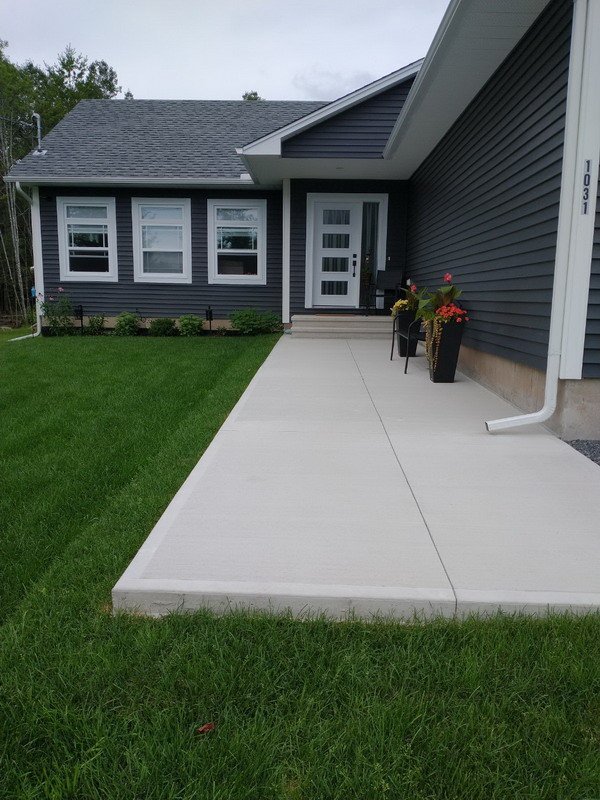
Designing the Perfect Commercial Walkway – Tips and Best Practice Ah, the humble walkway. It’s more than just a path leading to a destination; it’s the first impression a visitor gets of a commercial property. Think about it. Before they even step into a building or store, they’re walking on a commercial walkway. This simple path can set the tone for their entire experience. Let’s dive into the world of designing the perfect commercial walkway and understand why it’s so crucial. The Design of a Walkway Really Matters for Businesses Imagine stepping into an upscale boutique. If the path leading there is cracked and messy looking, you might doubt how nice the products inside are. But a well-thought out, attractive walkway can transform the whole feel of the place. It’s like putting out the welcome mat for patrons to really feel valued. How the walkway looks also affects someone’s whole visit. It’s not just about the way it appears. The width could make shoppers feel closed in or exposed. Even the material and colors change up a customer’s emotions and engagement in an area. A commercial walkway needs to be safe for everyone, including those with disabilities. Uneven surfaces, poor materials, or lack of proper lighting can lead to accidents. Moreover, in places where water is common, like near a beach, the walkway surface should be resistant to slipping. Understanding the Basics of Commercial Walkway Design Key Design Elements Size, material, and color choices all make a difference when designing a commercial walkway. The width needs consideration – too narrow could cause congestion while too wide may seem out of place. Materials like brick, stone, or concrete each have their own appeal from visual aesthetics to durability. Opting for a material that complements the surrounding architecture and landscaping helps create a seamless, attractive look overall. Different Types of Walkways Walkways can be straight, leading the visitor directly to their destination. Or they can be curved, offering a more scenic route. The shape and type of walkway should align with the commercial property’s overall design and the kind of experience you want to offer your visitors. Tips on Determining the Best Walkway Size and Shape High-traffic commercial areas with many visitors throughout the day may require a more expansive walkway to avoid bottlenecks. Alternatively, a boutique or cafe with a handful of customers at a time could make do with a narrow path. Understanding the typical flow of people is key to deciding size. Engaging stakeholder input also helps ensure the final design meets business and customer needs. Paving Material For Commercial Walkways Concrete Walkways Concrete paths are a practical selection. They stand up to lots of use without bumps or crumbling edges due to concrete’s strength. Cleanup involves little work beyond a rinse. Painting or stamped patterns alter concrete’s visuals, fitting various architectural styles. Owners enjoy low maintenance costs year after year too. Paver Walkways Walkways made of tiles, bricks, or stones arranged to form a design bring a nostalgic charm. Their intricate layouts add beauty to the commercial area. Pavers last through many changing seasons yet allow plants to poke through. Removable sections mean quick fixes when areas need repair without full replacement. Patterns vary widely, so pavers suit historic or modern tastes equally well. Choosing the Right Materials for Your Commercial Walkway Discussion on Various Materials Whether it’s the classic charm of stone, the warm friendliness of brick, or modern simplicity of concrete, your material choice affects much more than just looks. Stone lends elegance but tends to higher costs. Brick brings coziness through its varied tones yet withstands wear well over decades. Concrete comes in solid shades suitable for contemporary business images while staying affordable. Advantages and Disadvantages of Different Materials Stone exudes timeless visual appeal, but demands vigilant upkeep to repair any cracks that form. Brick sheds water easily and faces fewer vulnerabilities than stone, yet costs exceed concrete. Concrete proves a low-fuss option famous for its endurance, yet lacks the personality of natural materials. How to Choose the Best Material Consider foot traffic flowing in and out, the aesthetics harmonizing with your building, and element exposures like constant sun or water. Analyze maintenance requirements to fit within budget. Survey costs upfront and long-term to ensure fiscal alignment for the life of the walkway. With research, the right material enhances curb appeal, suits practical needs, and fits your commercial vision perfectly. Incorporating Smart Landscaping into Walkway Design Importance of Integrating Landscaping Thoughtful plantings lavished along the sides of a walkway transform it into a pleasant promenade. Vivid blooms and leafy branches lending shade provide visual interest that engages patrons strolling between building and parking lot. More than purely functional, decorative flora craft an inviting sensory experience and ambiance. Using Plants, Shrubs, and Trees Effectively Select varieties suited to the climate that flourish with minimal upkeep. Arrange shrubs and perennials complementing the path’s hues and layout. Strategically placed trees arching overhead furnish protection from the sun’s glare on sunny walks to and fro. Safety Features in Commercial Walkway Design Safety Requirements for Commercial Walkways Walkways should follow guidelines allowing problem-free strolling. Make certain lighting lines paths after dark, a key consideration given evening activities. Slip-proof surfaces prevent tumbles, while handrails aid stability when slopes exist. Ensuring clear, hazard-free routes protects patrons’ happiness and health during every visit. Importance of Regular Maintenance Regular maintenance can prevent accidents and keep the walkway looking its best. Whether it’s fixing a cracked tile or replacing a burnt-out light, timely repairs are crucial. Professional Help for Commercial Walkway Design Importance of Hiring a Hardscape Contractor Bringing in professionals with know-how makes a big difference. They create walkways that make businesses wow customers. Good contractors offer suggestions taking a boring walkway and turning it into one grabbing attention. What They Can Bring to the Table Hardscape crews share their learning choosing what items last longest and look best. They also know how to design walkways that pop for visitors. Masonry contractors have

Are pavers a good idea for the Driveway
Uncategorized

Are pavers a good idea for the Driveway?

Are pavers a good idea for the Driveway? The driveway is one of the defining features of a home’s exterior. Its material and design can make or break the curb appeal and value of a property. As a homeowner, choosing the right surface is an important decision you don’t want to get wrong. In this article, we’ll take an in-depth look at pavers as an option and whether they may be suitable for your needs. Brief History and Growing Popularity For decades, the most affordable options were concrete or asphalt (pavement). Both were inexpensive initially but require replacement every 10-15 years as cracks develop from weathering and seasonal temperature fluctuations (freeze-thaw cycles). As homeowners seek longevity alongside curb appeal, pavers have emerged as a rising star in driveway construction, primarily due to their unsurpassed durability. What are Pavers? Pavers, in the simplest terms, are multi-shaped, multi-colored pieces used for paving. Historically, ancient Romans were among the first to use this paving method, creating extensive and durable roads that are still present in some parts of Europe. Types of Pavers Whether it’s the classic appeal of brick pavers or the durability of concrete pavers, there’s something for every homeowner. Some common types include: Concrete paver: Often preferred because concrete pavers are a great blend of affordability and resilience. Brick paver: Offers a traditional look. Natural stone paver: Adds an element of luxury and uniqueness. Permeable paver: Designed to allow water to drain through, making it an eco-friendly option. Benefits of Using Pavers for Driveways Pavers are Meant to Last When it comes to durability, pavers have concrete and asphalt beat. Unlike solid slabs that crack and deteriorate rapidly, individual paver blocks flex naturally with temperature changes instead of buckling. This allows a paver driveway, when set properly on a sturdy base, to stand strong against weather, traffic, and even snowplow blades for 50+ years or more without needing a complete overhaul. Endless Design Possibilities With pavers, you aren’t limited to a plain gray rectangle. Various shapes, colors, and patterns let you get creative – mix in some smaller bluestone accents with neutral beige pavers for depth, or lay a subtle border in contrasting brick. The options are limited only by your imagination, so you get long-lasting curb appeal unique to your tastes. Dealing with Extreme Weather Whether you face scorching summers or brutal blizzards, pavers take it all in stride. Their ability to flex without cracking makes them impervious to damage from repeated freezing and thawing under snow and ice. The gaps between pavers also reduce dangerous ice buildup that causes slip hazards. Individual Repairs Made Simple Unlike complete driveway replacement, fixing a single cracked concrete slab or one small pothole isn’t so simple. But with pavers, swapping out a single damaged unit is no fuss at all. Just lift it out and pop a new one in its place – as good as new! Up Your Home’s Resale Value Compared to aging asphalt or crumbling concrete, a well-installed paver driveway leaves lasting impressions on potential buyers. Its design appeal and longevity could fetch you thousands more at sale time, making the initial material cost well worth the investment. Cons of Using Pavers for Driveways Compared to plain concrete or asphalt driveways, pavers can run at a higher cost. However, their longevity might offset this in the long run. Gaps between pavers can sometimes be a breeding ground for weeds, although this can be mitigated with proper maintenance. Installing permeable pavers or any other type might require more time compared to pouring concrete. Improperly installed pavers might shift over time, especially if the ground beneath isn’t compact enough. How to Choose Pavers for Driveway? Making Your Budget Go the Distance Pavers do require more dough initially than asphalt, so it’s important your budget allows for quality materials. But think long-term – you’ll avoid increasingly expensive repairs down the road that jack up the total cost of ownership for other surfaces. So while it means saving more now, pavers let your driveway dollars go further in the long haul. Curb Appeal that Comes from the Heart You want function, but you also want your driveway design to reflect your personal style. Do you crave coastal charm with seaside bluestone? Or modern flair from geometric concrete patterns? Consider textures, colors, and patterns that complement your home’s architecture for the curb appeal you love. Picking Materials that Prevail If heavy rains or intense winters are usual where you live, permeable pavers built to drain well minimize flooding risks more than impermeable options. Similarly, certain stone varieties handle the cold better than others. Consult a local masonry company with regional conditions to help your investment withstand whatever mother nature throws its way. With some upfront planning factored into your decision, pavers could deliver decades of useful service tailored to your priorities, budget, and climate in the long run when done right. It’s all about determining what’s most suitable for keeping your driveway looking its best for years ahead. Maintenance Tips for Paver Driveways Keep your driveway free from debris, and consider sealing it to maintain its luster. Regularly check for weeds and moss and remove them before they grow big. Replace individual damaged pavers to maintain the driveway’s integrity and appearance. Considering a Quality Paver Driveway Installation in Fredericton When planning a new paver driveway project, ensuring proper installation by an experienced hardscape contractor is key to enjoying your investment for decades. Located right here in Fredericton, Atlantic Brick and Stone has been helping homeowners and businesses with their hardscaping needs for over 15 years. Backing our work, we provide an industry-leading warranty protecting against defects. Our reputation depends on delivering quality that lasts for generations. You have our guarantee your pavers will stand the test of time, assured a representative. Whether seeking design guidance or stress-free installation, it’s clear why many Fredericton homeowners and businesses choose us to transform their driveways. Our expertise ensures not only beauty but dependability you can count on

resurfacing concrete stairs importance
Uncategorized

The importance of resurfacing concrete stairs

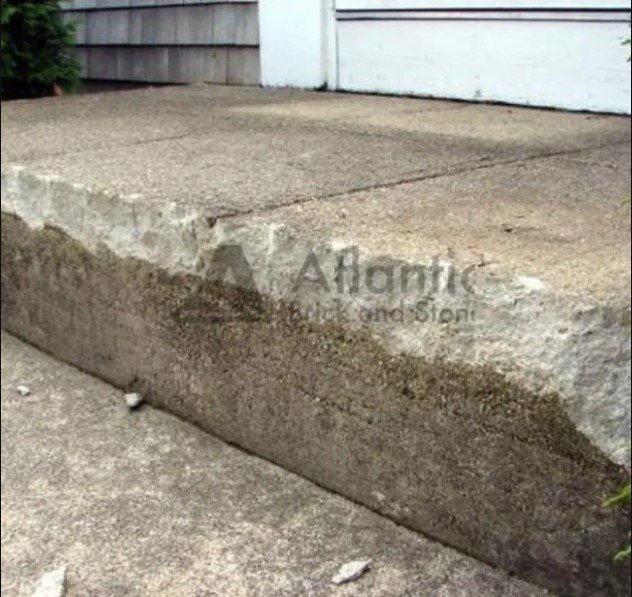
The importance of resurfacing concrete stairs Concrete stairs are an essential part of any building, allowing people to easily access different levels. However, over time and with continuous use, concrete stairs can become worn out and damaged. Cracks, chips, stains and discoloration start appearing on the surface. This leads to concrete stairs losing their structural integrity as well as aesthetic appeal. Neglecting the damage and not promptly resurfacing concrete stairs can pose serious safety hazards to anyone using them. Resurfacing stairs timely restores their strength and evens out imperfections to provide a safe, slip-resistant surface. It also enhances the visual curb appeal of the property. Thus, regular resurfacing of concrete stairs is essential from perspectives of both safety and aesthetics. Regularly Maintaining and Resurfacing Concrete Steps Concrete stairs, just like any commonly used structural elements of a home, require periodic maintenance to withstand regular wear and tear. Over time, being exposed to environmental elements and continuous foot traffic, these stairs can develop cracks, chips, and stains that not only spoil their visual appearance but also pose safety risks. Resurfacing provides an effective solution to this issue. The process refreshes and restores the surface of existing concrete stairs, making them look good as new while eliminating hazards like irregularities. By resurfacing timely, homeowners can achieve dual benefits of enhanced safety through an even, slip-resistant surface and improved aesthetics with the stairs gaining a clean updated look. This helps maintain the functionality as well as curb appeal of the property. Process of Resurfacing Concrete What Resurfacing Is? Resurfacing is essentially applying a fresh new layer of material over existing concrete to restore its original pristine state and smooth texture. This procedure works wonders especially when the concrete has become worn out, damaged, or stained over time. Resurfacing Procedure The resurfacing project first starts with thoroughly cleaning the concrete base. Any cracks or chips present are then filled using a repairing substance. Once those fillings are dried completely, a sealing or coating agent is evenly applied on the surface using tools such as a trowel or broom. The final part of the work involves allowing the resurfaced stairs to dry totally. DIY or Professional Concrete Resurfacing While some homeowners may be tempted to take this up as a DIY project, hiring a concrete specialist is advised as they can accomplish the task properly and safely. Professionals have the essential tools, materials, and expertise to handle any hurdles emerging during the resurfacing work. Resurfacing Steps for Safety Cracks, chips, and an uneven walking surface can seriously compromise the safety of steps. These imperfections on old concrete stairs are major trip and slip points waiting to happen, imperiling people with increased chances of tumbles, falls, and resultant injuries when using those stairs. By filling in any cracks, holes, and uneven patches and rendering the surface sleek once more, resurfacing does away with possible tripping hazards. Certain resurfacing compounds also impart an anti-slip texture, making the repaired steps much more stable and less risky to traverse. This significantly raises safety quotients for everyone using those stairs. Resurfacing Stairs for Curb Appeal Extended exposure to elements and relentless foot traffic over the years tends to cause concrete stairs to attract stains, chips, and wears of different extents. This natural outcome of lengthy usage not only makes the steps look fatigued and disregarded but also pulls down the whole aesthetic vibe of the surroundings like home or building to an extent. Resurfacing imbues the stairs with a completely renovated appearance. Homeowners can choose either a classical bare concrete aesthetic or inject some zing by opting for colored finishes or tactile textures. The revitalized stairs with their refreshed look are sure to vastly boost the aesthetic curb appeal of the property. The investment is definitely worth it for the all-around visual upgrading. Important Aspects to Weigh In Before Resurfacing Concrete How to Identify When Your Stairs Need Resurfacing? Observable cracks, chips, discolorations, or a generally worn-out, fatigued appearance of the steps emerging after prolonged usage is a fair indication that resurfacing needs serious consideration. Homeowners must keep an eye out for such clear warning signals from the stairs which then require sprucing up through resurfacing. Material Options for Resurfacing There are various concrete resurfacing products available for homeowners to choose from depending on their specific needs and budget such as plain cement, acrylic coatings, polymer overlays, etc. Each comes with its benefits like longevity and curb appeal improvement prospects but also potential drawbacks relating to installation complexity and costs involved which need accounting. Thinking Through the Cost Factor While resurfacing paves the way for stairs revitalization at comparatively lower costs than full replacement, the outlay still depends majorly on material choice, severity of damages, labor costs, and job complexity. Getting preliminary project estimates helps homeowners plan costs in advance for resurfacing to stay within budget. Lasting Advantages of Consistent Preventive Care Consistent upkeep including concrete repair at suitable intervals delivers notable perks beyond merely beautification. Routinely addressing niggles like sealing cracks, filling pits, and refurbishing the surface layer can keep aggravations from escalating and help prolong the structural soundness as well as aesthetic endurance of the stairs. Regular preventive resurfacing focuses on restoring the stairs’ integrity, prolonging their functional lifespan for homeowners to enjoy seamless, safe usage for years on end. Rather than pricey total replacement, minor timely resurfacing suffices to maintain the stairs in their prime condition, safety, and appearances alike. Truly, preventing is always better than curing. Concrete Restoration Experts to Rely on for the Fredericton Region Residents in and around Fredericton have trusted choices for their outdoor concrete maintenance needs. Atlantic Brick and Stone, as a prime example, is a renowned masonry repair contractor with over 15 years of serving the area. With our team of highly experienced experts, Atlantic Brick & Stone can expertly tackle any concrete problems. From resurfacing and sealing to foundation repairs, we achieve best-in-class results. It is always prudent to hire established prowess like us to confidently restore structures to

Is it Normal for Pavers to Sink Over Time
Uncategorized

Is it Normal for Pavers to Sink Over Time?

Is it Normal for Pavers to Sink Over Time? Pavers are a popular choice for outdoor hardscaping, but homeowners often encounter issues with their pavers sinking over time. If not addressed properly, sunk pavers can lead to safety hazards, accelerated wear and tear, and reduced aesthetic appeal. Understanding the causes of paver sinking and the best repair and prevention methods is key to ensuring long-lasting, stable pavers. Let’s discuss this in depth.  What are Pavers? Pavers are versatile hardscape materials commonly used for driveways, patios, and walkways. Made of concrete, brick, and natural stone, pavers provide both aesthetic appeal and function for homeowners. The Basics of Paver Installation Laying pavers correctly involves more than just placing stones. You must prepare a solid base, ensure proper drainage, and set the pavers in an interlocking pattern. A good base is key – a compacted gravel layer topped with sand, then the pavers are laid level and fitting together tightly. Why Pavers Sink? Soil Erosion Below Pavers One of the primary reasons pavers sink is due to soil erosion underneath them. Over time, water can wash away the soil, creating voids where the pavers no longer have support. This is especially common in areas with heavy rainfall or improper drainage. Improper Base Materials Using the wrong base materials or not compacting the base properly can cause pavers to settle. For example, using dirt as a base means your hardscape may sink significantly. Drainage Issues Poor drainage can cause water to accumulate underneath pavers. This leads to erosion and freezing/thawing, which destabilizes the base. Natural Ground Settlement Over time, the ground naturally settles which can make pavers sink. This is especially true for newly developed areas with unset soil. Signs Your Pavers Are Sinking Visible Dips The most obvious sign is dips and uneven spots in your paver patio or walkway. These sunken areas mean the base was improperly prepared or has eroded. Post-Rain Puddles Puddles that form on paved areas after it rains can indicate sunken pavers. This means water isn’t draining properly. Cracks and Gaps Cracks and widening spaces between pavers can be a sign of sinking or shifting. This could be from an improperly compacted base or other issues. Consequences of Ignoring Sunken Pavers Sunken pavers are a tripping hazard. Especially in high-traffic areas, uneven pavers can lead to accidents and injuries. Ignoring sunken pavers can lead to accelerated wear and tear. The uneven surface can cause increased pressure on certain pavers, leading to cracks and breaks. Sunken pavers can be an eyesore and can reduce the aesthetic appeal of your property. This can potentially lower your property’s value, especially if potential buyers see it as a sign of neglect. Fixing & Preventing Sinking Pavers Assess the Problem Before any repair, it’s essential to evaluate the extent of the damage. This might involve removing the pavers in the affected area to inspect the base. Lift, Reset and Rebuild the Base To repair, lift sunken pavers, add fresh base material, and compact it well. Using the right base and proper compaction is key. Proper Installation Techniques to Prevent Future Sinking To prevent pavers from sinking in the future, ensure a well-compacted base, use appropriate materials, and ensure proper drainage. Hiring experienced contractors can also make a difference. Drainage is Crucial A good drainage system is essential to channel water away from the pavers, preventing erosion and water accumulation. Recommended Upkeep Inspect pavers regularly for signs of sinking or damage. Ensure proper drainage and consider sealing pavers to protect them from water exposure and erosion. Insights from Atlantic Brick and Stone, a Professional Paving Contractors Atlantic Brick and Stone, a renowned hardscapes contractor based in Fredericton, has been at the forefront of paving solutions for years. Their expertise and insights into the world of pavers are invaluable for homeowners and other professionals alike. Here’s what they have to say about paver sinking: Experience Matters One of the key takeaways is the importance of experience. Paver installation might seem straightforward, but it requires a deep understanding of materials, soil types, and drainage solutions. An experienced contractor can identify potential issues before they become problems. Regular Maintenance We emphasize the importance of regular maintenance. Over time, even the best-laid pavers can face issues due to natural elements. Regular inspections can help identify and rectify problems before they escalate. Quality Over Cost While it might be tempting to opt for cheaper materials or contractors, Atlantic Brick and Stone caution against this. Investing in quality materials and skilled contractors might seem expensive initially, but it saves money in the long run by reducing the need for repairs and replacements. Drainage is Key One of the most common reasons for paver sinking is poor drainage. We have consistently highlighted the importance of a good drainage system. It’s not just about channeling water away from the pavers but ensuring that the entire landscape is designed to prevent water accumulation. Client Education Atlantic Brick and Stone believe in educating their clients. A well-informed homeowner can make better decisions regarding their hardscaping needs. Final Words While some settling is expected over time, the significant sinking of pavers is not “normal” and often indicates underlying issues. Proper installation and maintenance are key to preventing this. Best Practices for Long-Lasting and Stable Pavers Ensure a well-compacted and adequately prepared base. Use the right base materials. Ensure proper drainage to prevent water accumulation and erosion. Regularly inspect and maintain your pavers. Consider hiring experienced contractors for installation. In hardscaping, knowledge and proper practices are your best allies. By understanding the causes and signs of sinking pavers, homeowners can take proactive steps to ensure their paved areas remain beautiful and functional. Get Your Paver Installation or Repair Estimate Online Now! 506-304-0771 atlanticbrickandstone@gmail.com Request an Estimate

Rebuilding Brick Steps
Uncategorized

Rebuilding Brick Steps with a Professional Mason

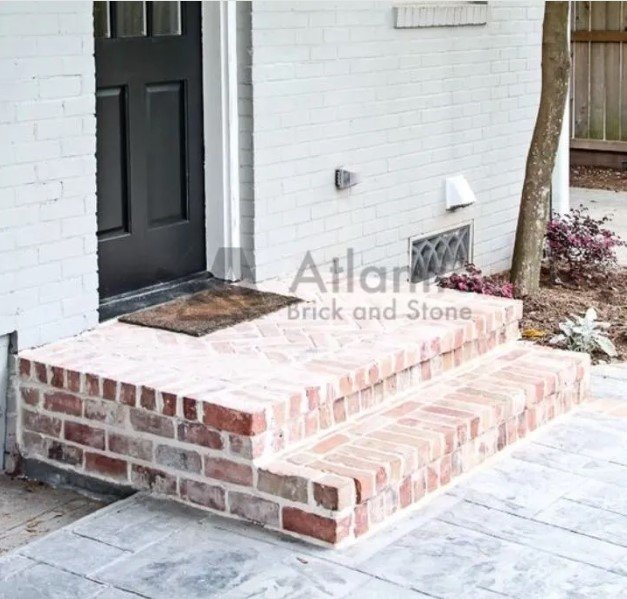
Rebuilding Brick Steps with a Professional Mason Nothing adds character and curb appeal to a home like a set of classic brick steps. But over time, wear and tear takes its toll. Cracking, shifting bricks and crumbling mortar signal the need for a rebuild. A professional mason has the expertise to dismantle your worn steps, assess which bricks can be reused, and rebuild your stairs sturdily and strategically for long-lasting performance. Follow this comprehensive guide to understand how rebuilding brick steps with a pro is done right. Brick Step Rebuilding Brick steps are a classic addition to any home, offering a timeless aesthetic appeal and durability. However, like any other structure, they are not immune to wear and tear. Over time, the harsh weather conditions, heavy usage, and natural aging process can cause the bricks and mortar to deteriorate, leading to loose or broken bricks, crumbling mortar, and overall instability. This is where the process of rebuilding brick steps comes into play. Do you really need Rebuilding Brick Steps? Rebuilding those brick steps of yours is about more than just how they look. It’s also about safety and making sure the steps can actually do their job. Loose or cracked bricks can be dangerous, even causing a fall. And mortar that’s crumbled away means the bricks don’t fit together properly anymore. Without a solid foundation, those steps could shift or even collapse underfoot. Plus, broken bricks and mortar let water seep through which causes all kinds of problems like frost damage and mold. When your brick steps are deteriorating, it’s time for a professional rebuild to restore the stability and performance of those stairs. So don’t just focus on aesthetics – getting your steps rebuilt the right way by a pro will make them safe and durable again. Hiring a Professional Mason for the Task While there are numerous DIY guides available, rebuilding brick steps is a task best left to professionals. A masonry repair contractor has the necessary skills, experience, and tools to ensure the job is done properly and safely. They can accurately assess the condition of your brick steps, draft a plan for the rebuilding process, and execute it efficiently. The Role of a Professional Mason What Does a Professional Mason Do? A professional mason fulfills an important role, building and repairing structures made of materials like brick and stone. Regarding rebuilding brick steps, a mason’s duties include assessing the condition of the existing steps, dismantling the old structure with care, preparing a suitable work area for the new structure, establishing a foundation, constructing the new steps, and conducting necessary cleaning and inspection after completion. By evaluating the steps, a mason can determine what is salvageable from the existing build and create an efficient plan for reconstruction. Throughout the process, from safely taking apart the structure to laying each new brick, the mason executes the project with the skills and techniques required to produce steps that will stand the test of time. Upon finishing, the mason inspects their work and the overall area to identify and address any imperfections or issues before considering the project finished to the appropriate standard. In this way, a professional mason is able to completely and properly rebuild brick steps from start to finish. Skills and Expertise Required for Masonry Work Masonry work requires a unique set of skills and expertise. A professional mason must have a thorough understanding of different types of bricks and mortars, and how they interact with each other and the environment. They must be proficient in using various tools such as a trowel, chisel, and wire brush, and techniques like mixing the mortar, applying it to the bricks and removing excess mortar. They should also have a keen eye for detail to ensure the new steps are level, straight, and aesthetically pleasing. Initial Assessment and Planning Stage Evaluating the Condition of Existing Brick Steps Evaluating the condition of existing brick steps is the first step in determining the appropriate approach for repairs or rebuilding. A professional mason will conduct a thorough visual assessment of the structure to identify signs of damage such as loose or broken bricks, deteriorating mortar, and structural irregularities. The extent of the issues observed will inform the mason’s recommendations. Isolated problems like loose bricks that have not yet caused secondary damage may be addressed through targeted repairs, while more severe and widespread deterioration likely indicates the need for a complete rebuild. Drafting a Plan for the Rebuilding Process Once the condition of the brick steps is evaluated, the mason will draft a plan for the rebuilding process. This includes deciding on the type and quantity of bricks and mortar needed, the design of the new steps, and the timeline and cost of the project. Demolition Process Safe Demolition of Old Brick Steps Demolition is a critical part of the rebuilding process. It involves removing the old bricks and mortar to make way for the new construction. This needs to be done carefully to avoid causing damage to the surrounding area. The mason will use tools like a chisel and hammer to dislodge the bricks and remove the old mortar. Preparing the Area for New Construction After the old brick steps are demolished, the area needs to be prepared for new construction. This involves cleaning the area, removing any debris, and leveling the ground. The mason may also need to lay a new foundation, depending on the condition of the existing one. Construction Phase: Rebuilding the Brick Steps Laying the Foundation for the New Brick Steps The foundation provides stability and support for the entire structure, so the mason puts special care into laying a strong, level base for the new brick steps. They will typically mix and pour concrete into the prepared area. Using a trowel, the mason smoothes the concrete to the desired grade and shape. Once leveled, the foundation concrete must cure before bricks can be set in place. This ensures the mortar properly adheres to the hardened concrete when

Stamped Concrete vs Exposed Aggregate
Uncategorized

Stamped Concrete vs. Exposed Aggregate: Which is Right for You?

Stamped Concrete vs. Exposed Aggregate: Which is Right for You? Deciding on the perfect surface for your driveway, patio or walkway can feel overwhelming, especially when you’re torn between stamped concrete and exposed aggregate. Each surface has its advantages and would undoubtedly make your outdoor areas look amazing. Ultimately, the decision comes down to what you prefer, your budget, how long it lasts and the final appearance you want. What is Stamped Concrete? Stamped concrete, a favorite among many homeowners and businesses in Fredericton, is a type of decorative concrete that is patterned or textured to mimic the look of other materials such as brick, stone, wood, and even seashells. The versatility of stamped concrete in terms of design and color options makes it a cost-effective alternative to these materials. Installation Process Installing stamped concrete involves a series of steps. First, the concrete is poured and leveled. Then, color is added either in the mixer (integral coloring) or after the concrete is placed (surface or broadcast coloring). A release agent is then applied to prevent the texturizing mats from sticking to the concrete. The mats are laid out in succession to imprint the desired pattern onto the concrete. After a day of drying, the release agent is removed by pressure washing, and the surface is sealed. Pros of Using Stamped Concrete 1. Aesthetics Stamped concrete is highly valued for its aesthetic appeal. It can replicate a wide range of patterns and textures, making it a popular choice for homeowners looking to add a touch of elegance to their outdoor spaces. 2. Versatility Stamped concrete is versatile and can be used in a variety of applications, including patios, driveways, walkways, and even interior floors. It can be customized to match the existing décor or landscape, making it a flexible choice for different types of projects. 3. Durability Stamped concrete forms a continuous, solid surface that doesn’t allow weeds to grow through the cracks, unlike pavers and cobbles. It can also be reinforced with rods for added strength, making it a durable choice for outdoor spaces. Cons of Using Stamped Concrete 1. Maintenance While stamped concrete is durable, it does require some maintenance. It needs to be resealed every few years to maintain its color and prevent it from becoming dull. 2. Cost The cost of installing stamped concrete can be higher than other types of paving project due to the additional materials and labor involved in the stamping process. 3. Difficulty in the Installation Process The process of installing stamped concrete is more complex than that of regular concrete. It requires special tools and skills and is not typically a do-it-yourself project. What is Exposed Aggregate Exposed aggregate concrete gives your driveway, walkway or patio an interesting textured look. They remove part of the top layer of concrete to reveal the small stones underneath. This exposes the aggregate, which are the stones mixed into the concrete. The exposed aggregate finish provides a nice look and feel that withstands use well. It’s often used for places you walk a lot like driveways, sidewalks, patios and around pools. Installation Process Doing exposed aggregate concrete is a multi-step job. First, they pour the concrete with rocks mixed in. Once the concrete is poured flat, they spray on a retarder chemical to slow the hardening of just the top layer. Then after the concrete sets a bit, they remove part of the top layer – usually by washing or sandblasting it off. This reveals the rocks mixed inside, called the aggregate. After exposing the aggregate, they apply a sealer to protect it and make the colors pop. That gives you the tough, textured look of exposed aggregate concrete that’s long-lasting for places like your driveway, walkway or patio. Pros of Using Exposed Aggregate 1. Durability Exposed aggregate is extremely durable and can withstand heavy traffic and harsh weather conditions. It is also resistant to skidding, making it a safe choice for driveways and pool decks. 2. Low Maintenance Exposed aggregate is low maintenance. It does not need to be resealed as often as stamped concrete, and it is less likely to show stains and marks due to its textured surface. Cons of Using Exposed Aggregate 1. Limited Color Options While exposed aggregate offers a variety of textures, the color options are limited to the colors of the aggregate. This can limit the design options compared to stamped concrete, which can be colored to match any desired hue. 2. Difficulty in Achieving Uniformity Due to the nature of the material, achieving a uniform look with exposed aggregate can be challenging. The size, shape, and distribution of the aggregate can vary, leading to an inconsistent appearance. 3. Surface Slipperiness While exposed aggregate is skid-resistant, it can be slippery when wet, especially if the aggregate is polished. This can pose a safety risk, particularly in areas like pool decks. Comparing Stamped Concrete Or Exposed Aggregate Cost Comparison Both stamped concrete and exposed aggregate are cost-effective options for outdoor spaces. However, exposed aggregate is generally more affordable than stamped concrete. The cost of installing stamped concrete can start at around $120 per square meter, while an exposed aggregate finish can start at around $100 per square meter. These costs can vary depending on the materials, contractor, size of the project, and location. Looks and Styles In terms of aesthetics, both stamped concrete and exposed aggregate offer unique looks. Stamped concrete can mimic a wide range of patterns and textures, making it a versatile choice for different design preferences. On the other hand, exposed aggregate provides a more natural and earthy look, which can complement a variety of landscapes. Durability of Both Options Both stamped concrete and exposed aggregate are durable options that can withstand heavy traffic and harsh weather conditions. However, exposed aggregate is generally considered more durable than stamped concrete. It can resist hot and cold temperatures and is more efficient for pathways and driveways because it can handle heavy traffic and vehicles. Maintenance Requirements Stamped concrete

How to Restore Pavers
Uncategorized

How to Restore Pavers: A Comprehensive Guide

How to Restore Pavers: A Comprehensive Guide Pavers, whether they’re made of brick or concrete, are a popular choice for driveways and patios due to their durability and aesthetic appeal. However, like all things, they’re not immune to the wear and tear of time and weather. Restoring your pavers not only revives their original beauty but also extends their lifespan, making your outdoor living space a sight to behold. Knowing When to Restore Your Pavers Pavers are sturdy, but they’re not invincible. If you notice your pavers losing their color, or if weeds start sprouting from the joints, it’s time to consider restoration. Neglecting these signs can lead to further damage, making the restoration process more complex and costly. Benefits of Restoring Pavers Restoring your pavers is more than just a cosmetic fix. It enhances the visual appeal of your outdoor space, increasing your property’s value. Moreover, it improves the durability of your pavers, ensuring they last longer. Plus, by fixing uneven or loose pavers, you’re also ensuring the safety of those who tread on them. Preparing for Paver Restoration Before you start, gather the necessary tools and materials. You’ll need a pressure washer to remove dirt and grime, a long-handled brush for scrubbing, and a sealer to protect the pavers after restoration. Don’t forget to consider safety measures, like wearing protective gear to avoid injuries. Step-By-Step Guide on How to Restore Pavers Restoring pavers is a straightforward process if you follow these steps: Cleaning the pavers Use a pressure washer to remove dirt and grime from the pavers. For stubborn stains, a cleaner specifically designed for brick pavers or concrete can be used. Removing weeds from the paver joints Weeds can be removed manually or with the help of a weed killer. Make sure the pavers are dry before proceeding to the next step. Correcting any paver misalignments If any pavers are uneven or loose, they should be realigned. This might require removing the paver, adding or removing sand underneath, and then replacing the paver. Applying a layer of paver sealer A sealer helps protect the pavers from future stains and wear. It can be applied with a sprayer or a roller. Some sealers also help restore color to faded pavers. Maintenance post restoration Regular cleaning and resealing every few years will keep your pavers looking great and extend their lifespan. Hiring a Professional for Paver Restoration While DIY paver restoration is doable, there are instances where hiring a paver installer might be beneficial. If the area to be restored is large, or if the pavers are severely damaged, a professional can save you time and ensure the job is done right. When choosing a professional, consider their experience, reviews, and cost structure. Restoring your pavers is a worthwhile investment that pays off in the long run. Not only does it enhance the visual appeal of your outdoor space, but it also increases your property’s value and ensures the longevity of your pavers. Paver Installation and Repair in Fredericton Atlantic Brick and Stone, located in Fredericton, are the leading experts in paver installation and repair. With a team of professionals, we offer comprehensive services for all types of hardscapes. The team possesses extensive knowledge and skills, ensuring they effectively handle any paver-related task, including the repair of damaged pavers. When these fundamental outdoor components crack or chip, they not only lose their aesthetic appeal but also create safety hazards. Thankfully, Atlantic Brick and Stone’s paver repair services can rectify these issues swiftly and effectively. As Fredericton’s trusted hardscapes contractor, we work diligently to install, repair, and maintain the integrity of paver systems, assuring residents of enduring and beautiful outdoor spaces. What are brick pavers? A: Brick pavers are a popular choice for outdoor flooring. They are made from clay or concrete and come in various shapes and sizes. They are commonly used for driveways, walkways, patios, and other outdoor surfaces. How do I restore color to brick pavers? A: To restore color to brick pavers, you can follow a few steps. First, clean the pavers thoroughly using a pressure washer and a brick paver-specific cleaner. After cleaning, allow the pavers to dry completely. Once dry, apply a brick paver sealer that is specifically formulated to restore color to your pavers. My brick pavers have faded. What can I do to restore them? A: If your brick pavers have faded, you can restore them by following a restoration process. This includes cleaning the pavers, applying a color restorer, and sealing the pavers with a brick paver sealer to protect and enhance the color. Can I use a concrete sealer to restore color to brick pavers? A: No, it is not recommended to use a concrete sealer to restore color to brick pavers. Concrete sealers are designed for use on concrete surfaces and may not provide the same results on brick pavers. It is best to use a brick paver sealer that is specifically formulated for brick surfaces. What are the restoration steps for brick pavers? A: The restoration steps for brick pavers generally involve cleaning, repairing any damaged areas, applying a color restorer if needed, and sealing the pavers to protect and enhance their appearance. Are there specific brick paver sealers available for restoration? A: Yes, there are brick paver sealers available that are specifically formulated for restoration purposes. These sealers are designed to restore the color of your brick pavers and provide long-lasting protection. Can I strip the existing sealer from my brick pavers? A: Yes, if there is an existing sealer on your brick pavers, you can use a sealer stripper to remove it. This will allow you to start the restoration process with a clean surface. How long should I wait before applying the sealer to my brick pavers? A: After cleaning and restoring your brick pavers, it is recommended to let them dry completely before applying the sealer. This typically takes around 24-48 hours, depending on the weather conditions. Get Your Paver Restoration Project Estimate

GET STARTED

START MASONRY PROJECT THE RIGHT WAY

Create stunning structures with our residential and commercial masonry services in Fredericton. From meticulous designs to the completed build, our process is professional and rewarding, and we can’t wait to build your dream with you.

Atlantic Brick and Stone, one of the best masonry contractors in Fredericton, NB

Contact

8 Muskie Street, Lower Kingsclear, New Brunswick E3E 0E7, Canada

Scroll to Top