Author name: richardonna@rogers.com

Why Brick Chimney Looks Wet on Outside?
Uncategorized

Why Brick Chimney Looks Wet on Outside?

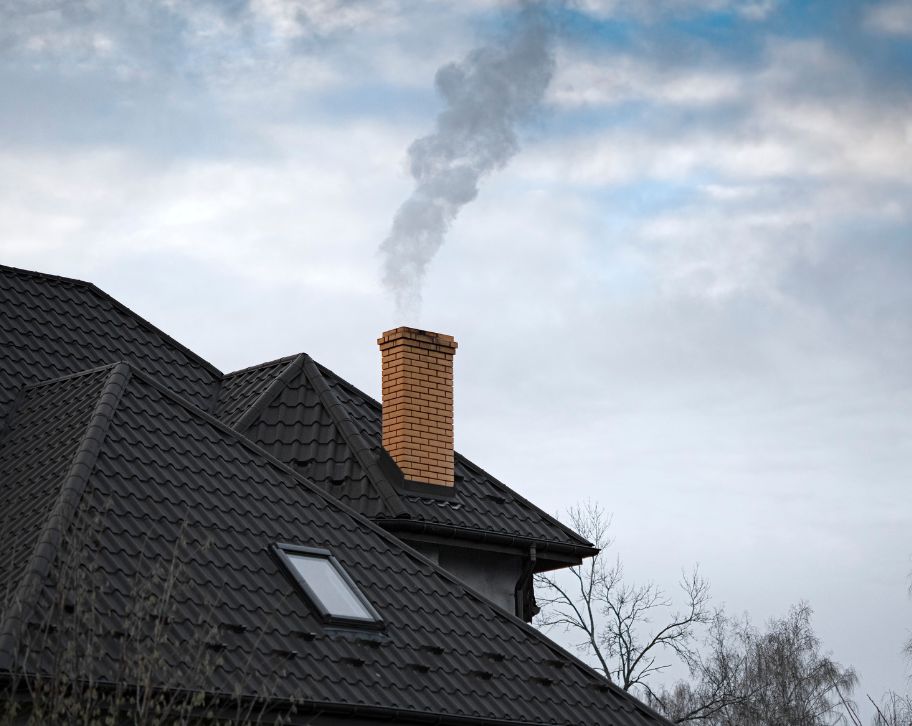
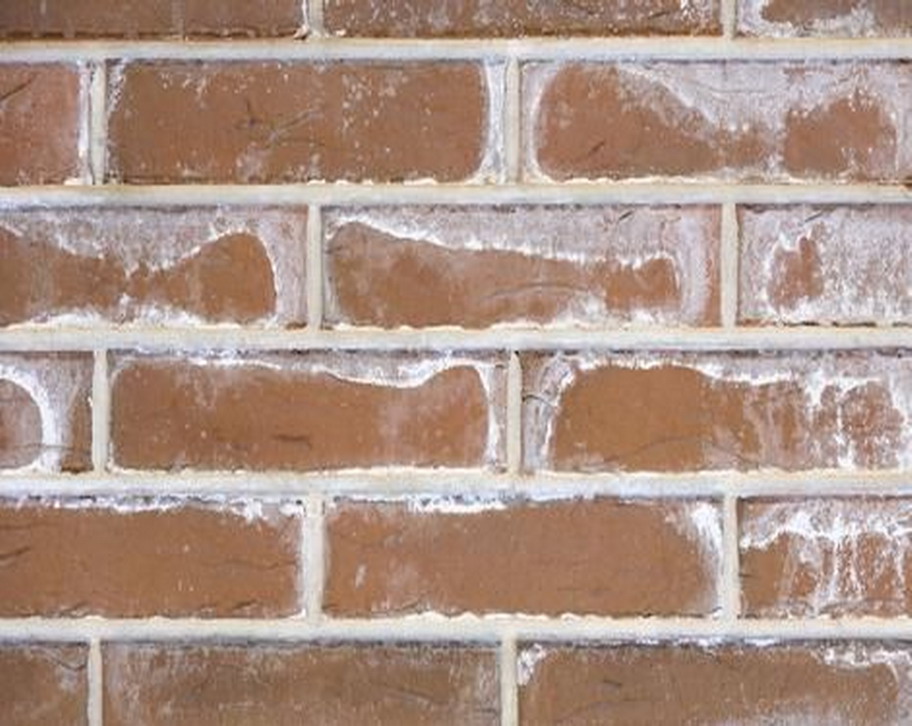
Why Brick Chimney Looks Wet on Outside? Your brick chimney should stand strong and dry, but what if it keeps looking wet outside? That’s a question many in Fredericton are asking right now. With our region’s frequent weather changes, homeowners are increasingly noticing concerning moisture patterns on their chimneys. Multiple factors can contribute to your chimney’s wet appearance, including compromised masonry, faulty waterproofing, or hidden structural issues. These problems, while common, shouldn’t be ignored as they can lead to significant damage if left untreated. What can cause exterior chimney dampness? Have you noticed water stains on your brick chimney lately? Your chimney’s moisture problems might stem from several sources. The most common cause is the natural porosity of bricks and mortar, which tend to absorb water like a sponge. When water freezes and thawing occurs repeatedly, it can cause your chimney bricks to spall and crack. This process weakens the masonry over time, especially in older chimneys where structural damage is more likely to occur. A damaged chimney cap or crown can be causing damp patches to appear. Without proper protection at the top of the chimney, rain easily seeps into the brickwork and flue liner. Similarly, faulty chimney flashing around the chimney-roof connection often leads to water intrusion. Inside your home, poor ventilation or an improperly lined chimney can create condensation problems. When warm air meets cold surfaces inside the chimney, moisture begins to build up and seep through the bricks. Spalling bricks Spalling bricks are a serious concern, characterized by visible crumbling and chipping of brick surfaces. This deterioration often begins subtly but can quickly worsen, compromising your chimney’s structural integrity. When mortar joints begin to deteriorate, they create openings that allow water to penetrate the masonry. During freeze-thaw cycles, this trapped water expands and contracts, accelerating the decay of your bricks and further weakening the structure. If left unattended, spalling can lead to severe structural damage and potential chimney collapse. One early warning sign is the presence of brick debris or pieces around your chimney’s base. Regular inspection and prompt chimney repairs are essential to prevent these issues from escalating into costly repairs. Chimney Cap or Crown Failures Your chimney cap serves as the first line of defense against water damage. When this protective cover fails, rain and snow can easily enter your flue, leading to serious moisture problems. A properly installed cap also prevents debris from blocking proper ventilation. The chimney crown, which is the concrete top of your brick chimney, often develops cracks over time. These fissures allow water to seep into the masonry structure, causing the mortar to deteriorate. Watch for white stains on your brick chimney, as this efflorescence indicates water is moving through and evaporating from the masonry. To waterproof your chimney effectively, consider installing a seamless crown with proper flashing. Regular inspection of these components helps prevent leaks and extends your chimney’s lifespan. Flashing leaks and roof junction issues When chimney flashing becomes rusted or buckled, it compromises the crucial seal between your roof and chimney. This deterioration allows water to penetrate, potentially causing significant damage to your home’s interior structure. Water trails appearing along your chimney’s edges are clear indicators of flashing failure. In colder regions, ice dams can form, creating additional pressure on the flashing and worsening existing leaks around the chimney area. The key to preventing these issues lies in professional installation using high-quality, durable materials like copper. Proper installation by experienced professionals ensures a watertight seal that can withstand various weather conditions and protect your home for years to come. Internal condensation from appliances Modern gas appliances can create significant moisture inside your chimney system. When warm exhaust meets cool chimney walls, condensation forms and begins to collect, potentially damaging your masonry from the inside out. An incorrectly sized flue liner worsens this problem. When your liner is too large for your appliances, exhaust gases cool too quickly, leading to excessive condensation. This trapped moisture becomes particularly problematic during cold weather months. Don’t ignore dampness signs in walls or attic spaces near your chimney. These could indicate dangerous mold growth. Consider upgrading to a properly sized stainless steel liner to prevent condensation issues and ensure safe venting of your appliances. Flue liner damage and water infiltration Your chimney’s clay or tile liner serves as a crucial barrier against moisture. When cracks develop in these liners, water seeps through, compromising your chimney’s structural integrity and creating potential safety hazards. Metal liners face their own challenges. The acidic nature of creosote, a byproduct of wood burning, can corrode these liners over time. This corrosion creates weak spots where moisture can penetrate the system. A properly functioning liner protects your masonry from both external water and exhaust moisture. Without this protection, your chimney becomes vulnerable to deterioration. Regular inspection of your liner helps identify issues before they become major problems. Repair solutions for chimney dampness Chimney cap and crown installation A robust chimney cap and crown system serves as your first line of defense against water damage. Modern materials and proper installation techniques ensure maximum protection, preventing moisture from seeping into your chimney structure while maintaining proper ventilation. Mortar joint restoration Professional brick repointing is necessary for maintaining your chimney’s structural integrity. This process involves removing deteriorated mortar and replacing it with new material, effectively sealing gaps that could otherwise lead to water infiltration and structural weakness. Flashing system upgrades Installing high-quality flashing materials like copper or stainless steel creates a reliable barrier at the roof-chimney junction. Expert installation ensures proper overlap and sealing, providing long-term protection against water intrusion at this critical intersection. Flue liner improvements Modern flue liner solutions offer enhanced protection for your chimney’s interior. Whether choosing stainless steel inserts or cast-in-place options, these systems provide superior defense against both moisture damage and harmful exhaust gases. Masonry rehabilitation When bricks show severe damage, strategic replacement combined with waterproof sealant application becomes necessary. This comprehensive approach not only addresses current damage but also helps prevent future deterioration

Prevent Flue Gas Moisture Damage to Your Masonry Chimney
Uncategorized

Prevent Flue Gas Moisture Damage to Your Masonry Chimney

Prevent Flue Gas Moisture Damage to Your Masonry Chimney Flue gas moisture is like a slow leak you can’t see. In Fredericton’s cold winters, it can eat away at your masonry chimney before you notice. This silent destroyer combines with combustion byproducts to form acidic compounds that gradually deteriorate your chimney’s structure, potentially leading to costly repairs or even dangerous conditions. Protecting your chimney from flue gas moisture requires a multi-layered approach. From installing proper chimney liners to implementing professional waterproofing solutions, there are proven strategies that can shield your masonry chimney system from this destructive force while ensuring your heating system operates safely and efficiently. Flue gas moisture and its impact When you light your fireplace, the burning process creates water vapor that rises through your chimney flue. This might seem harmless, but it’s actually a serious concern for your chimney’s health. The moisture mixes with other combustion byproducts, forming acidic substances that can deteriorate your chimney’s interior. Your modern, energy-efficient heating systems may actually increase this risk. These appliances burn fuel more efficiently, resulting in cooler flue gases that are more likely to condense inside your chimney liner, creating a perfect environment for moisture damage. Think of your chimney as facing a two-front battle against moisture. While flue gas condensation attacks from within, rain and snow assault your chimney’s exterior. Without proper protection, water can easily seep through bricks and mortar, weakening your entire chimney structure over time. How moisture damages masonry chimneys Your chimney’s bricks and mortar are like tiny sponges, naturally absorbing moisture from both inside and outside. This seemingly simple process can start a destructive chain reaction that threatens your entire chimney structure. During winter, the absorbed water freezes and expands within these tiny pores. Think of it like an ice cube tray – as water freezes, it needs more space. This continuous freeze-thaw cycle creates cracks in your bricks, leading to unsightly spalling where pieces of brick start flaking off. The problem gets worse when flue gases enter the picture. When moisture mixes with combustion byproducts, it creates an acidic cocktail that slowly eats away at your chimney’s interior. This corrosive liquid can deteriorate your flue liner, mortar joints, and even the bricks themselves, compromising your chimney’s structural integrity. Acidic Condensation and Spalling When warm flue gases meet your cool chimney walls, they create condensation – similar to how water droplets form on a cold drink on a hot day. In unlined chimneys, this moisture seeps directly into the masonry, starting a destructive process. The condensation isn’t just water, it’s highly acidic due to mixing with combustion byproducts. This acidic solution acts like a slow-working acid, gradually eating away at your mortar joints and brick surfaces. Over time, this chemical assault weakens your chimney’s structure. When bricks begin spalling, there’s no turning back. You’ll notice pieces of brick face flaking off, creating a distinctive pattern of deterioration. This damage isn’t just cosmetic – it’s a sign that your chimney’s structural integrity is at risk. 9 tips to stop flue gas moisture from causing chimney damage Primary defense – chimney liner installation A chimney liner acts as a protective shield within your chimney, creating a smooth, continuous pathway for exhaust gases. Think of it as a pipe within your chimney that guides harmful gases safely to the outside, much like a straw in a glass directs liquid in one direction. This vital component creates an impenetrable barrier between corrosive flue gases and your chimney’s masonry walls. By preventing direct contact between these harmful gases and your chimney’s porous materials, the liner helps maintain your chimney’s structural integrity for years to come. The benefits of a properly installed liner extend beyond just protection. It improves your chimney’s draft efficiency, helping smoke and gases flow upward more effectively. Additionally, it enhances the overall safety of your heating system by preventing dangerous gases from seeping through cracks and maintaining proper temperatures throughout the flue. A quality chimney liner installation is one of the most important investments you can make in your chimney’s longevity and your home’s safety. Professional waterproofing Professional waterproofing is crucial for long-term chimney protection. A quality treatment creates a protective shield while maintaining the masonry’s natural breathability. This balance is essential for preventing moisture accumulation within the structure while blocking external water penetration. Crown protection The chimney crown requires special attention as it’s the first line of defense. High-grade sealants should be applied to prevent water from seeping through any cracks or joints. Regular maintenance of the crown ensures continuous protection against water damage and deterioration. Chimney cap installation A properly fitted chimney cap serves as your chimney’s umbrella. It effectively blocks rain, snow, and debris from entering the flue while allowing smoke to escape. This simple addition significantly reduces moisture-related problems and extends your chimney’s life. Masonry protection Using specialized masonry sealants is vital for brick and mortar preservation. These products penetrate deeply into the masonry materials, creating a strong barrier against moisture absorption. Regular reapplication ensures continuous protection and prevents deterioration. Flashing system Proper installation of flashing where the chimney meets the roof is crucial. Proper flashing prevents water from seeping into this vulnerable area and protects both the chimney structure and your roof. Regular inspection ensures the flashing remains secure and effective. Winter protection Cold weather poses unique challenges to chimney maintenance. Water-repellent treatments are essential for preventing freeze-thaw damage during winter months. These treatments help maintain the chimney’s structural integrity when temperatures fluctuate. Interior Defense Interior waterproofing provides an additional layer of protection against flue gas moisture. These compounds create a barrier that prevents corrosive condensation from damaging the chimney’s interior while allowing proper ventilation. Regular maintenance Annual inspections are essential for maintaining your chimney’s waterproofing system. Professional evaluations help identify potential issues before they become serious problems. Regular maintenance ensures all protective measures continue to function effectively. How to avoid future problem? Regular professional chimney inspections are crucial for detecting moisture-related issues early. Like getting regular health check-ups, these

Why Do Concrete Block Walls Develop Stair Step Cracks?
Uncategorized

Why Do Concrete Block Walls Develop Stair Step Cracks?

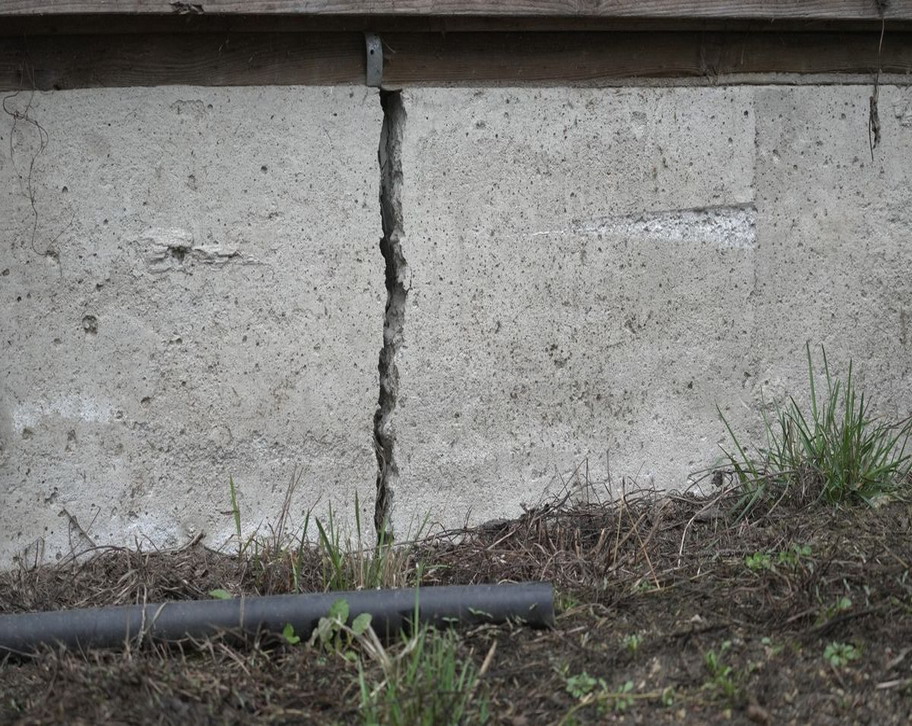
Why Do Concrete Block Walls Develop Stair Step Cracks? Cracks that form a staircase shape don’t show up by accident. They often point to deeper movement in your foundation. These concerning patterns often develop slowly, giving homeowners a chance to address the underlying issues before they become severe. These distinctive cracks typically result from five main factors: foundation settlement, hydrostatic pressure, freeze-thaw cycles, drainage issues, and construction defects. Each cause requires specific repair approaches and preventive measures to ensure long-term structural stability. How to identify stairstep cracks? Have you noticed a strange zig-zag pattern in your concrete block walls? A stair-step crack follows mortar joints between blocks, creating a distinctive stepped pattern. Unlike vertical cracks or horizontal cracks that run straight, these cracks form a unique diagonal path up or down your foundation wall. You will often spot these type of crack patterns near corners, windows, or along your basement wall. Some begin as hairline cracks, barely visible to the naked eye. However, they can develop into wider foundation cracks that signal deeper foundation problems. Watch for other signs that might accompany these cracks in foundation walls. A bowing foundation wall, gaps around doors, or uneven floors are serious red flags. If you notice a stair-step crack wider than 1/4 inch or multiple cracks forming in your block foundation, it’s time to contact a foundation professional. These foundation wall cracks typically appear more pronounced on concrete block walls than on poured concrete foundations. In masonry construction, the mortar joints create natural weak points where cracks commonly develop under stress. 5 culprits of Stair-Step Cracks in concrete block walls? Uneven foundation When soil beneath your foundation isn’t properly compacted or contains expansive clay, different sections of your foundation may sink at varying rates. This differential movement creates stress on the walls, forcing them to crack in a distinctive stair-step pattern along mortar joints. Hydrostatic pressure Water accumulation in the soil surrounding your foundation can exert significant pressure on your walls. As this pressure builds up, it pushes against the concrete blocks, causing them to bow inward. The resulting stress often manifests as stair-step cracks in the weakest points of the wall. Freeze thaw cycles In New Brunswick with cold climates, repeated freezing and thawing of soil moisture puts enormous strain on foundation walls. As water freezes, it expands, pushing against the walls, and when it thaws, the soil contracts. This continuous cycle weakens the wall structure, leading to stair-step cracking. Poor drainage Inadequate drainage systems can allow water to erode the soil supporting your foundation. As water washes away the soil, it creates empty spaces beneath the foundation. Without proper support, sections of the foundation can sink, resulting in stair-step cracks in the walls above. Construction defects Initial construction problems can set the stage for future cracking. Issues like improperly mixed mortar, inadequate curing time, or insufficient reinforcement create weak points in the wall. Over time, these vulnerabilities become apparent through stair-step cracks that form along mortar joints. Are stair step cracks a serious issue? Stair-step cracks in foundation walls can signal serious structural issues that shouldn’t be ignored. The severity depends on factors like crack width, how quickly they grow, and whether multiple cracks appear. Hairline cracks might be less concerning, but cracks wider than 1/4 inch often indicate significant foundation settlement. Watch for warning signs beyond the cracks themselves. Bowing foundation walls, doors that won’t close properly, or windows that stick are red flags of structural instability. These symptoms suggest your foundation problems are progressing. If left untreated, these cracks can lead to serious consequences. Water seepage through foundation wall cracks can cause basement flooding, while widening gaps create entry points for pests. Unlike normal shrinkage cracks, stair-step patterns typically indicate active structural movement requiring professional foundation repair. How to fix concrete block walls stair step cracks? For minor concrete block wall cracks less than 1/8 inch wide, epoxy injection provides an effective repair solution. This method seals hairline cracks to prevent water infiltration and stabilize the affected area. However, this is only suitable for non-structural issues. More severe foundation settlement problems require structural interventions. Installation of helical piers can lift and stabilize sinking foundations, while carbon fiber straps reinforce bowing walls. For deteriorated mortar joints, professional repointing restores the wall’s integrity. Addressing underlying causes is crucial for long-term foundation crack repair. This often involves improving drainage through French drain installation, extending downspouts, or regrading the soil around your foundation. The cost of repairs varies significantly based on the type of foundation, extent of damage, and chosen repair method. When should you call a masonry repair contractor? Don’t delay contacting a masonry repair contractor if you notice rapidly expanding stair-step cracks in your foundation walls. Other urgent signs include widening gaps in block foundations, water seepage, or multiple types of cracks appearing simultaneously, especially when horizontal cracks combine with stair-step patterns. A qualified foundation repair expert will conduct thorough inspections, including detailed soil analysis and precise laser measurements. They’ll create comprehensive crack maps to track the progression of foundation settlement and determine the extent of structural damage. When selecting a foundation repair company, ask critical questions about their warranty coverage and specific experience with concrete block walls. Get clear timelines for the project completion and ensure they explain their repair methods. A reputable professional will provide detailed documentation and answers to all your concerns. 5 tips to prevent future cracks in concrete block walls Keep gutters clean and extend downspouts at least 6 feet from foundation to prevent water accumulation around walls. Monitor soil moisture levels and maintain consistent watering patterns, avoiding excessive irrigation near foundation walls. Inspect foundation walls regularly and seal minor cracks immediately with appropriate waterproof materials to prevent deterioration. Install frost protection barriers in cold regions and maintain proper soil grading to direct water away from foundation. Place root barriers between large trees and foundation walls to prevent soil destabilization from root systems. Fix stair step cracks with Fredericton’s trusted masonry experts With 15+

Are Cracked Concrete Steps a Structural Risk
Uncategorized

Are Cracked Concrete Steps a Structural Risk?

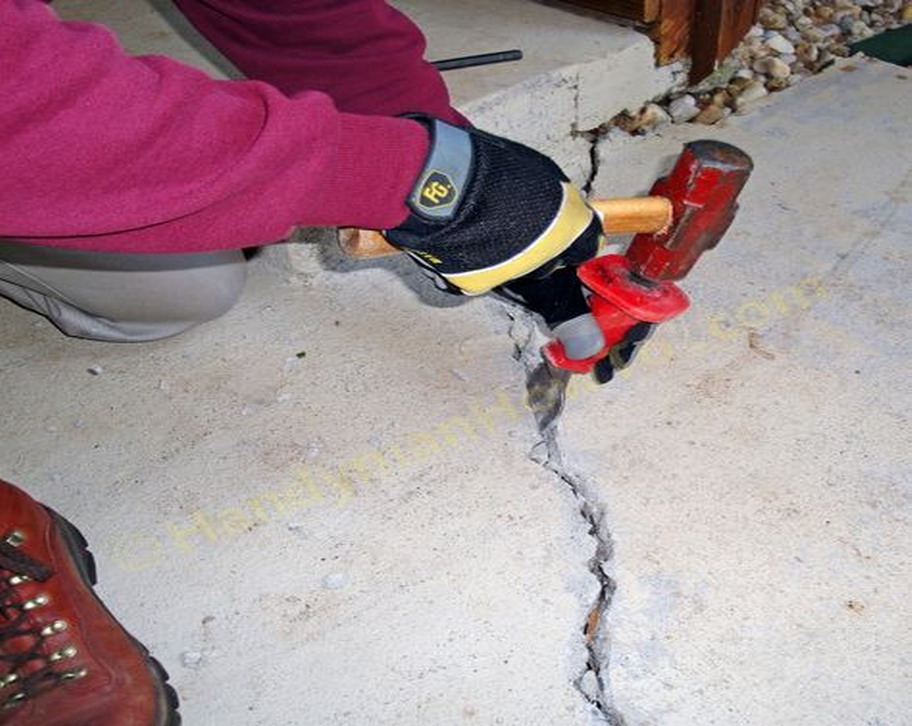
Are Cracked Concrete Steps a Structural Risk? One day it’s just a line; the next, your step feels loose. If you’re in Fredericton, it’s smart to know when a crack becomes a real concern. With our region’s freeze-thaw cycles and varying soil conditions, even minor cracks can rapidly transform into major structural headaches. Concrete step cracks indeed pose significant risks to your home’s structural integrity. Like a tiny leak in a dam, these small fissures can gradually worsen, potentially leading to complete step failure and extensive foundation damage if not properly addressed. Types of concrete step cracks Structural vs non structural cracks When examining concrete step cracks, the width is a crucial indicator of severity. Structural cracks exceeding 1/4 inch width are serious concerns that require immediate attention, as they often stem from foundation problems. In contrast, hairline cracks are usually surface-level imperfections that don’t compromise the step’s integrity. Stair-step crack These distinctive patterns manifesting in concrete steps are particularly troubling signs. They typically emerge when the foundation experiences movement or when the soil beneath begins to settle unevenly. Such cracks deserve prompt professional evaluation as they can indicate significant structural instability. Horizontal crack Among the most dangerous types of cracks are horizontal ones, which often develop due to excessive lateral pressure. These cracks typically result from expanding soil or water damage pushing against the concrete. They require immediate expert assessment as they can lead to complete structural failure if left unaddressed. Shrinkage vs settlement cracks During the concrete curing process, thin and shallow shrinkage cracks may naturally appear, which are generally harmless. However, settlement cracks are more serious as they develop gradually and continue to expand both in width and depth. These cracks often indicate ongoing foundation issues that need professional attention. Remember, even properly installed poured concrete steps can develop cracks from seasonal temperature changes and normal foundation settlement. How concrete step cracks threaten your home’s stability Concrete step cracks often serve as early warning signs of deeper foundation issues. When these cracks appear, they are usually indicating problems extending beyond just the steps themselves, potentially affecting your home’s foundation. Water is a major culprit in escalating crack damage. Once water seeps into these cracks, it starts a destructive cycle, especially in Fredericton colder months where freezing and thawing repeatedly stress the concrete, making cracks progressively wider and deeper. This process weakens the steps’ ability to bear weight safely. Left unaddressed, these cracks can lead to catastrophic failures. What starts as a minor crack can result in complete step collapse or separation from your home’s structure, creating dangerous conditions and costly repairs. Red flags you should not Ignore Certain warning signs demand immediate professional attention. If you notice cracks wider than 1/4 inch, uneven step surfaces, or if your doors and windows start sticking, these are serious red flags that shouldn’t be ignored. Horizontal and stair-step cracks in your foundation or steps are particularly concerning. These specific crack types often indicate severe structural problems that require expert evaluation. A foundation repair expert can perform a thorough structural assessment to determine the root cause. Postponing concrete repair can be a costly mistake. Not only do foundation problems worsen over time, leading to more expensive fixes, but they also create dangerous tripping hazards. What might start as a minor crack can quickly escalate into a major safety concern. Concrete steps repair options Minor crack solutions For small, superficial cracks in concrete steps, quick and economical repairs can be achieved using epoxy or polyurethane sealants. These materials effectively prevent water from seeping into the cracks, which could otherwise lead to more severe damage. This type of repair is particularly effective for hairline cracks that haven’t yet developed into structural issues. Structural reinforcement methods When steps begin to sink or show signs of instability, more robust solutions like steel bracing or mudjacking become necessary. These techniques help stabilize the structure and prevent further settlement. Mudjacking, in particular, can effectively lift and level sunken steps by pumping a specialized mixture underneath. Foundation problem solutions In cases where step damage stems from serious foundation issues, comprehensive solutions like underpinning or soil stabilization are required. These methods address the root cause of the problem by strengthening the foundation or improving soil conditions. Such repairs are more complex and typically require professional expertise. Preventive maintenance approach Regular inspection and timely repair of minor cracks represent the most cost-effective strategy for concrete step maintenance. By addressing small issues promptly, homeowners can avoid the need for extensive and expensive repairs later. This proactive approach includes routine sealing and maintaining proper drainage around the steps. How to prevent cracks to occur Proper installation and drainage The foundation of crack prevention begins with correct installation techniques and effective drainage systems. Well-compacted soil beneath the steps provides a stable base that minimizes settling risks. Additionally, ensuring proper water drainage away from the steps helps prevent soil erosion and moisture-related damage that often leads to cracking. Strategic use of expansion joints Expansion joints are vital components in concrete step construction that help manage natural movement. These specially designed joints act as buffers, allowing the concrete to expand and contract as temperatures fluctuate throughout the year. When properly installed by professionals, these joints significantly reduce the likelihood of stress-related cracking. Seasonal maintenance practices Regular maintenance is crucial for preventing crack formation in concrete steps. This includes removing debris regularly, especially during fall and winter months, and conducting thorough inspections for any early warning signs. Addressing drainage issues promptly and keeping the steps clean helps maintain their structural integrity. Professional installation standards The expertise of concrete contractors plays an important role in preventing future cracks. Proper concrete mixing ratios, correct placement of reinforcement materials, and appropriate curing techniques are essential aspects that only experienced professionals can ensure. Their knowledge of local climate conditions and building codes helps create durable, crack-resistant steps. Should you DIY repair concrete step cracks? DIY repairs often fail due to common mistakes like using incorrect materials. Homeowners frequently choose

Why do hairline cracks appear in concrete
Uncategorized

Why Do Hairline Cracks Appear in Concrete?

Why Do Hairline Cracks Appear in Concrete? You did not drop anything heavy, so why is your concrete cracking? Hairline cracks often show up without warning, causing unnecessary stress and concern among homeowners. These fine lines can appear mysteriously on pathways, patios, and foundations, leading to questions about the concrete’s quality. These hairline cracks typically emerge due to natural concrete curing processes and environmental factors. While some cracks result from improper installation or poor mixture ratios, most hairline cracks are simply concrete’s natural response to shrinkage, temperature changes, and settlement. What exactly are hairline cracks? If you have noticed thin lines appearing on your concrete surface then dont worry, these are hairline cracks in concrete that typically measure less than 0.3mm in width. Just like fine threads on fabric, these cracks form subtle patterns across your concrete slab. You will often spot these fine cracks running randomly or alongside control joints in your concrete surface. While they might appear on any concrete structure, they are most common in concrete slabs, foundation walls, and walkways where the concrete dries and cures. Here’s something reassuring – these thin cracks usually don’t signal structural problems. However, you shouldn’t ignore them completely. Though hairline crack repair is not always urgent, these small openings can let water seep deep in the slab, potentially causing issues if left unchecked. Think of these cracks as your concrete’s way of adjusting to its environment. New concrete can develop these surface-level cracks as part of its natural settling process. While most types of cracks need repair, hairline cracks often just need monitoring. How to differentiate between structural cracks and hairline cracks? Hairline cracks are superficial surface imperfections less than 0.3mm wide, typically forming thin web-like patterns that don’t compromise structural integrity. These surface-level cracks remain stable over time and don’t affect the concrete’s ability to bear weight or maintain structural stability. Structural cracks are significantly wider, deeper, and often appear diagonally, indicating serious foundation problems or excessive weight stress. Professional concrete crack repair is necessary for structural cracks, requiring specialized repair methods like epoxy injection to restore structural integrity. Watch for warning signs: cracks appearing near windows/doors, increasing width over time, or cracks accompanied by uneven settling. Top 5 reasons hairline cracks form Natural shrinkage during curing As concrete transitions from a liquid to a solid state, it undergoes a natural moisture loss process. This evaporation creates internal tension within the material, causing microscopic stress points. When the internal stress exceeds the concrete’s tensile strength, tiny fissures begin to appear on the surface, resulting in hairline cracks. Poor concrete mix design The quality of concrete depends significantly on its initial composition. When some concrete contractors use excessive water or low-grade aggregates, the concrete’s structural integrity becomes compromised. A high water-to-cement ratio weakens the material’s overall strength, making it more susceptible to developing cracks during and after the curing process. Inadequate curing Proper concrete curing requires moisture management and consistent environmental conditions. Skipping this critical step leads to uneven moisture distribution, creating irregular stress patterns across the concrete surface. These variations can cause non-uniform drying, which increases the likelihood of hairline crack formation. Temperature fluctuations Concrete is sensitive to temperature changes and responds by expanding and contracting. Daily and seasonal temperature shifts in New Brunswick create repetitive stress cycles that gradually strain the material. These continuous thermal movements can cause microscopic movements, ultimately resulting in small, interconnected surface cracks. Subgrade instability The foundation beneath the concrete plays a big role in preventing cracks. Poorly compacted or unstable soil can shift and settle unevenly over time, creating unpredictable pressure points. These ground movements translate into stress on the concrete surface, which can manifest as hairline cracks spreading across the material. Is it possible to prevent hairline cracks before pouring? Yes of course, starting with the right concrete mix is a key to control these cracks. A proper water-cement ratio between 0.4 and 0.6, combined with high-quality aggregates, creates a strong foundation that resists cracking. This precise mix helps control shrinkage during the curing process. Strategic placement of control joints is also essential. Planning these joints at proper intervals helps guide where cracks might form naturally. Think of them as planned weak points that direct stress away from random cracking patterns. Before pouring concrete, proper soil preparation makes a huge difference. Thorough compaction prevents future settlement that could lead to concrete cracking. This step is often overlooked but remains vital for long-term stability. The curing process requires patience and protection. Keep the new concrete moist for a full week using wet burlap or quality sealants. Shield the surface from direct sunlight and strong winds to prevent rapid moisture loss. 4 simple fixes for hairline cracks Proper preparation is key before starting any repair work. Begin by thoroughly cleaning the crack area using a wire brush to remove loose particles and debris. Follow up with vacuuming to ensure a clean surface for better adhesion. For most hairline cracks, DIY solutions work effectively. Apply polymer-based sealants or epoxy fillers directly into the cleaned cracks. Once the filler dries completely, sand the area smooth to match the surrounding concrete surface. However, some situations require professional expertise. If cracks keep returning after your repairs, or you notice signs like mold growth or uneven floor levels, it’s time to contract masonry repair contractor. These symptoms could indicate deeper structural issues. Remember, successful repair depends on proper timing and technique. Don’t rush the process – allow adequate drying time between steps for the best results. Long term concrete maintenance tips to avoid cracks Apply quality penetrating sealers annually to create a protective barrier, preventing moisture from seeping into the concrete surface. Skip chemical de-icers and opt for sand during winter – salt-based products seriously damage concrete over time. better hire a local snow removal company and avoid surface damage. Keep control joints properly sealed against water infiltration, checking and resealing them when needed for optimal protection. Perform thorough inspections after each winter season to catch and address

Ways to Fix Damaged Chimney Flashing
Uncategorized

Ways to Fix Damaged Chimney Flashing

Ways to Fix Damaged Chimney Flashing Your chimney shouldn’t leak, no matter how wild the Fredericton weather gets. If it does, your flashing might be damaged, and there’s more than one way to repair it. Every drip through your ceiling is like watching money leak from your wallet, and ignoring these warning signs could turn your cozy fireplace into a costly nightmare. Professional chimney flashing repair methods range from quick-fix solutions like roofing cement and silicone sealants to permanent solutions such as section replacement and complete re-flashing. Each method serves different purposes and offers varying levels of protection, depending on the extent of damage and your budget constraints. Why chimney flashing matters for your roof? Your chimney and roof require proper flashing to prevent water damage to your home. This critical component creates a watertight seal at the point where your roof and chimney meet, directing water away from vulnerable areas. Without proper flashing around the chimney, water can seep into your home, causing serious problems. From unsightly water stains on your ceiling to dangerous structural damage and costly roof repairs, failing flashing can lead to extensive damage over time. The flashing system consists of three main parts working together. Base flashing slopes away from the chimney bottom, step flashing protects the sides, and counter flashing tucks into mortar joints for complete protection. Each piece plays a vital role in your roof system’s defense against water intrusion. Professional installers typically choose between copper flashing for durability, aluminum for cost-effectiveness, or lead for historic homes. While roofing cement offers temporary fixes, investing in quality metal flashing materials ensures long-lasting protection for your home. Spotting chimney flashing trouble Have you noticed mysterious water stains on your ceiling, especially near your fireplace? This is often the first warning sign that your chimney flashing isn’t doing its job properly. Don’t ignore these early indicators, as they can signal bigger problems ahead. Common early warning signs: Water stains on ceiling, particularly near fireplace areas Discoloration or dampness on walls adjacent to chimney Musty odors in the attic or upper floors Regular visual inspections of your roof can reveal obvious signs of trouble. Look for rusty or corroded metal flashing around your chimney, which weakens its water-resistant properties. Also check for any gaps that have developed between the flashing and your chimney’s mortar joints. Critical areas to inspect: Loose or missing flashing pieces Deteriorating mortar joints Visible gaps between flashing and chimney Sometimes damage isn’t immediately visible to untrained eyes. Warped or cracked flashing materials might hide beneath the surface, silently allowing water to penetrate your roof system. That’s why having a professional chimney inspection annually is important, they can spot potential issues before they become major headaches. Remember, catching flashing problems early can save you from expensive repairs. If you spot any of these warning signs, it’s time to call a qualified chimney repairs for a thorough assessment. Now lets talk what are the ways to fix damaged flashing. Quick fixes vs. permanent solutions Temporary solutions When facing minor chimney flashing problems, quick fixes like roofing cement or silicone sealants can offer immediate protection from leaks. While these solutions provide a short-term answer, they typically last only 1-2 years and shouldn’t be relied upon as permanent fixes. For emergency situations, especially during severe weather, temporary measures such as waterproof tape or tarps can prevent immediate water damage, but these should be replaced with proper repairs as soon as possible. Roofing cement applications Roofing cement is a thick, adhesive material that can be quickly applied to seal small cracks and gaps in chimney flashing. This solution works by creating a waterproof barrier that prevents moisture from seeping through damaged areas. While effective for immediate repairs, roofing cement typically needs to be reapplied every year, making it a temporary solution rather than a permanent fix. Silicone sealant treatments Silicone sealants offer a flexible and water-resistant solution for minor flashing repairs. These sealants can effectively fill small gaps and maintain their elasticity despite temperature changes, making them suitable for varying weather conditions. Unlike roofing cement, silicone sealants generally have better durability and UV resistance, but they still require periodic inspection and eventual replacement. Emergency waterproof taping Waterproof taping serves as a crucial emergency solution during severe weather conditions when immediate action is needed. This method involves applying specialized waterproof tape over damaged areas to create a temporary barrier against water infiltration. While it’s an excellent short-term fix to prevent water damage, it should be replaced with a more permanent repair solution once weather conditions improve. Permanent repairs For long-lasting results, targeted section replacement or complete re-flashing are the most effective solutions. When dealing with isolated damage, replacing specific sections of flashing can address the issue without disturbing the entire chimney system. However, for comprehensive protection, complete re-flashing with new copper or aluminum materials offers the most durable solution. While this option is more costly and labor-intensive, it provides the best long-term protection for your roof-chimney junction. Section replacement for isolated issues When specific portions of chimney flashing show damage while the rest remains intact, targeted section replacement is the most cost-effective approach. This method involves removing damaged flashing pieces and replacing them with new materials while maintaining proper overlap with existing sections. This solution is particularly effective for addressing localized rust, bent pieces, or small areas of deterioration without disturbing the entire flashing system. Complete chimney Re flashing installation This comprehensive solution involves removing all existing flashing components and installing an entirely new system. During installation, chimney repair professionals carefully integrate base flashing, step flashing, and counter flashing to create a watertight seal around the chimney. While this is the most expensive and time-consuming option, it provides the most reliable long-term protection against water infiltration and typically lasts for decades with proper maintenance. 2 important factors for long lasting chimney flashing Types of flashing material When selecting type of flashing material, copper stands out as a premium choice for your roof system. Its impressive 50-year lifespan and

Signs of a Damaged Chimney Cap
Uncategorized

Signs of a Damaged Chimney Cap

Signs of a Damaged Chimney Cap Noticed a strange smell or rust stains around your fireplace? These might be quiet signals from a damaged chimney cap you shouldn’t ignore.” When your chimney cap starts failing, it often sends subtle warning signs that can escalate into major problems if left unchecked, potentially leading to costly repairs and safety hazards. A damaged chimney cap typically reveals itself through visible rust patches, unusual debris in your firebox, or water stains on your ceiling. By learning to recognize these early warning signs, you can protect your home from serious structural damage and maintain a safe, efficient fireplace system. Role of a chimney cap Your chimney cap sits atop your chimney like a protective shield, serving as the first line of defense for your entire chimney system. It’s a metal covering designed specifically to keep your fireplace and chimney safe from unwanted visitors and elements. Chimney cap acts like a guardian that stops leaves, twigs, and other debris from falling into your chimney. Without a properly functioning chimney cap, rain and snow could easily make their way down your chimney, potentially causing damage to your chimney liner and structure. It also acts as a barrier against curious critters like birds, squirrels, and raccoons who might see your chimney as a cozy new home. Plus, it helps maintain proper airflow, which is essential for your fireplace to work efficiently and safely. Protecting your chimney crown is another task of the cap, as it prevents water damage that could lead to expensive repairs. Many types of chimney caps are made with durability in mind, ensuring long-lasting protection for your chimney and fireplace. What a damaged chimney cap looks like? Visual inspection When inspecting your chimney cap from the ground, keep an eye out for obvious damage like cracks, holes, or chips in the structure. These defects, even if they seem minor, can quickly develop into serious problems that compromise your chimney’s protection. Rust spots and corrosion on your metal chimney cap are clear warning signs that shouldn’t be ignored. These issues typically start as small brown or orange patches but can spread rapidly, weakening the cap’s material and potentially leading to structural failure. Weather exposure often causes parts of the chimney cap to deteriorate or break away completely. You might notice missing pieces, warped metal, or sections that have pulled away from the chimney crown. These issues can leave your chimney vulnerable to water damage and pest intrusion. Look for any signs of severe weathering, as constant exposure to sun, rain, and extreme temperatures can compromise your cap’s protective abilities. Regular visual inspections can help catch these problems early. Debris accumulation and blockages in the firebox Finding leaves, twigs, or other outdoor debris in your firebox is a clear warning sign that your chimney cap isn’t doing its job properly. These materials shouldn’t be able to enter your chimney if your cap is functioning correctly. When debris makes its way into your chimney system, it can create dangerous blockages that affect proper ventilation. Over time, these accumulating materials can damage your chimney’s interior structure and flue tile, leading to costly repairs if left unaddressed. If you’re regularly cleaning debris from your firebox, it’s time to have your chimney cap inspected. This recurring issue typically indicates that your cap needs immediate repair or replacement to restore proper protection for your chimney system. 3 Signs of animal infestation in chimney system Strange noises like scratching, chirping, or rustling from your chimney indicate unwanted animal residents accessing through damaged caps. Animal nests built inside chimneys can damage caps further and block proper ventilation, compromising your entire chimney system. Nesting materials create serious fire hazards and can cause extensive damage to chimney linings and internal components. Water damage A damaged chimney cap allows rainwater to seep into your chimney system, causing immediate issues like water stains and rust formation. This unwanted moisture creates a damaging cycle that weakens the cap’s protective abilities over time. When water continuously enters your chimney, it can severely damage the liner and flue system. The constant exposure to moisture accelerates deterioration, leading to expensive repairs if not addressed promptly. The most concerning aspect is how water infiltration affects your entire chimney structure. From crumbling mortar to weakened bricks, persistent moisture can compromise your chimney’s stability and safety, potentially requiring major structural repairs. Aging effects Even the highest quality chimney caps experience natural deterioration over time. Environmental factors like rain, snow, and temperature changes gradually wear down the cap’s materials, particularly affecting metal components through rust and corrosion. As your chimney cap ages, it becomes more susceptible to damage and may show signs of material fatigue. What starts as minor wear can quickly escalate into significant problems that compromise your cap’s protective function. Regular inspection becomes important as your cap gets older. Professional evaluation can identify early signs of age-related deterioration, helping prevent expensive repairs and ensuring your chimney system remains safe and effective. Why should not neglect damaged chimney cap Poor ventilation from a damaged cap traps dangerous creosote buildup inside your chimney, significantly increasing fire risk potential. Compromised caps allow sparks and flames to escape through gaps, potentially igniting nearby roofing materials or surrounding structures. Damaged caps create unsafe draft conditions, allowing toxic gases and carbon monoxide to back up into living spaces. Why Professional Inspection and Maintenance is Necessary Regular professional inspections are essential for maintaining your chimney cap. A certified chimney repair can identify potential issues before they develop into big issues, saving you time and money in the long run. Professional maintenance helps ensure your entire chimney system functions safely and efficiently. Experts can spot subtle signs of damage that might go unnoticed by untrained eyes, preventing dangerous situations from developing. Professionals can extend your chimney cap’s lifespan and maintain proper ventilation. Whether it’s a minor repair or complete replacement, professional service ensures your chimney system remains safe and functional year-round. DIY vs. Professional chimney repair While homeowners can perform basic

Can You Fix Pitted Concrete Garage Floors
Uncategorized

Can You Fix Pitted Concrete Garage Floors?

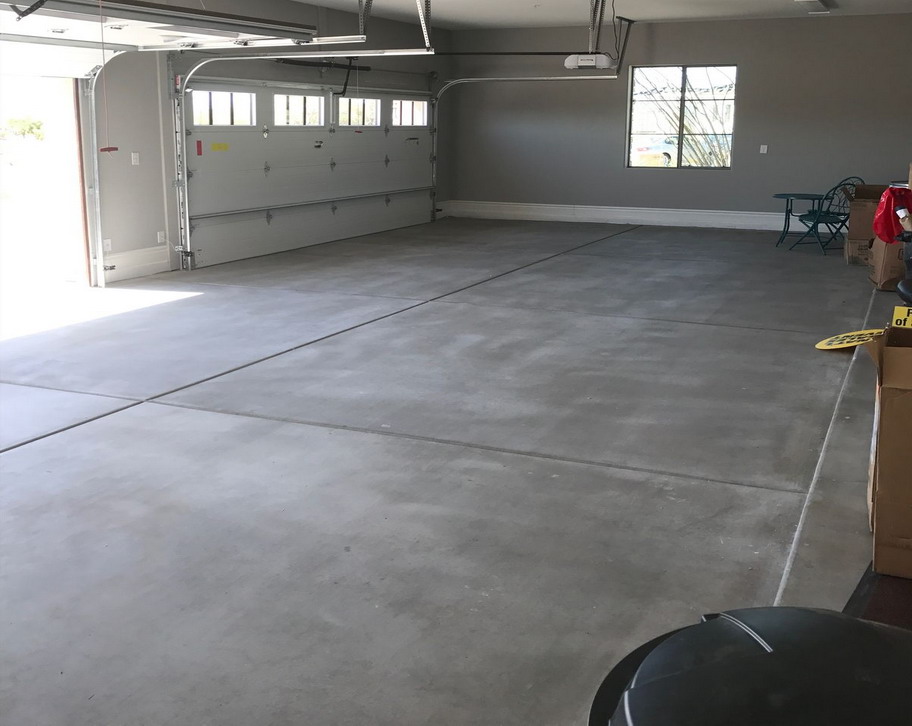
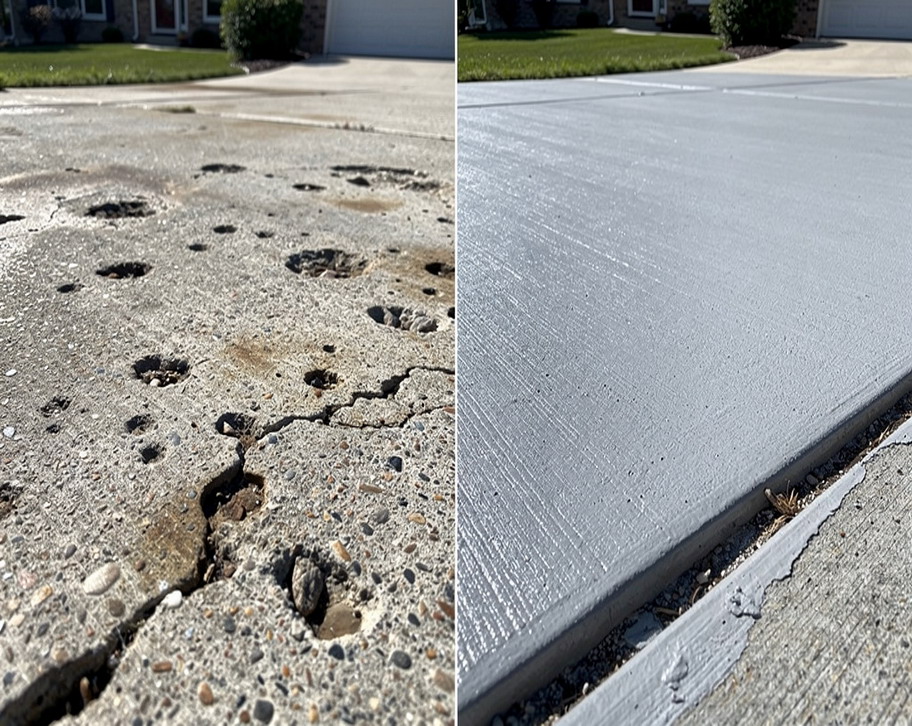
Can You Fix Pitted Concrete Garage Floors? Pitted concrete can sneak up on you after a harsh Fredericton winter. Wondering if you need to start from scratch or just patch things up? Those unsightly holes and depressions in your garage floor not only look terrible but can also lead to more serious structural issues if left untreated, potentially costing you thousands in repairs. The good news is that most pitted concrete garage floors can be successfully repaired using various techniques, from simple patching to complete resurfacing. The key lies in properly assessing the damage extent and choosing the right repair method, which we’ll explore in detail throughout this guide. Can a pitted concrete garage floor be repaired? Assessing feasibility Your pitted garage floor might look beyond repair, but don’t lose hope! Many concrete surfaces can be restored with the right approach. Before diving into repair work, you’ll need to evaluate your floor’s condition carefully. The success of your garage floor project depends on understanding what caused the damage. Road salt, freeze-thaw cycles, or improper finishing techniques can create different types of deterioration. Some pitted floors might need simple patching, while others require complete resurfacing. Here’s how to check if your floor needs repair: Use a ruler to measure pit depths, anything less than ½ inch is considered shallow Look for cracks, loose concrete, or areas where the surface is flaking away Survey the entire floor to see if damage affects specific spots or the whole floor Remember to identify underlying moisture issues before starting repairs. Ignoring these problems could lead to future concrete pitting, even after fixing the current damage. 4 causes of concrete pitting in garage floors Water seeps into concrete pores and expands during freeze-thaw cycles, causing surface damage and eventual pitting. Road salt, automotive fluids, and harsh chemicals break down your garage floor’s surface, leading to deterioration and pits. An inadequate concrete mix or improper finishing during installation creates weak spots prone to pitting and surface damage. Regular vehicle traffic, heavy tools, and equipment dragging can wear down concrete surfaces, forming shallow depressions and pits. Steps to repair pitted garage floor Initial assessment Before starting repairs, walk through your garage and carefully map out all damaged areas. Take photos and measure pit depths with a ruler. This helps determine the repair materials needed and creates a clear plan of action. Deep cleaning process Getting your floor spotless is crucial for repair success. Start by removing all debris with a heavy-duty vacuum. Tackle those stubborn grease spots with a strong alkaline cleaner. Finish with pressure washing to ensure every speck of dirt is gone, but remember to let it dry completely. Surface preparation For minor pitting, an acid etching solution can create the perfect surface for repairs. However, deeper pits need mechanical grinding to ensure proper bonding. Choose your method based on pit depth and damage severity. This step is crucial for making sure your repairs stick around for the long haul. Repair techniques based on damage severity Basic surface treatment For minimal damage and shallow pits, concrete resurfacer provides an excellent solution. This thin overlay, typically 1/8 to 1/4 inch thick, can effectively cover minor imperfections. Multiple coats might be necessary for a smooth, even finish. Epoxy based solutions When dealing with moderate damage or oil-stained areas, epoxy fillers mixed with sand offer great durability. These work particularly well for pits deeper than 1/4 inch and can be textured to match the surrounding concrete surface perfectly. Deep pit repairs For isolated deep pits exceeding 1/2 inch, mortar-based repairs are essential. The process begins with careful chiseling of damaged areas to create a clean bonding surface. This method provides a strong, long-lasting solution for severe localized damage. Extensive damage solutions When facing widespread damage, structural overlays thicker than 1 inch might be necessary. For less severe but extensive surface damage, polishing can be a viable cosmetic solution. These methods address large-scale problems while maintaining the floor’s integrity. When concrete replacement is necessary Signs of structural issues When your garage floor shows exposed rebar or cracks wider than 1/8 inch, it’s a red flag for serious structural problems. Uneven settling of the concrete indicates foundation issues that can’t be fixed with foundation repairs. These conditions make replacement the only safe and viable option for maintaining your garage’s integrity. Widespread surface damage If more than half of your floor shows deep pitting exceeding 1/2 inch, repairs become impractical. At this point, patching and resurfacing won’t provide a lasting solution. The extensive nature of such damage typically means the concrete has deteriorated beyond repair. Moisture related problems Persistent water issues, evidenced by white mineral deposits (efflorescence) or constant seepage, indicate serious underlying problems. When moisture continuously undermines repair attempts, it’s time to consider full concrete replacement. These issues often signal deeper drainage problems that need addressing. Financial considerations Compare the costs of repeated repairs versus a one-time replacement. While replacement seems expensive initially, multiple repair attempts can add up quickly. Consider the long-term value and durability of a new concrete floor against the ongoing expense of maintaining a deteriorating surface. Preventative maintenance to extend floor life Protect your garage floor with quality penetrating sealers or epoxy coatings, creating a barrier against moisture and harmful substances. Clean up oil, chemical spills, and other contaminants immediately to prevent concrete deterioration and permanent staining. Replace corrosive de-icing products with gentler alternatives like sand or cat litter during winter months. Perform monthly inspections to identify and address early signs of surface damage before they become major issues. Act fast – Pitted garage floors can be fixed in Fredericton At Atlantic Brick and Stone, we understand that a pitted garage floor can be a major concern for homeowners. Our experienced team specializes in assessing and repairing concrete surfaces, offering solutions tailored to your specific situation. We begin with a thorough evaluation of your floor’s condition, measuring pit depths and identifying underlying causes. Whether it’s freeze-thaw damage, chemical exposure, or wear and tear, we’ll determine the

How to Effectively Prepare a Commercial Property for Masonry Repair
Uncategorized

How to Effectively Prepare a Commercial Property for Masonry Repair? 

How to Effectively Prepare a Commercial Property for Masonry Repair?  Planning a masonry repair and restoration for your Fredericton commercial property? Before the work begins, knowing what to do can save you stress, time, and money. Without proper preparation, you might face disrupted business operations, escalating repair costs, and potential safety hazards. Effective preparation involves several critical steps that ensure smooth project execution. By following a systematic approach to pre-repair planning, selecting qualified contractors, and implementing proper safety measures, you can maintain your building’s structural integrity while minimizing business disruption. Pre repair planning & assessment Importance of building inspection Want to keep your commercial building in top shape? Start with a thorough inspection by a experienced commercial masonry contractor. They’ll look for signs of wear, cracks in brick surfaces, and mortar deterioration that might affect your property’s structural integrity. Regular assessment helps identify minor issues before they turn into extensive repairs, saving you money in the long run. Documentation is key Taking detailed photos and creating records of masonry damage is like creating a roadmap for your masonry restoration project. Property managers find this especially helpful when planning maintenance services. A well-documented inspection can help you track brick repair progress and ensure your building remains safe. This visual record also helps prevent disputes during the repair process. Planning your repair strategy Your masonry structure needs a clear action plan. Working with masonry professionals, determine which restoration techniques will work best for your situation. Whether it’s tuckpointing, waterproofing techniques, or addressing moisture penetration, having a written scope helps maintain brick quality. This planning stage ensures all parties understand the timeline and materials needed for successful masonry work. Contractor selection & professional consultation Finding the right commercial masonry contractor Your masonry repair success starts with choosing the right team of professionals. Look for contractors who specialize in commercial properties and understand various types of masonry. Expert tips from experienced masonry repair contractors can help prevent water damage and ensure proper restoration techniques. Consider their experience with similar projects and their understanding of local building codes. Check credentials and experience Before hiring any masonry contractor, review their portfolio of masonry restoration projects. Pay attention to their experience with brick walls and concrete surfaces. Ask about their approach to structural integrity assessment and maintenance tips. Good contractors should openly share references and showcase their successful commercial building repairs, demonstrating their expertise in handling different masonry structures. Setting clear project parameters Meet with your chosen contractor to discuss the building project details. A professional will help identify signs of damage like spalling and efflorescence while outlining effective ways to maintain your property. They should provide a detailed timeline for repairs, from addressing minor issues to completing major restoration work, ensuring your property’s aesthetic appeal remains intact throughout the process. Structural and environmental assessments Evaluating building stability Your building’s structural health needs a thorough check before any repair work begins. Commercial masonry contractors examine load-bearing walls, foundation stability, and potential weak points in your structure. This comprehensive evaluation helps identify hidden issues that could affect repair success, from moisture problems to structural concerns that might compromise your building’s integrity. Meeting code requirements Don’t let regulatory oversights delay your masonry project. Work with professionals who understand local building codes and permit requirements for commercial properties. Your contractor should handle all necessary paperwork and ensure compliance with safety regulations. This includes coordinating with local authorities for required inspections and obtaining proper documentation for any structural modifications. Managing environmental impact Protecting your property and its surroundings during repairs is crucial. Your masonry team should implement effective dust control measures and maintain clean work areas throughout the project. Proper containment systems help prevent debris from affecting indoor air quality or neighboring properties. Consider using eco-friendly materials and methods that minimize environmental impact while maintaining building quality. Site preparation and protection strategies Creating safe work zones Setting up proper work area boundaries is essential for both safety and efficiency during masonry repairs. Install visible barriers and warning signs to keep occupants away from active repair zones. Consider using temporary fencing or partitions to separate construction areas from daily business activities, ensuring everyone’s safety while maintaining professional operations. Safeguarding property assets Your building’s contents need protection during masonry work. Use heavy-duty covers and protective materials to shield valuable equipment, furniture, and flooring from construction dust and debris. When working near sensitive areas, consider temporary relocation of important items or installing additional barriers. This proactive approach helps prevent damage and reduces post-repair cleanup time. Organizing project logistics Efficient material handling and waste management are crucial for smooth project execution. Work with your contractor to establish designated areas for storing materials and equipment. Create a clear plan for debris removal that minimizes disruption to building occupants. Regular communication with property managers and tenants helps coordinate access points and timing for material deliveries and waste disposal. Dust containment and environmental control Advanced dust management systems Professional masonry repair requires sophisticated dust control methods to maintain indoor air quality. Modern containment systems, including high-efficiency air filters and sealed barriers, effectively trap construction particles. Proper ventilation strategies, such as creating negative air pressure in work zones, prevent dust from migrating to occupied areas. These systems work together to minimize the impact of repair activities on your building’s environment and its occupants. Safety measures for all occupants Protecting everyone during repairs means implementing comprehensive safety protocols. Workers should wear appropriate protective gear including respirators, safety glasses, and protective clothing. Building occupants need protection through carefully planned work schedules and enhanced air filtering systems. Regular air quality monitoring and maintaining clear communication about safety procedures helps ensure a healthy environment for everyone in the building during the repair process. Post repair maintenance and evaluation Quality assurance review After completing masonry repairs, a thorough inspection is crucial to ensure all work meets specifications. Professional evaluators should examine every repaired area, checking for proper mortar application, joint consistency, and overall structural integrity. This final inspection helps identify any overlooked issues

How Often Do you Need to Repoint a Brick House
Uncategorized

How Often Do you Need to Repoint a Brick House?

How Often Do you Need to Repoint a Brick House? Bricks don’t complain, but their mortar sure does. If you’re seeing gaps or dust, your Fredericton home might be due for repointing. Your brick home faces constant battles against weather, time, and environmental stress, with mortar joints serving as the first line of defense. Understanding when to repoint your brick home isn’t just about following a calendar – it’s about reading the signs. Generally, homes need repointing every 25-50 years, but local conditions in Fredericton might necessitate more frequent attention. Why does your brick house need repointing? You might notice your brick house showing signs of wear, especially in those spaces between the bricks. That’s where repointing comes in – it’s the process of removing old mortar and replacing it with fresh mortar between the bricks of your house. Think of mortar joints as the unsung heroes of your brick walls. They work like natural glue, keeping your brickwork strong and preventing water from sneaking behind your walls. Without proper mortar, your brick structure could face serious problems. Water damage is sneaky – it starts small but can lead to big headaches. When old mortar deteriorates, moisture finds its way in, causing structural brick repair needs and even mold growth. This is especially true for older homes built before 1930, where the original mortar wasn’t as durable as today’s materials. Keep an eye on your mortar joints between bricks. Regular maintenance and timely brick mortar repair can save you from costly masonry restoration down the road. Your home’s longevity depends on catching these issues early. How often should you repoint? 5 Key factors Mortar type selection The choice of mortar significantly impacts repointing frequency. Lime-based mortars, while more breathable and traditional, require more frequent maintenance with a lifespan of 20-30 years. In contrast, cement-based mortars offer extended durability, lasting over 50 years. However, it’s crucial to note that using cement mortar on older buildings can be detrimental, as it may trap moisture and cause brick damage. Weather impact and climate conditions Environmental factors play a vital role in determining repointing intervals. Properties in New Brunswick experiencing severe weather patterns, particularly those with frequent freeze-thaw cycles, face accelerated mortar deterioration. Constant exposure to moisture, extreme temperature fluctuations, and heavy rainfall can compromise mortar integrity faster. Regular inspections become essential in these areas to prevent extensive damage. Wall direction and sun exposure The orientation of your walls directly affects mortar longevity. South-facing walls are particularly vulnerable due to intense UV exposure throughout the day. This continuous sun exposure leads to more rapid deterioration of mortar joints compared to walls facing other directions. The combination of heat and UV rays can cause the mortar to crack and crumble more quickly. Craftsmanship quality The initial installation quality dramatically influences how long mortar joints will last. Professional, well-executed pointing work using properly mixed mortar can maintain its integrity for decades. Poor workmanship, including incorrect mortar mixing ratios or improper application techniques, often results in premature failure. This emphasizes the importance of hiring skilled professionals for initial pointing work. Building age The age of your property is a crucial factor in determining repointing frequency. Older homes, particularly those constructed before 1930, typically require more frequent attention, usually every 25-30 years. Modern buildings benefit from advanced construction techniques and materials, often extending the repointing interval to 50-100 years. Regular assessment becomes more critical as buildings age. When your mortar joints need attention – 5 key signs to spot Watch for crumbling mortar, visible gaps between bricks, and white powdery deposits (efflorescence) on brick surfaces – these indicate deterioration. Check horizontal mortar joints carefully, as they collect more water and deteriorate faster than vertical joints during weather exposure. Notice increased indoor drafts or unexpectedly high heating bills, which often signal compromised mortar allowing air infiltration. Test mortar strength by gently scraping with a screwdriver – if it crumbles easily, immediate attention is needed. Look for loose or wobbly bricks in your wall – this means the mortar has failed to hold them securely. Pro tips for successful repointing Choose the right mortar – The most important part Selecting appropriate mortar is a key for successful repointing. Using new mortar that’s too hard can cause bricks to crack and deteriorate, while overly soft mortar will break down quickly. Getting the right match is essential for long-lasting results. To identify your original mortar type, examine its color, texture, and conduct simple hardness tests. This assessment helps ensure you select a compatible replacement that won’t damage your existing brickwork. For historic buildings, Natural Hydraulic Lime (NHL) mortar is often the best choice. Its breathable and flexible properties protect old bricks while maintaining structural integrity. When dealing with localized damage, tuckpointing might suffice instead of complete repointing. This targeted approach repairs specific damaged areas, saving time and money while preserving the wall’s integrity. Weather can impact your repointing schedule Winter’s freeze-thaw cycles in New Brusnwick pose a significant threat to mortar integrity, causing rapid deterioration as water expands and contracts within the joints. This process can accelerate the need for repointing significantly. The ideal time for brick repointing in Fredericton, NB is during spring or fall when temperatures are mild and conditions are dry. These seasons provide optimal conditions for proper mortar curing. Climate change has introduced new challenges, with increased storm frequency in region requiring more regular inspections and potentially more frequent repointing schedules. Maintenance between repointing Annual inspections are important, particularly focusing on foundation-level mortar joints where moisture tends to accumulate. Early detection of issues can prevent major damage. When cleaning brick walls, avoid high-pressure washing which can damage mortar joints. Instead, opt for gentle cleaning methods using appropriate cleaners and soft brushes to preserve the mortar’s integrity. Keep climbing plants like ivy away from your brick walls. Their roots can penetrate and weaken mortar joints, accelerating deterioration over time. Maintain your gutters regularly to prevent water from overflowing onto brick walls. Proper drainage is essential as constant water

GET STARTED

START MASONRY PROJECT THE RIGHT WAY

Create stunning structures with our residential and commercial masonry services in Fredericton. From meticulous designs to the completed build, our process is professional and rewarding, and we can’t wait to build your dream with you.

Atlantic Brick and Stone, one of the best masonry contractors in Fredericton, NB

Contact

8 Muskie Street, Lower Kingsclear, New Brunswick E3E 0E7, Canada

Scroll to Top