How Bad is Concrete Spalling?
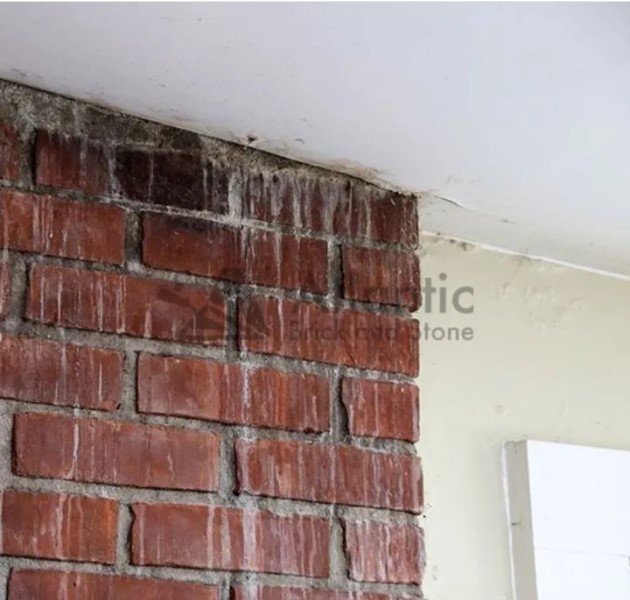
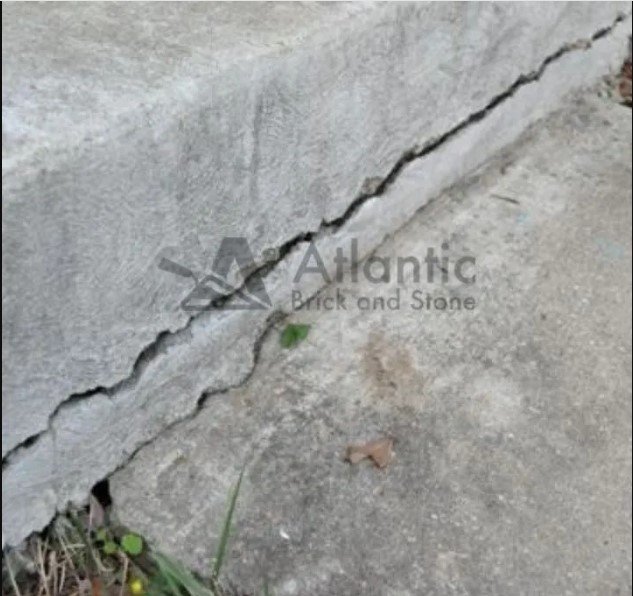
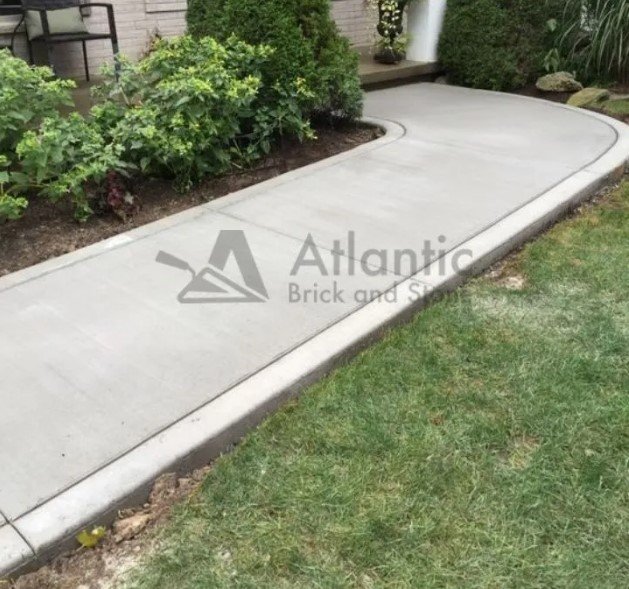
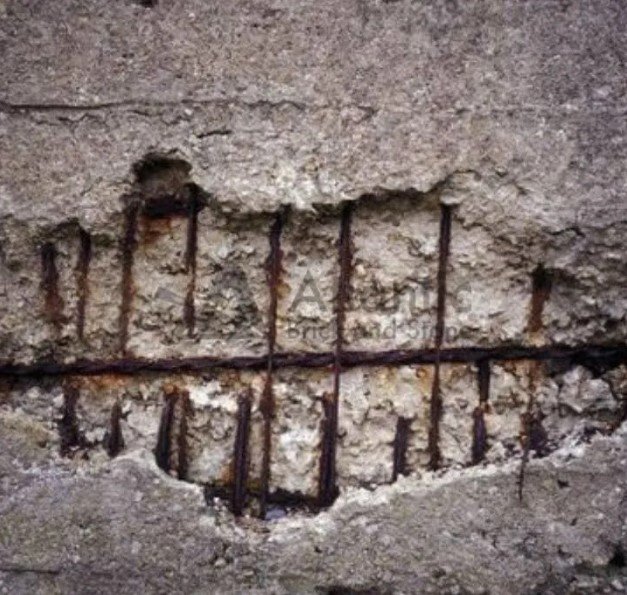
How Bad is Concrete Spalling? Concrete spalling is not just an eyesore; it’s a cry for help from your building’s structural integrity. Known for its robustness, concrete is not immune to deterioration. The phenomenon of spalling is a clear indicator that your concrete structures need attention. Understanding its severity is crucial for maintenance and repair. This article will discuss concrete spalling, outline its origins and effects, and detail the various approaches to safeguard and maintain your structures. What is Concrete Spalling? Spalling occurs when the concrete surface begins to break away, chip, or flake off, often in small, but sometimes in large pieces. This deterioration process can be due to a variety of reasons, primarily due to water ingress, freeze-thaw cycles, chemical reactions, or the corrosion of embedded steel rebar. When water seeps into the concrete and reaches the reinforcing steel, it can cause the steel to rust and expand, exerting internal pressure on the surrounding concrete. This process is gradual but detrimental. Early identification can lead to timely repairs, preventing further damage. Signs of spalling include: Patchy areas, pits, or large sections of the surface layer of concrete flaking or chipping away. Often visible on driveways, sidewalks, or any concrete surface exposed to the elements. How Bad Concrete Spalling Can Get Spalling can start superficially but eventually lead to severe structural damage if not addressed. It’s not just an aesthetic issue; it’s a progressive problem that can compromise the load-bearing capacity of structures, leading to unsafe conditions and costly repairs. Spalling exposes the steel bars to the elements, accelerating deterioration and weakening the overall structure. It reduces the cross-sectional area of structural components, impacting their ability to bear loads and leading to potential structural failures. Can It Lead to Serious Structural Damage? In severe cases, spalling can lead to significant structural damage, especially in critical components like beams, columns, and foundations. When the structural integrity of concrete is compromised, it can lead to catastrophic failures, especially in load-bearing structures. Causes of Spalled Concrete Spalling is a condition caused by a variety of factors, each contributing to the deterioration and flaking off of the concrete. Corrosion of Embedded Reinforcements Embedded steel reinforcements are meant to enhance the constructional strength of concrete. However, when these steel bars corrode, typically due to moisture and oxygen infiltration, they expand up to several times their original volume. This expansion exerts undue stress on the surrounding concrete. Consequences: The pressure causes the concrete to crack and eventually flake off, leading to spalling. The integrity of the structure is compromised as the steel bars continue to deteriorate, reducing its strength and the overall load-bearing capacity of the concrete component. Prevention: To prevent this, it is crucial to ensure proper concrete cover, use corrosion-resistant reinforcement like epoxy-coated bars, and maintain low-permeability concrete to protect the steel. Freeze-Thaw Cycles Concrete, though seemingly solid, is porous and can absorb water. In cold climates like Fredericton winter, the water trapped inside concrete freezes and expands, exerting internal pressure. When temperatures rise, the ice melts, leaving voids inside the concrete. Repeated cycles of freezing and thawing cause the concrete to break apart, leading to spalling. Consequences: Over time, the surface becomes rough and flaky, and large chunks may break off. This not only affects the appearance but also the construction integrity, especially if the freeze-thaw action reaches the reinforcing steel. Prevention: Using air-entrained concrete, which includes tiny air bubbles that provide space for water to expand when it freezes, can mitigate this issue. Properly sealing the concrete and ensuring water doesn’t accumulate on its surface are also key preventive measures. Poor Concrete Mix or Placement Concrete’s strength and durability are highly dependent on its mix proportion and placement. An improper mix, inadequate compaction, or insufficient curing can lead to weak concrete that’s susceptible to environmental stresses. If the water-cement ratio is too high, the concrete will have more pores, making it weaker and more prone to spalling. Consequences: Poorly mixed or placed concrete will have decreased durability and resistance to environmental factors, leading to an increased likelihood of spalling. It may also result in uneven surfaces, which are more prone to water retention and further damage. Prevention: Ensuring a proper mix design and adhering to best practices in concrete placement and curing are important. This includes controlling the water-cement ratio, using the right aggregate size, ensuring proper compaction and curing, and providing adequate time for the concrete to set and gain strength. Moisture Ingress and Deicing Salts Moisture ingress occurs when water seeps into the concrete, which can be exacerbated by the use of deicing salts on concrete surfaces. These can cause the water to penetrate more deeply into the concrete. Furthermore, the chemical reaction between the winter grit and the concrete can lead to further deterioration. Consequences: The combination of moisture and sodium chlorides accelerates the rusting of steel reinforcements and increases the rate of freeze-thaw damage. It can lead to more extensive and faster spalling, with larger portions of concrete flaking off. Prevention: Regular sealing of concrete overlays can prevent water and Sodium chloride from penetrating. Promptly clearing snow and ice, using less corrosive alternatives to traditional deicing salts, and ensuring proper drainage can also help mitigate these issues. How to Fix the Spalled Concrete? Repairing damaged concrete is very important to maintain the safety and appearance of your structures. Here are several methods to consider, based on the extent and severity of the damage: Patching the Affected Areas: Best for minor, superficial spalling. Quick and cost-effective for small areas. Applying a Resurfacing Overlay: Suitable for larger areas where the aesthetic appearance is a concern. Provides a fresh, new look and extends the life of the Cementitious covering. Removing and Replacing Damaged Concrete: Necessary for extensive, deep, or structural spalling. Most long-term solution, restores structural robustness and appearance. Using Epoxy Injections for Cracks: Ideal for cracks that have led to spalling. Stops the spread of damage and restores some of the structural strength. Sealing the Concrete: As a