Uncategorized

The Essentials of Concrete Walkways
Uncategorized

The Essentials of Concrete Walkways

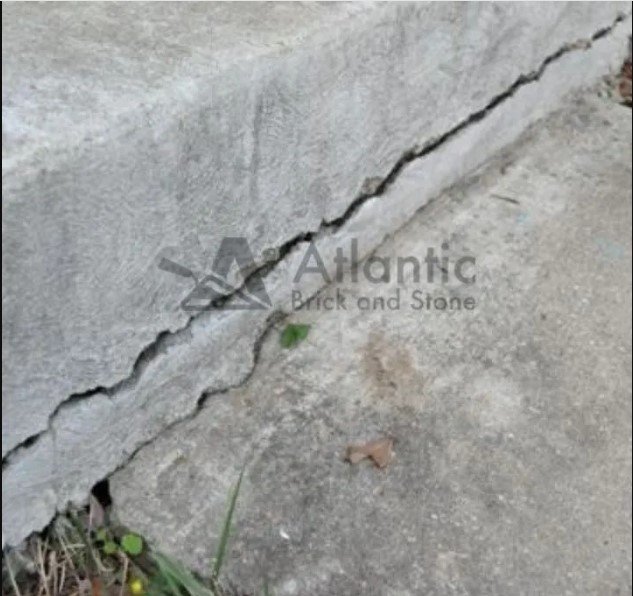
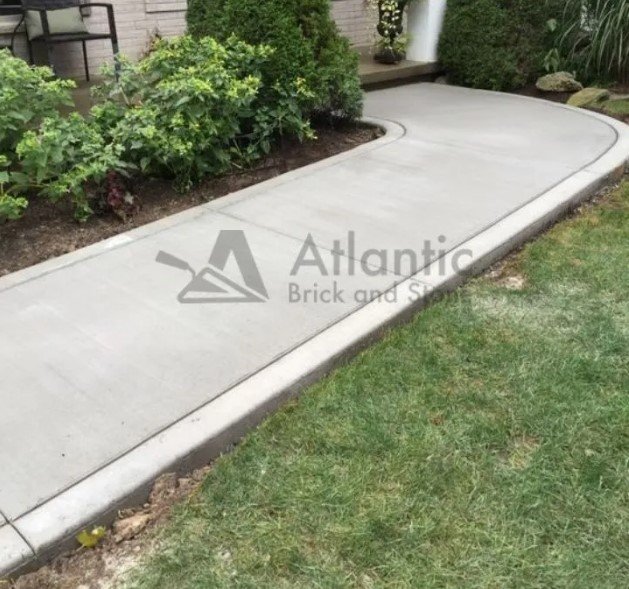
The Essentials of Concrete Walkways Explore the fascinating world of concrete walkways – an often-overlooked concrete structure that adds so much value to any property. You’ll discover why these simple yet functional slabs are an essential part of homes, businesses, and public spaces. We’ll cover everything you need to know to create the perfect concrete walkway for your needs. We’ll discuss the benefits of concrete as a durable, low-maintenance material. We’ll explore different walkway types and decorative finishes that fit any style. And we’ll provide a step-by-step process for planning, preparing and installing your new concrete structure. By the end of this guide, you’ll see how a well-designed concrete walkway can provide a safe, attractive route from your driveway or entry to your front door while increasing the aesthetic and economic value of your home for longer time. What are Concrete Walkways? Concrete walkways, often simply called sidewalks, offer so much more than a simple path from one place to another. They truly define the appeal of a home or building, serving as the first thing visitors see. With the variety of designs and finishes available today, your plain old sidewalk can be transformed into a beautiful work of art. These walkways are made by mixing cement, gravel, and water to form concrete, which is then poured into forms or molds. Once the concrete hardens and cures, the forms are removed to reveal your new pedestrian path. Concrete has rightfully earned its place as the premier material for walkways. It weathers all kinds of conditions like rain, snow, heat, and cold. Even with constant foot traffic, concrete slabs endure for decades. This durability and value make concrete the smartest choice when building outdoor paths. With some creativity and the right technique, your concrete sidewalk will go from adequate to outstanding. You’ll transform an eyesore into a source of joy that adds charm and personality to your space for years to come. Basic Components The essential parts that make up a concrete walkway include the concrete mixture itself, reinforcement to strengthen the slab, and control joints to prevent cracks from forming. The concrete mixture is made by combining cement, gravel, and water. Reinforcement, usually steel bars or wire mesh, is added to the concrete mix to boost its strength and keep it from cracking as it cures. Control joints are planned crack lines that allow the concrete to expand and contract with temperature changes without causing damage. These planned cracks let the concrete “breathe” as it dries, hardens, and heats up from the chemical reactions inside, while also shrinking when it cools. So by including reinforcement and control joints when you pour your concrete pathway, you can provide it with the structure and “breathing room” it needs to stay solid and stable for many years. The right combination of cement, gravel, and water along with steel rebar or mesh helps your concrete slab take the stress of expansion and contraction through all seasons. Advantages Durability and Maintenance Concrete walkways are tough. They put up with loads of foot traffic, bad weather like rain and snow, and stand the test of time. All concrete paths need is an occasional wipe down and sealant coating to keep them in tip-top shape for decades. Versatility and Design Flexibility With concrete, the design possibilities are endless. You can choose from a variety of colors, patterns, and finishes to match your home’s exterior or landscape. You can even have your walkway stamped or stained to mimic the look of more expensive materials like brick or stone. Cost-effectiveness Compared to other materials, concrete is relatively inexpensive. The cost of a concrete walkway depends on the size, design, and finishes you choose, but it’s generally more affordable than walkways made of brick or natural stone. Types of Concrete Walkways Stamped Concrete Walkways Stamped concrete walkways are created by pressing molds into the wet concrete to create patterns. They can mimic the look of brick, stone, or other materials. Exposed Aggregate Walkways Exposed aggregate walkways feature a pebble-like finish that is not only beautiful but also slip-resistant. This is achieved by removing the top layer of cement paste to reveal the aggregate underneath. Colored Concrete Walkways Colored concrete walkways are created by adding dyes or stains to the concrete mix. This allows you to match your walkway to your home’s exterior or landscape. Textured Concrete Walkways Textured concrete walkways have a patterned surface that provides extra grip, making them a safe choice for areas that may get wet. Planning for a Concrete Walkway Choosing the Right Concrete Contractor Choosing the right concrete contractor is most important to the success of your concrete project. Look for a contractor with experience in concrete work, a good reputation, and a portfolio of previous projects. Assessment of the Area Before the installation process begins, the contractor will assess the area where the walkway will be installed. This includes checking the ground conditions, drainage, and any potential obstacles. Planning the Right Design and Layout The design and layout of your walkway should complement your home’s exterior and landscape. Consider the width of the sidewalk, the shape of the path, and any decorative elements you want to include. Budget Estimation The cost of a concrete walkway depends on several factors, including the size, design, and finishes you choose. Your contractor should provide you with a detailed estimate before work begins. Installation Process Detailed Steps from Excavation to Finishing The installation process begins with excavation, where the top layer of soil is removed to make way for the walkway. Next, a form is built to hold the concrete, and reinforcement is added. The concrete mix is then poured into the form and leveled with a screed. Once the concrete has started to harden, it’s smoothed with a float, and any decorative finishes are applied. Finally, the concrete is left to cure for a few days. Time Required for the Process The time required for the installation process depends on the size and complexity of the

How to Design a Paver Walkway
Uncategorized

How to Design a Paver Walkway – A Comprehensive Guide

How to Design a Paver Walkway – A Comprehensive Guide We’re excited to guide you through designing and installing a beautiful paver walkway! Whether you want to add elegance to your garden, improve how you use your outdoor area, or increase your home’s value, a well-designed paver walkway can really make a difference. This guide will take you through the whole process from start to finish. We’ll cover planning, materials, layout, and the final touches. We’ll also share advice from landscape professionals and discuss why a properly designed paver walkway is worthwhile. So, let’s get started! Follow these steps and before long you’ll be enjoying the transformed look and feel of your outdoor space. What is a paver walkway? Imagine strolling through your garden on a path that not only serves a functional purpose but also adds a touch of elegance to your outdoor space. That’s what a paver walkway can do for you. It’s a path made from individual pavers—pieces of material like stone, brick, or concrete—laid out in a pattern and secured to create a solid, durable walkway. Benefits of a well-designed paver walkway A well-designed paver walkway is more than just a path—it’s a feature that can transform your outdoor space. Here are some of the key benefits: Safety: A paver walkway provides a safe and comfortable path for walking, reducing the risk of slipping on grass or mud. It’s especially beneficial in areas with heavy rainfall or snow, where the ground can become slippery and hazardous. Aesthetic Appeal: Paver walkways can significantly enhance the aesthetic appeal of your home. With a variety of materials, colors, and patterns to choose from, you can design a walkway that complements your home’s style and adds a touch of elegance to your outdoor space. Increased Home Value: A well-designed and well-maintained paver walkway can increase your home’s value. It’s a desirable feature for many homebuyers, so it can also make your property more attractive if you decide to sell in the future. Durability: Pavers are incredibly durable and can withstand heavy foot traffic and harsh weather conditions. With proper installation and maintenance, your paver walkway can last for many years. Low Maintenance: Paver walkways are relatively low maintenance. They’re easy to clean and, if a paver gets damaged, you can simply replace the individual paver rather than having to redo the entire walkway. Versatility: Paver walkways are versatile and can be used in various outdoor spaces. Whether you want a path leading to your front door, a trail through your garden, or a connection between different sections of your yard, a paver walkway is an excellent choice. Environmentally Friendly: Many pavers are made from natural materials and are permeable, allowing water to seep through and replenish groundwater supplies. This makes them an environmentally friendly choice for your landscaping needs. So, as you can see, a well-designed paver walkway offers numerous benefits, making it a worthwhile addition to any home. Essential Considerations for Designing a Paver Walkway Purpose of the walkway Before you start designing your paver walkway, consider its purpose. Is it a path to your front door, a trail through your garden, or a connection between different sections of your yard? The purpose will influence the layout, size, and materials you choose. Position of the walkway The position of your walkway should complement your home and landscape. It should provide a natural flow from one point to another, enhancing the overall layout of your outdoor space. Choosing the suitable paver material Pavers come in various materials, including stone, brick, and concrete. Each material has its pros and cons, so choose one that suits your style, budget, and climate conditions. Key Factors to Keep in Mind for Paver Walkway Design Consulting with Local Hardscape Contractor A local hardscape contractor can provide valuable insights into the design process. They can help you choose the right materials, understand the local regulations, and avoid common pitfalls. Evaluating the size and shape The size and shape of your walkway should be in proportion with your outdoor space. It should be wide enough for comfortable walking and have a shape that complements your landscape. Deciding on a pattern The pattern of your paver walkway can add visual interest. From simple running bond patterns to intricate circular designs, the choice is yours. Choosing the color and texture of the paver The color and texture of your pavers should complement your home’s exterior and landscape. You can choose from a variety of options, from natural stone textures to smooth concrete finishes. Considering the surrounding landscape and architecture Your paver walkway should blend seamlessly with your landscape and architecture. Consider the style of your home, the types of plants in your garden, and other elements like fences or patios. Implementing proper drainage Proper drainage is crucial to prevent water from pooling on your walkway. Make sure your design includes a slight slope and consider installing drains if necessary. How We Professionally Design a Paver Walkway in Fredericton As a seasoned hardscape contractor in Fredericton, we will walk you through the process of designing a paver walkway. Let’s dive in! Sketching an Initial Plan The first step in our journey is to sketch a rough plan of your walkway. This is where we’ll outline the start and end points, the path it will take, and any unique features like curves or steps. This sketch will serve as our roadmap, guiding us through the project. Marking off the walkway area Once we have a solid plan in place, it’s time to translate it into the real world. We’ll mark the area for your walkway using stakes and string. This step is crucial as it helps us visualize the final result and ensures we stay on track during the installation process. Excavating the designated walkway area Next, we roll up our sleeves and start the real work. Using a spade, we’ll dig about 8 inches of soil from the walkway area. This step is essential as it creates room for

Prevent Concrete Beam Cracking
Uncategorized

Effective Methods to Prevent Concrete Beam Cracking

Effective Methods to Prevent Concrete Beam Cracking Ever you noticed those ugly cracks appearing on concrete beams? Yup, we all hate them too. But don’t worry, we’ve got you covered! In this article, we’ll be sharing some practical tips on how to prevent concrete beam cracking. So, say goodbye to those unsightly lines, and let’s strengthen those beams together! Keep reading to learn more about the importance of proper construction techniques, material choices, and maintenance methods, all aimed at keeping those concrete beams looking sharp and standing strong. Let’s get started! Proper Design and Planning Preventing concrete beam cracking starts with proper design and planning. Concrete, while incredibly durable, is strong in compression but weak in tension. This means that if it’s subjected to tensile stresses beyond its capacity, cracks may start to appear. By ensuring a proper design that takes into account the expected loads and environmental conditions, we can mitigate the risk of such stresses and prevent cracking. Hiring Qualified Professionals Qualified professionals, such as structural engineers, have the necessary training and experience to design concrete structures that can withstand the forces they will be subjected to. They understand the properties of concrete and how to design structures that maximize its strengths and minimize its weaknesses. They can calculate the right amount of reinforcement needed and place it in the correct locations to resist tensile stresses. They can also consider factors such as the type of soil the structure will be built on, the climate it will be exposed to, and the expected loads it will carry, all of which can influence the risk of cracking. Ensuring Adequate Reinforcement Reinforcement is a crucial component of concrete structures. It is typically made of steel rebar and is embedded in the concrete to improve its tensile strength. The size, spacing, and placement of the rebar need to be carefully calculated based on the design of the beam. If the reinforcement is insufficient or incorrectly placed, the concrete may be unable to resist the tensile stresses it is subjected to, leading to cracking. Quality Materials and Construction Practices Using High-Grade Materials The quality of the concrete mix is important in preventing cracks. The cement, aggregate, and water used should all be of high quality. The mix should also be designed to minimize shrinkage as the concrete cures, as this can lead to cracking. For example, using a low water-to-cement ratio can reduce shrinkage and increase the strength of the concrete. Ensuring Proper Curing Methods Curing is the process of keeping the concrete hydrated as it hardens. If the concrete dries out too quickly, it can shrink and crack. Proper curing involves keeping the concrete damp for a period of time after it’s been poured. This can be done by spraying it with water, covering it with damp cloths, or using a curing compound. By ensuring proper curing, we can control the rate at which the concrete dries and hardens, reducing the risk of shrinkage and cracking. Control of External Factors Thermal Insulation Concrete expands and contracts with changes in temperature. If this movement is not accounted for, it can lead to cracking. Thermal insulation can help to moderate temperature changes within the concrete, reducing the risk of thermal expansion and contraction. This is particularly important in climates with large temperature swings. Expansion Joints Expansion joints are another method for dealing with thermal movement. These are essentially planned cracks that allow the concrete to move without causing unplanned cracking. They’re typically filled with a flexible material to prevent water and debris from getting in. By allowing the concrete to expand and contract in a controlled manner, expansion joints can prevent cracking caused by thermal stresses. Regular Inspection and Maintenance Identifying Early Warning Signs of Cracking By regularly inspecting your concrete beams, you can catch early warning signs of cracking, such as small hairline cracks or changes in the concrete’s color or texture. These signs can indicate that the concrete is under stress and at risk of cracking. Regular inspections can also help identify any external factors, such as water infiltration or excessive load, that may be contributing to the stress on the concrete. Promptly Addressing Any Issues If you do find signs of cracking, it’s important to address them promptly. This might involve applying a sealant to small cracks to prevent water infiltration, which can exacerbate the cracking by causing freeze-thaw cycles or corroding the reinforcement. For larger cracks, more extensive repairs may be needed to restore the structural integrity of the beam. Promptly addressing any issues can prevent minor cracks from developing into major structural problems. Use of Crack-Resistant Concrete Fibre-Reinforced Concrete Fibre-reinforced concrete contains small fibres that help to distribute tensile stresses throughout the material, reducing the likelihood of cracking. These fibres can be made of various materials, including steel, glass, and synthetic polymers. The fibres work by bridging cracks that start to form, preventing them from growing and becoming a structural issue. This can be particularly beneficial in applications where the concrete is subjected to high tensile stresses. Engineered Cementitious Composites ECC is a type of concrete that’s engineered to be more flexible and durable than traditional concrete. It contains a high volume of fine aggregates and a low amount of coarse aggregates, which gives it a unique ability to bend and deform without cracking. This makes it particularly useful in applications where the concrete is subjected to large deformations or dynamic loads. Repairing Cracked Concrete Beams Evaluating the Extent of Damage The first step in repairing cracked concrete beams is to evaluate the extent of the damage. This involves determining the depth, width, and length of the crack, as well as the cause. This information will guide the selection of the appropriate repair technique. For example, a shallow, narrow crack caused by shrinkage may require a different repair method than a deep, wide crack caused by overloading. Selecting Appropriate Repair Techniques There are several techniques for repairing cracked concrete beams. These include epoxy injection, where a high-strength

What is masonry renovation
Uncategorized

What is masonry renovation? Everything Explained

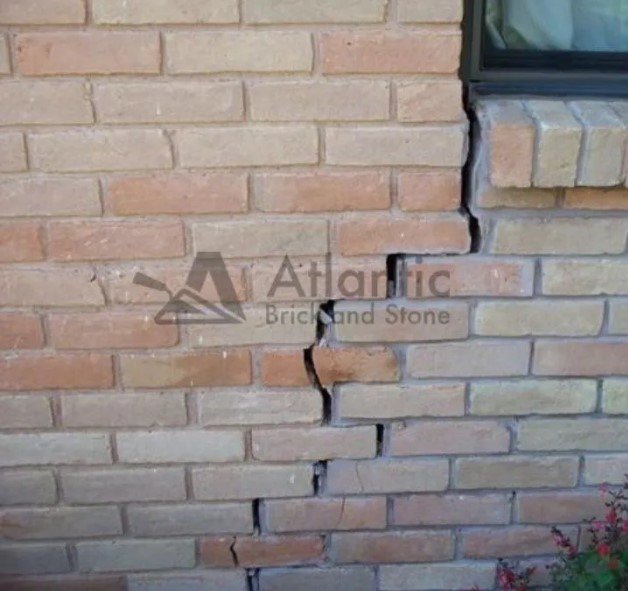
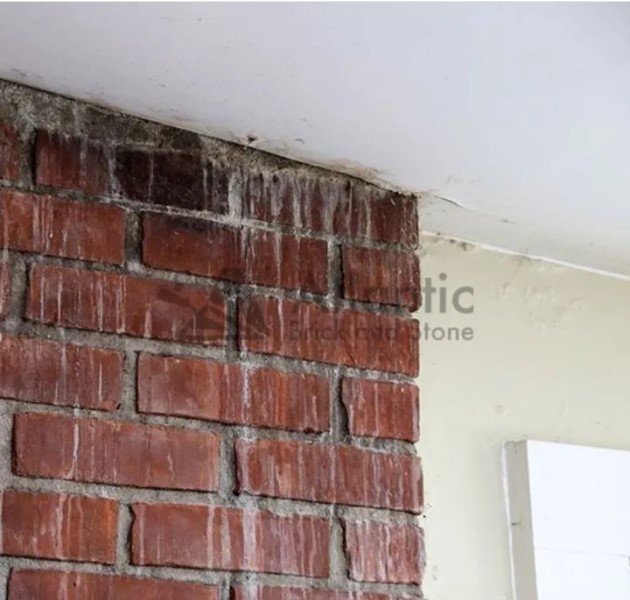
What is masonry renovation? Everything Explained Masonry renovation is all about fixing up and keeping old buildings in good shape. It’s really important but often people don’t get how vital it is. There are so many old buildings and monuments that have been around for ages and we need to keep them looking good. This guide is here to break down all the ins and outs of masonry renovation, from the techniques used, the materials needed, and the things that the pros do best. So, whether you’ve got a place that needs a touch-up, or you’re just interested in this kind of stuff, this article will make everything about masonry renovation easy to understand. Understanding Masonry Renovation Masonry renovation, simply put, is the art and science of restoring masonry structures to their original state or even better. This involves masonry repair of various materials such as brick, stone, concrete, and mortar. Masonry structures are sturdy and durable, offering longevity that is hard to match. However, just like any other structures, they need occasional repair and maintenance. That’s where a skilled masonry contractor steps in to breathe new life into old, worn-out structures. Importance of Renovation Masonry renovation isn’t just about improving looks—it’s a vital step in preserving the structural integrity of a building. Over time, even the most durable masonry structures can suffer from wear and tear. Cracks can develop, bricks can erode, and the mortar holding everything together can deteriorate. By undertaking a renovation, you can repair these issues before they escalate into more significant problems. Aesthetic appeal is another significant factor, especially for historical structures. A well-executed masonry renovation can restore a building’s original beauty, adding immense value to the property. Masonry Problems that Require Renovation Cracking and Mortar Deterioration Cracks in masonry structures are like wrinkles on the face, they reveal age and deterioration. These cracks, whether in the brickwork or the mortar, are not only unsightly, but they can also allow water infiltration that may further damage the structure. Similarly, mortar deterioration is a common issue. Mortar is the binding agent for bricks or stones in masonry, but over time, it can crumble and wear away, requiring repair or repointing. Efflorescence and Staining Efflorescence is a white powdery substance that forms on brick or stone surfaces due to water-soluble salts. While it’s not a structural concern, it does affect the appearance of the masonry. Staining, too, can detract from the aesthetic appeal. Both issues can be addressed in a masonry renovation. Water Infiltration and Damage Water is one of the most destructive forces when it comes to masonry. Unaddressed, water infiltration can lead to serious structural damage, including weakening of the mortar and even causing bricks to crack or spall. Settling and Foundation Issues Over time, the ground upon which a masonry structure rests may shift, leading to settling or foundation issues. This can result in an uneven structure, cracks, and in severe cases, a total structural failure. Masonry Joint Failures Masonry joint failures are often due to improper construction, aging, or the impact of severe weather conditions. This type of failure can compromise the structural integrity and aesthetic appeal of the structure, calling for immediate repair. The Masonry Renovation Process 1) Inspection and Assessment Identifying Problem Areas The first step in the masonry renovation process is to inspect the structure and identify any problem areas. This may involve looking for visible signs of damage, such as cracks, efflorescence, and staining, as well as checking for less obvious issues, such as water infiltration and structural instability. Determining the Extent of Damage Once the problem areas are identified, the next step is determining the extent of the damage. This helps in deciding the right course of action, be it a minor repair, a significant renovation, or even a complete rebuild. 2) Preparation and Planning Choosing Appropriate Materials Choosing the right materials is crucial for a successful masonry renovation. The materials used should match or be compatible with the existing masonry to ensure the structure’s integrity and aesthetic appeal. This may involve sourcing bricks or stones that match the existing ones in color, size, and texture, and choosing a mortar that is compatible with the masonry units. Ensuring Safety Measures Safety is paramount in any renovation project. This may involve setting up scaffolding, using personal protective equipment, and following safe work practices. It’s also important to ensure that the work site is safe for others, especially if the structure is located in a public or high-traffic area. Creating a Timeline and Estimated Costs Once the necessary repairs have been identified and the materials have been chosen, a timeline and cost estimate for the renovation can be created. This will depend on the extent of the damage, the materials used, and the labor required. 3) Execution of Renovation Work Repairing and Replacing Damaged Components The actual renovation work begins with repairing or replacing damaged components. This may involve repointing mortar joints, replacing damaged bricks or stones, and repairing cracks. Each of these tasks requires specialized skills and knowledge, making it essential to hire a professional masonry contractor. Installing Additional Waterproofing or Insulation In some cases, additional waterproofing or insulation may be needed to protect the masonry structure from future damage. This could involve applying a waterproofing membrane or coating, installing flashing to direct water away from the structure, or adding insulation to improve the structure’s energy efficiency. Cleaning and Restoring the Surface of the Masonry The final step in the masonry renovation process is to clean and restore the surface of the masonry. This can involve removing efflorescence, stains, and other surface contaminants, as well as restoring the color and texture of the masonry. This step not only improves the structure’s appearance but also helps to protect it from future damage. Masonry Renovation Contractor in Fredericton Atlantic Brick and Stone, a leading masonry renovation contractor in Fredericton, specializes in providing high-quality masonry repair and restoration services to residential and commercial clients. Our expert team of skilled craftsmen is

How to troubleshoot common hardscaping problems
Uncategorized

How to troubleshoot common hardscaping problems

How to troubleshoot common hardscaping problems Hardscaping is an essential aspect of landscaping that involves the use of non-living elements such as pavers, retaining walls, concrete, stone, and gravel to create functional and attractive outdoor spaces. However, hardscapes can also be prone to several common problems that may affect their appearance, functionality, and durability. In this article, we will discuss these common hardscaping problems, their causes, and how to troubleshoot them effectively. Common Hardscaping Materials and Issues Pavers Settling and Shifting One common issue with pavers is settling or shifting, which can cause an uneven surface and create tripping hazards. This usually occurs when the base material beneath the pavers is not properly compacted or when water infiltration causes the ground to become unstable. Additionally, using pavers with irregular shapes or sizes can contribute to instability. Weeds and Moss Growth Weeds and moss can grow between paver joints, detracting from the appearance of the hardscape and potentially causing damage over time. This problem often results from inadequate joint preparation, such as insufficient sand or incorrect joint material, which allows organic matter and moisture to accumulate. Staining and Fading Pavers can become stained or discolored from spills, chemicals, or prolonged exposure to the elements. The use of low-quality pavers or improper sealing techniques can exacerbate this issue. Retaining Walls Leakage and Drainage Problems Retaining walls can experience water leakage or poor drainage, which can lead to structural damage or even collapse. These issues can arise due to improper wall construction, inadequate waterproofing, or failure to incorporate proper drainage systems. Cracking and Bowing Cracks and bowing in retaining walls can indicate structural issues and may pose safety concerns. Common causes include inadequate reinforcement, poor construction techniques, or excessive pressure from soil or water behind the wall. Structural Integrity Concerns Structural integrity concerns can arise if a retaining wall is not built to withstand the forces acting upon it. This can result from poor design, inadequate materials, or failure to consider factors such as soil type, slope, and drainage. Concrete Cracking and Heaving Cracking and heaving in concrete hardscapes can occur due to a variety of reasons, including freeze-thaw cycles, soil expansion and contraction, or improper subgrade preparation. Additionally, the use of low-quality concrete or insufficient reinforcement can contribute to these issues. Surface Damage and Wear Concrete surfaces can become damaged or worn over time, leading to a loss of aesthetic appeal and functionality. Causes may include improper finishing techniques, exposure to harsh weather conditions, or the use of abrasive chemicals for cleaning. Color Discrepancies Color discrepancies in concrete surfaces can result from inconsistent mixing, variations in curing conditions, or the use of incompatible materials during installation. This can lead to unsightly color variations or fading in the finished hardscape. Stone and Gravel Erosion and Displacement Erosion and displacement of stone or gravel hardscapes can occur due to inadequate edging, poor installation techniques, or the effects of water runoff and weather. This can result in unstable surfaces and the need for frequent maintenance. Maintenance Challenges Stone and gravel hardscapes can pose maintenance challenges, as they may require regular replenishment, leveling, or weed control to maintain their appearance and functionality. These issues can be exacerbated by improper installation or the use of low-quality materials. Stability Issues Stability issues in stone and gravel hardscapes can arise from poor compaction, inadequate base materials, or the use of stones or gravel with irregular shapes or sizes. This can result in shifting, settling, or an uneven surface. Identifying the Underlying Cause Material Selection Low-quality or incorrect materials can cause various hardscaping problems, such as cracking, fading, and structural issues. Choosing the right materials for your specific project and environment can help prevent these problems and ensure the durability and longevity of your hardscape. Quality of Installation Poor installation techniques can significantly impact the appearance and functionality of your hardscape. Hiring a professional hardscape installer with experience and knowledge of proper techniques can help ensure a successful and long-lasting project. Environmental and Weather Factors Environmental and weather factors, such as extreme temperatures, fluctuating moisture levels, and exposure to harsh elements, can adversely affect hardscape materials and contribute to common problems. Proper planning and material selection can help mitigate these issues and prolong the life of your hardscape. Assessing the Damage Severity and Extent of the Problem Before attempting to repair or replace damaged hardscape elements, it’s essential to assess the severity and extent of the problem. This will help you determine the most appropriate course of action to restore your hardscape to its original condition. Considerations for Repair vs. Replacement In some cases, repairing damaged hardscape elements may be a viable option, while in others, a full replacement may be necessary. Consulting with a hardscaping professional can help you make an informed decision about the best approach for your specific situation. Consultation with a Hardscaping Professional A hardscaping professional can assess the damage to your hardscape, identify the underlying cause, and recommend the most effective repair or replacement options. They can also provide guidance on proper maintenance practices to prevent future problems. Preventative Maintenance and Proper Care Regular Inspections and Cleaning Regular inspections and cleaning can help prolong the life of your hardscape by identifying and addressing minor issues before they become more significant problems. Inspect your hardscape for signs of damage, such as cracks, shifting, or staining, and clean surfaces regularly to remove dirt, debris, and organic matter that may contribute to deterioration. Proper Drainage and Erosion Control Implementing proper drainage and erosion control measures is crucial for maintaining the integrity and longevity of your hardscape. This can include installing French drains, grading the terrain to direct water runoff away from your hardscape, and using permeable materials to allow for natural water infiltration. Material-Specific Maintenance Tips Different hardscape materials may require specific maintenance practices to ensure their longevity and appearance. For example, sealing concrete surfaces can protect them from staining and weather-related damage, while re-sanding paver joints can help prevent weed and moss growth. Consult a hardscaping

Causes Behind Cracked Beams
Uncategorized

Uncovering the Causes Behind Cracked Beams?

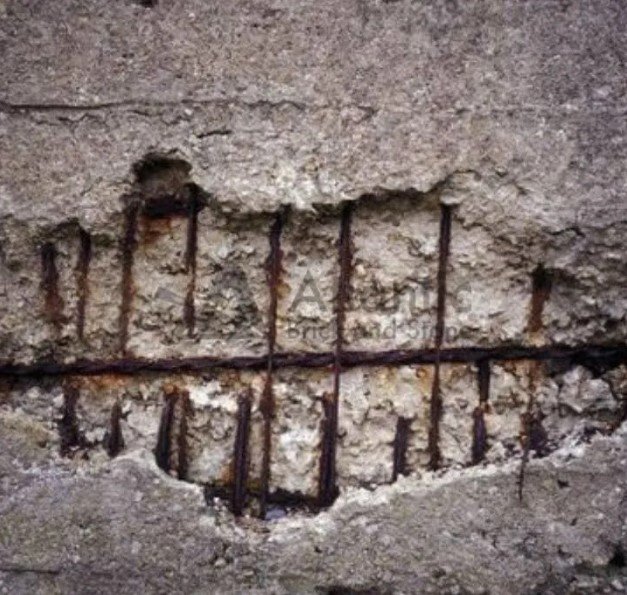
Uncovering the Causes Behind Cracked Beams? Cracked beams are a prevalent issue in the construction industry, posing significant risks to the stability and longevity of various structures. These seemingly innocuous flaws can lead to catastrophic failures in buildings, bridges, and other infrastructures. Uncovering the underlying causes of cracked beams is crucial in preventing potential disasters and ensuring structural integrity. This article aims to explore some of the primary factors that contribute to the formation of these cracks, from design flaws and material deficiencies to environmental and load-bearing factors. By gaining an understanding of these causes, professionals in the field can develop effective strategies for addressing and mitigating this critical problem. Understanding Concrete Beams Composition and Properties of Concrete Concrete is a versatile and widely used construction material composed of cement, water, and aggregates such as sand, gravel, or crushed stone. The mixture hardens over time, forming a durable and strong substance that can withstand significant loads and pressure. Concrete’s properties, such as its compressive strength, can be tailored to specific requirements by adjusting the proportions of its components. Types of Concrete Beams Concrete beams come in various shapes and sizes to suit different applications. Some common types of concrete beams include: Rectangular Beams: These beams have a simple rectangular cross-section, making them easy to design and construct. They are commonly used in residential and commercial buildings for supporting floor and roof slabs. T-Beams: T-beams have a T-shaped cross-section, with a flange extending on one side of the web. The flange provides additional strength and stiffness, making T-beams suitable for longer spans and heavier loads. L-Beams: L-beams are similar to T-beams but have an L-shaped cross-section. They are often used as edge beams or in corner situations where a right-angle connection is required. Functions of Concrete Beams in Structures Concrete beams play a critical role in the structural integrity of buildings and other structures. They serve as essential load-bearing elements, transferring loads from floors, roofs, and other components to columns, walls, or other supports. In addition, concrete beams help distribute loads evenly throughout a structure, preventing localized stress concentrations that can lead to failure. Causes of Concrete Beam Cracking Shrinkage Explanation of Shrinkage in Concrete Shrinkage is a natural phenomenon that occurs in concrete as it hardens and dries. The loss of water during the curing process causes the concrete to contract, which can lead to cracks forming in the material. Factors Affecting Shrinkage The degree of shrinkage in concrete depends on several factors, including the water-cement ratio, type, and number of aggregates, and environmental conditions such as temperature and humidity. High water-cement ratios and the use of fine aggregates can increase shrinkage, while the use of shrinkage-reducing admixtures can help mitigate this effect. Thermal Expansion and Contraction Explanation of Thermal Expansion and Contraction Concrete, like most materials, expands when heated and contracts when cooled. These changes in volume can cause stress within the concrete, leading to the formation of cracks. Effects on Concrete Beams Thermal expansion and contraction can cause cracks in concrete beams, especially if the concrete is prevented from moving freely. For example, in cases where beams are rigidly connected to other structural elements, the resulting stress can cause cracks to form at the connections or within the beam itself. Overloading Effects of Excessive Loads on Concrete Beams Concrete beams are designed to withstand specific loads and stresses. However, when subjected to loads beyond their design capacity, the beams may crack or even fail completely. Overloading can result from errors in design, construction, or use, such as the placement of heavy equipment or the addition of extra floors to a building. Causes of Overloading Some common causes of overloading include an inadequate design for the intended loads, construction errors, and changes in building use that result in higher-than-anticipated loads. In these cases, it is essential to identify the cause of the overloading and take appropriate measures to correct the issue, such as reinforcing the beams or redistributing the loads. Settlement or Movement in Supporting Structures Effects of Movement on Concrete Beams When the supporting structures beneath a concrete beam settle or move, the beam can be subjected to uneven loading or additional stresses, causing it to crack. This type of damage is especially common in areas with poor soil conditions or in cases where the supporting structures have not been adequately designed or constructed. Identifying and Addressing Settlement Issues To prevent cracking due to settlement or movement in supporting structures, it is essential to ensure proper design, construction, and maintenance of foundations and other supports. In cases where settlement or movement has already occurred, it may be necessary to repair or reinforce the affected beams and address the underlying causes of the movement. Corrosion of Reinforcing Steel Explanation of Reinforcing Steel Corrosion Reinforcing steel, or rebar, is commonly used in concrete beams to provide tensile strength and resist bending. However, the steel can corrode over time, especially if exposed to moisture, oxygen, or aggressive chemicals. This corrosion can weaken the bond between the steel and the surrounding concrete, reducing the overall strength of the beam. Effects on Concrete Beams Corrosion of reinforcing steel can cause cracks to form in concrete beams, as the corroded steel expands and creates pressure within the concrete. If left unchecked, this corrosion can eventually lead to the failure of the beam and the need for costly repairs or replacement. Design and Construction Errors Inadequate Reinforcement Inadequate reinforcement is a common cause of cracks in concrete beams. If the amount or placement of rebar is not sufficient to resist the tensile forces acting on the beam, the concrete can crack under load. To prevent this, it is crucial to follow proper design guidelines and ensure that the reinforcement is correctly installed during construction. Improper Curing Methods The curing process is critical for achieving the desired strength and durability of concrete. If the curing process is not properly managed, the concrete may not develop its full strength, making it more susceptible to cracking. Factors

Know About Interlocking Pavers
Uncategorized

What You Need to Know About Interlocking Pavers?

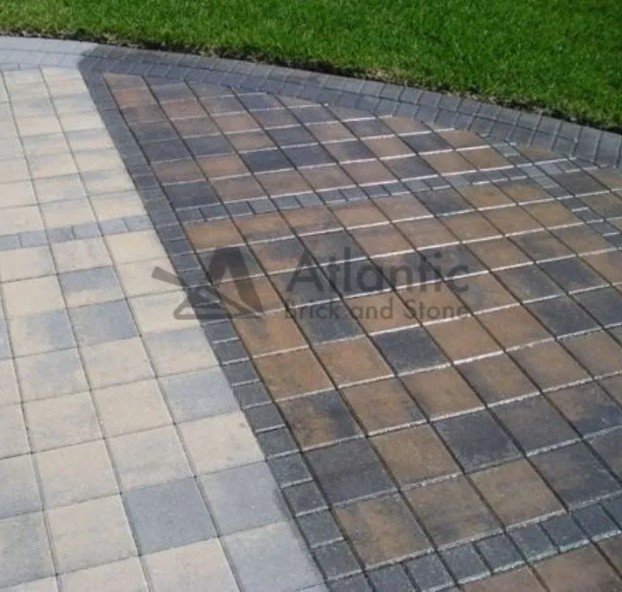
What You Need to Know About Interlocking Pavers? Interlocking pavers are a versatile solution for various types of outdoor spaces. They come in various shapes, colors, and materials, creating endless possibilities for customization and innovation in landscape design. Their applications range from walkways and driveways to patios and pool decks, providing both aesthetic appeal and practical benefits. As you consider updating or enhancing your property, it’s essential to understand the intricacies of interlocking pavers to make informed decisions. In this article, we will explain the various types of interlocking pavers, and their applications. Join us as we explore the world of interlocking pavers and reveal the secrets behind their versatility and allure. What are interlocking pavers? Interlocking pavers are individual, precast pieces of concrete, brick, or natural stone that fit together to form a continuous surface. They are designed with specific shapes and sizes to ensure they interlock tightly, leaving minimal space between each piece. This interlocking design provides a strong and stable surface that can withstand heavy loads, resist shifting, and endure traffic without cracking. Types of Interlocking Pavers There are several types of interlocking pavers, each offering its unique characteristics and benefits. Let’s take a closer look at the three main types. Concrete pavers Interlocking concrete pavers are made of cement, sand, and water. They are available in various colors, shapes, and sizes, making them a versatile option for many applications. Concrete pavers are known for their durability and low maintenance, making them an excellent choice for high-traffic areas. Brick pavers Brick interlocking pavers are made from clay or a mixture of clay and other natural materials, such as shale. They are fired at high temperatures to create a strong, durable product. Brick pavers offer a classic, timeless look that adds warmth and character to any outdoor space. They are available in various colors and can be arranged in numerous patterns for added visual interest. Natural stone pavers Natural stone pavers are made from quarried stone, such as granite, limestone, or slate. They offer a unique, natural appearance that cannot be replicated by other materials. Each stone paver has its distinct color, texture, and pattern, making them a popular choice for those seeking a one-of-a-kind look. Natural paving stones are incredibly durable and can last for decades with proper maintenance. Advantages of Interlocking Pavers Interlocking pavers offer several benefits, making them popular for residential and commercial applications. Aesthetics Interlocking pavers provide a visually appealing and customizable surface that can enhance the appearance of any outdoor space. With a wide variety of colors, shapes, and materials, they can be arranged in numerous patterns to create a unique and attractive design. The flexibility in style and color enables homeowners and contractors to create personalized landscapes and hardscape elements. Durability Interlocking pavers are designed to withstand heavy loads and resist shifting, making them an ideal choice for driveways, walkways, and other high-traffic areas. Their durability ensures they maintain their appearance and functionality for many years, even under heavier loads. Low maintenance These pavers require minimal maintenance, making them a hassle-free choice for homeowners and businesses. They are easy to clean and resistant to stains, ensuring they continue to look great with little effort. Unlike asphalt or cement surfaces, interlocking pavers do not crack easily, reducing the need for frequent repairs. Versatility Interlocking pavers are suitable for a wide range of applications, from residential landscaping projects to commercial and public spaces. Their versatility makes them a popular choice for various design styles and requirements. Easy to repair If a paver becomes damaged or stained, it can be easily removed and replaced without disturbing the surrounding pavers. This makes repairs quick, simple, and cost-effective. The use of joint sand between the pavers also ensures a flexible surface that can accommodate minor ground movements without cracking. Common Applications of Interlocking Pavers Interlocking pavers are used in various settings, thanks to their durability, aesthetics, and versatility. Here are some common applications: Residential landscaping and patios Interlocking pavers provide an attractive and functional surface for outdoor living spaces, such as patios, pool decks, and outdoor kitchens. They enable homeowners to create stunning landscape designs that complement their homes’ style. Walkways and sidewalks Their durability and slip-resistant surface make interlocking pavers an excellent choice for walkways and sidewalks in residential and commercial settings. They can be used to create inviting pathways that guide visitors through gardens, parks, and other outdoor spaces. Driveways Interlocking pavers are a popular alternative to traditional asphalt or cement driveways. Their durability and ability to withstand heavier loads make them well-suited for use in driveways, where they can provide a visually appealing and low-maintenance surface. Commercial projects Interlocking pavers are often used in commercial settings, such as shopping centers, office complexes, and other large-scale projects. Their durability, low maintenance, and design flexibility make them popular for businesses looking to create attractive outdoor spaces that can stand up to high traffic and wear. Public spaces and parks These pavers are also commonly used in public spaces, such as parks, plazas, and other communal areas. Their durability, slip resistance, and low maintenance make them an ideal choice for surfaces that must withstand heavy foot traffic and exposure to the elements. Professional Pavers Installation Services in Fredericton Atlantic Brick and Stone is a leading provider of professional hardscape services in Fredericton, specializing in paver installation and repair. With 15 years of experience in the industry, our team of skilled professionals is dedicated to transforming your outdoor spaces into beautiful and functional living areas. From residential driveways and walkways to commercial projects, our professional pavers installation services are renowned for their durability, aesthetics, and ease of maintenance. The expertise of our team in paver installation and repair is second to none in the Fredericton area. We utilize cutting-edge techniques and the highest-quality materials to create stunning hardscapes. In need of repairing damaged pavers or designing and installing a new interlocking driveway or patio? Atlantic Brick and Stone has the expertise and supplies to make your vision

Concrete Slab Foundations
Uncategorized

Understanding Concrete Slab Foundations

Understanding Concrete Slab Foundations A concrete slab foundation is a type of foundation widely used in modern construction projects. It provides a stable base for various structures, including homes, commercial buildings, and industrial facilities. In this article, we’ll explore the ins and outs of concrete slab foundations, their importance, types, advantages, disadvantages, and factors that affect their longevity. Explanation of Concrete Slab Foundations A concrete slab foundation is a single, thick layer of concrete that serves as the base for a structure. This type of foundation is poured directly on the ground, and its edges are thickened to ensure a strong and stable support for the building above. The slab of concrete is typically reinforced with steel rebar to enhance its load-bearing capacity and prevent cracking. Concrete slab foundations can be a cost-effective and practical solution for construction projects, especially in areas with high water tables or poor soil conditions. They eliminate the need for a traditional basement or crawl space, which can be susceptible to moisture, pests, and other issues. Types of Slab Foundations There are two main types of concrete slab foundations: T-shaped foundations and slab-on-grade foundations. Each has its unique features and is suitable for different situations. T-Shaped Foundation A T-shaped foundation is a traditional method used in areas with a frost line (the depth below which the ground doesn’t freeze during winter). The footing and foundation walls are poured first, followed by the concrete slab. This type of foundation is designed to provide extra support, keeping the slab above the frost line to prevent damage from soil expansion and contraction caused by freezing and thawing. Slab-on-Grade Foundation A slab-on-grade foundation is a single pour of concrete placed directly on the ground. It’s best suited for areas with a high-water table or poor soil conditions that make excavation for a basement or crawl space challenging. This kind of foundation is simpler and faster to construct than a T-shaped foundation, making it a popular choice for warm climates where frost isn’t a concern. The slab is often reinforced with rebar or post-tension cables to provide additional structural support. Advantages Cost-Effective Concrete slab foundations are generally less expensive than other types of foundations, such as basement or pier foundations. They require less excavation, fewer materials, and a shorter construction time, which translates to lower labor and material costs. Low Maintenance Since there’s no basement or crawl space, concrete slab foundations eliminate the need for ongoing maintenance associated with those areas. They are also less prone to issues such as pest infestations and moisture-related problems, which can require costly foundation repairs. Easy Construction Concrete slab foundations are relatively simple and quick to construct. The process involves preparing the site, placing the reinforcement, and pouring the concrete. There’s no need for complicated excavation or the construction of foundation walls, which can save time and resources. Disadvantages Limited Design Options One of the main drawbacks of concrete slab foundations is the limited design options for the structure above. With no basement or crawl space, you’ll have less flexibility for adding features like additional storage, living space, or utilities. Prone to Cracks Concrete slabs can be susceptible to cracking due to soil movement, shrinkage, or other factors. While reinforcement can help prevent major structural issues, minor cracks may still appear over time. These cracks can be unsightly and may require repair to maintain the appearance and integrity of the foundation. Susceptible to Moisture Although concrete slab foundations are less prone to moisture issues than basement or crawl space foundations, they can still experience problems in areas with poor drainage or high water tables. Proper grading and using vapor barriers can help mitigate moisture-related issues, but they may still arise in some cases. Factors That Affect the Longevity of these Foundations Quality of Materials The quality of the concrete and reinforcement materials used in the foundation can significantly impact its longevity. High-quality concrete, rebar, and other components will help ensure a durable and long-lasting foundation. Terrain The terrain on which the foundation is built can also affect its lifespan. Poor soil conditions, such as expansive clay or loose sand, can lead to uneven settling, which may cause cracks in the concrete slab. Proper site preparation, including soil testing and compaction, can help address these issues. Climate Climate plays a crucial role in the durability of concrete slab foundations. In areas with freezing and thawing cycles, a T-shaped foundation is recommended to prevent soil expansion and contraction damage. On the other hand, slab-on-grade foundations are better suited for warmer climates where frost isn’t a concern. Properly designed and constructed foundations should be able to withstand the local climate conditions to ensure a long-lasting base for your structure. Foundation Construction and Repair in Fredericton Atlantic Brick and Stone, a trusted foundation contractor in Fredericton, specializes in providing top-notch foundation services for both residential and commercial buildings. Our experienced team of professionals offers a wide range of solutions, including foundation repair, waterproofing, and new construction services. With a focus on quality workmanship and exceptional customer service, we are dedicated to addressing any foundation issues you may encounter, from cracked concrete slabs to moisture-related problems. Whether you’re building a new structure or need expert advice on maintaining your property’s foundation, Atlantic Brick and Stone has you covered, ensuring long-lasting stability and durability for your investment. FAQ Q: How thick should a slab foundation be? A: The thickness of a slab foundation can vary depending on the specific circumstances, but it is typically 4-6 inches thick. Q: What is a concrete pad? A: A concrete pad is a flat, level piece of concrete, usually poured on top of a compacted gravel base, that can be used as a foundation for various outdoor structures, such as sheds or hot tubs. Q: How does a slab foundation differ from other types of home foundations? A: A slab foundation differs from other types of home foundations, such as basement foundations, because it does not have a basement or crawl space. Instead,

Chimney Flashing Repair Guide
Uncategorized

A Comprehensive Guide to Chimney Flashing Repair

A Comprehensive Guide to Chimney Flashing Repair Chimney leaks are the silent and often overlooked enemy of homeowners, causing not only aesthetic issues but also potential structural damage. One primary cause of these leaks is damaged or improperly installed chimney flashing. Flashing is critical in maintaining the watertight seal between your roof and chimney. Without it, you place your home at risk for costly and dangerous problems. This comprehensive guide will help you navigate the world of chimney flashing repair. We will discuss various types of flashing materials, how to identify signs of damage, and the importance of timely intervention to prevent further deterioration. Don’t let leaks destroy your home – read on and become a more informed and prepared homeowner. Importance of maintaining a healthy chimney A healthy and well-maintained chimney is crucial for the safety and comfort of your home. The chimney is vital in venting smoke, fumes, and potentially harmful gases from your fireplace, furnace, or stove. When properly functioning, chimneys ensure these byproducts are expelled outside, keeping your home safe and free from hazardous air quality issues. Dangers of water leaks in the chimney Rainwater leaks in the chimney can lead to a host of problems that can compromise the integrity of your home. Leaks can cause damage to the chimney structure, resulting in costly repairs and potential safety hazards. Additionally, water intrusion can lead to mold growth, wood rot, and damage to the surrounding building materials, which can harm your home’s overall health and safety. Role of chimney flashing in preventing leaks Flashing plays a critical role in preventing water leaks in your chimney. It acts as a protective barrier between the chimney and the roof, ensuring that water is directed away from the chimney and preventing it from seeping into your home. Properly installed and maintained flashing around the chimney is essential for protecting your home from leaks and the costly damage they can cause. Understanding Chimney Flashing Definition and purpose of chimney flashing Chimney flashing is a weatherproofing system that seals the gap between the chimney and the roof. It consists of metal sheets that are strategically installed to create a watertight seal, preventing water from entering the home through the joint where the chimney meets the roof. The primary purpose of chimney flashing is to direct water away from the chimney, ensuring it does not penetrate the roof or chimney structure. Materials commonly Used There are several materials commonly used for chimney flashing. These include: Aluminum: Lightweight and resistant to corrosion, aluminum is a popular choice for flashing. However, it is less durable than other materials and can be prone to damage from hail or falling debris. Copper: Known for its durability and long lifespan, copper is excellent for roof flashing. It is also less prone to corrosion and can develop a natural patina over time, which adds to its aesthetic appeal. However, it is more expensive than other materials. Galvanized steel: This material is affordable and widely available, making it a popular choice for chimney flashing. Galvanized steel is coated with a layer of zinc, which helps protect it from rust and corrosion. However, it may not be as long-lasting as other materials and can be susceptible to damage over time. Stainless steel: Highly resistant to rust and corrosion, stainless steel is a durable, low-maintenance option for flashing. While it may be more expensive than other materials, it is known for its longevity and strength. Signs of damaged or failed chimney flashing Damaged or failed flashing can lead to water leaks and other issues in your home. Some common signs of damaged flashing include: Water stains on the ceiling or walls near the chimney Mold or mildew growth in the attic or around the chimney Damaged or missing flashing materials Deterioration of the mortar joints or brickwork Loose or dislodged flashing Roofing materials that are visibly damaged or curling near the chimney Causes of Chimney Flashing Damage Aging and wear Over time, chimney flashing materials can degrade and wear down due to exposure to the elements. This can result in the flashing losing its ability to effectively seal the gap between the chimney and roof, allowing water to infiltrate your home. Installation errors Improper installation of chimney flashing is a common cause of leaks and damage. If the flashing is not correctly installed or sealed, it may not protect against water intrusion. Additionally, using incorrect or low-quality materials during installation can lead to premature failure of the flashing. Weather-related damage Extreme weather events, such as heavy rain, hail, strong winds, or snow, can cause damage to chimney flashing. These events can lead to the flashing becoming dislodged or damaged, compromising its effectiveness in preventing leaks. Animal interference Pests and wildlife, such as birds, squirrels, and raccoons, can cause damage to the chimney by flashing by nesting or seeking shelter in the area around the chimney. Their activities can lead to the flashing becoming dislodged, damaged, or even chewed through, resulting in leaks. Diagnosing Leaks in Chimney Flashing Visible signs of leaks or damage The first step in diagnosing leaks in masonry chimney is to look for visible signs of damage or water intrusion. This can include water stains on the ceiling or walls near the chimney, mold or mildew growth in the attic or around the chimney, damaged or missing flashing materials, or deterioration of the chimney mortar or brickwork. If you notice any of these signs, it is essential to take action to address the issue and prevent further damage to your home. Identifying the source of the leak Once you have identified signs of a leak, the next step is to determine the source of the problem. This can be challenging, as water can travel along various paths before becoming visible in your home. You may need to inspect your roof, chimney, and flashing materials to locate the source of the leak. Look for cracks, gaps, or other signs of damage allowing water to enter. When to call

Masonry Caulking
Uncategorized

The Ultimate Guide to Masonry Caulking

The Ultimate Guide to Masonry Caulking Masonry caulking is essential to home maintenance, and knowing how to do it right can save you from costly repairs. In this guide, we will cover everything you need to know about masonry caulking, including its benefits, types of materials, preparation, steps for caulking, tips for success, and maintenance. What is Masonry Caulking Masonry caulking is an essential aspect of maintaining and protecting the structural integrity of a building. It involves applying a sealant, commonly referred to as caulk, to gaps and joints in masonry surfaces to prevent water damage, air infiltration, and energy loss. Masonry caulking is crucial for ensuring the longevity and durability of a building, as well as enhancing its overall appearance. Benefits of Masonry Caulking Increased energy efficiency By filling gaps and sealing joints in masonry surfaces, caulking prevents drafts and air infiltration, significantly reducing heating and cooling costs and increasing energy efficiency and savings on utility bills. Protection against water damage Water penetration can cause severe damage to masonry surfaces, leading to mold and mildew growth, structural degradation, and costly repairs. Masonry caulking creates a waterproof barrier that protects the building from the detrimental effects of water damage. Enhanced curb appeal Masonry caulking not only serves functional purposes but also contributes to the aesthetics of a building. A well-caulked surface looks more polished and well-maintained, increasing the curb appeal and potentially raising the property’s value. Types of Masonry Caulking Materials There are several types of caulking materials available for use in masonry applications. Each type has advantages and disadvantages, making choosing the right caulk for your specific project essential. Silicone caulk Silicone caulk is a popular choice for masonry applications due to its excellent adhesion, flexibility, and resistance to temperature changes. It also offers excellent water and weather resistance, making it suitable for indoor and outdoor use. However, silicone caulk is not paintable, and its cleanup requires using a solvent such as mineral spirits. Polyurethane caulk Polyurethane caulk is a highly durable and versatile option for masonry applications. It adheres well to various building materials, including masonry, siding, and windows. Polyurethane caulk is paintable, and it offers excellent resistance to water, weather, and UV exposure. However, it typically requires a solvent like mineral spirits for cleanup. Butyl rubber caulk Butyl rubber caulk is an adhesive and flexible sealant that works well for sealing joints in masonry surfaces. It offers excellent water resistance and can be used for interior and exterior applications. Butyl rubber caulk is paintable but may require a primer before painting. Cleanup can be done with mineral spirits, making it slightly more challenging than latex caulks. Hybrid caulks Hybrid caulks combine the properties of various caulking materials, such as silicone and polyurethane, to create a versatile and high-performing sealant. These caulks typically offer excellent adhesion, flexibility, and durability, making them suitable for a wide range of masonry applications. Hybrid caulks are often paintable and can be cleaned up with soap and water or a solvent, depending on the specific formulation. Preparation Before Caulking Before you begin caulking your masonry surface, there are a few essential steps to ensure a successful and long-lasting result. Inspecting the masonry surface Check the surface for any cracks, gaps, or damaged areas that must be repaired before caulking. Any existing caulk that is old or damaged should be removed and replaced. Cleaning the surface Clean the masonry surface thoroughly to remove dirt, dust, and debris. Depending on the surface’s condition, this can be done using a brush, rag, or pressure washer. Ensure the surface is dry before applying the caulk. Choosing the right caulk gun Select a high-quality caulk gun that provides precise control and smooth application. Caulk guns are available in various styles and sizes, so choose one that best suits your specific project and the type of caulk you will be using. Tips for a Successful Caulking Job Applying the right amount of caulk It is crucial to apply the appropriate amount of caulk to ensure a proper seal without wasting material. Too much caulk can be difficult to smooth and may cause a messy appearance, while too little caulk may not provide adequate coverage and protection. Using the right tool to smooth the caulk Invest in a high-quality caulking tool that allows precise control and a smooth finish. Many tools are available, including metal and plastic spatulas and caulking-smoothing tools designed specifically for this purpose. Allowing the caulk to dry properly Follow the manufacturer’s instructions for the recommended drying time for your specific caulk. Allowing the caulk to dry thoroughly ensures a proper seal and prevents potential damage to the caulk or masonry surface. Maintaining Masonry Caulking Regular maintenance is essential to ensure the longevity and effectiveness of your masonry caulking. This includes: Inspecting caulking periodically Check your masonry surfaces regularly for any signs of wear or damage to the caulking. Address any issues promptly to prevent further damage. Touching up caulk as needed If you notice any gaps or cracks in the caulking, touch up those areas with fresh caulk to maintain a proper seal. Replacing old or damaged caulk Over time, caulk may lose its effectiveness and require replacement. Remove old or damaged caulk and replace it with new caulk to ensure continued protection and energy efficiency. Masonry Repair and Restoration Services in Fredericton Atlantic Brick and Stone is the company to call if you are a homeowner in Fredericton and need masonry repair and restoration services. While masonry caulking is essential to masonry maintenance, it is just one of many services we offer to keep your brick, stone, and concrete surfaces in top condition. Our experienced technicians can also repair cracks, spalls, and other damage to your masonry surfaces, as well as restore the original beauty of your property through cleaning and sealing. At Atlantic Brick and Stone, we take pride in our attention to detail and commitment to customer satisfaction, so you can trust us to provide the highest quality workmanship. Contact us today

GET STARTED

START MASONRY PROJECT THE RIGHT WAY

Create stunning structures with our residential and commercial masonry services in Fredericton. From meticulous designs to the completed build, our process is professional and rewarding, and we can’t wait to build your dream with you.

Atlantic Brick and Stone, one of the best masonry contractors in Fredericton, NB

Contact

8 Muskie Street, Lower Kingsclear, New Brunswick E3E 0E7, Canada

Scroll to Top