Uncategorized

common paver installation mistakes
Uncategorized

8 Common Paver Installation Mistake You Should Avoid

8 Common Paver Installation Mistake You Should Avoid Whether you’re installing pavers for a new patio, walkway or driveway, it’s important to take the time to plan your project properly and avoid common mistakes. Proper paver installation is key to ensuring your new hardscaped area looks its best and lasts for many years. By taking some simple precautions, you can save yourself potential issues down the road. Installing interlocking concrete pavers may seem like an easy DIY project, but there are many technical details to get right. Without the right preparation and techniques, even small errors in the installation process can lead to problems such as cracking, shifting or premature deterioration of your pavers. To help you achieve best results and avoid hassles, this guide outlines eight common mistakes to watch out for. Not planning the project thoroughly The most important step is taking time to thoroughly plan your paver project before breaking ground. Consider the function and size of the area, as well as your budget. Make a detailed plan showing the layout, garden edging or other features. You’ll also need to check with your local authorities for any permitting requirements. Poor planning can result in issues like running out of materials or realizing the project is too big to complete within your timeframe. You don’t want to be halfway done and unable to finish. A comprehensive plan will help your project stay on schedule and on budget. Ignoring soil and subgrade preparation Proper preparation of the soil and subgrade (the layer of material below the surface) is critical for your pavers to have a stable base. The soil needs to be well-draining and compacted to provide stability without settling over time. For a paver patio project, you may need to excavate several inches of existing soil and replace it with fresh compactible material to create an even surface. Ignoring this step can lead to problems like weeds growing through joints or pavers becoming uneven as the soil shifts below. Take time to prepare the subgrade properly before installing anything above ground. Skimping on base materials Quality base materials like compacted gravel are essential to distribute the weight of the pavers and protect against gradual settling. Pea gravel or decorative stone is not suitable – these will compress easily. Eg. for driveways, you’ll need a very substantial 6-8 inches of crushed stone (minimum 1-1/2 inches thick) and drainage. Using subpar materials can cause your pavers to crack or sink within a few years. An insufficient base won’t provide even support to your pavers. Make sure to use proper base materials designed for the intended use. Inadequate compaction Thoroughly compacting the gravel or crushed stone base is key to preventing uneven settling later on. For small areas, you can rent a gas-powered plate compactor or use a hand tamper. Larger or professional projects may require a large walk-behind roller. If the base layer isn’t compressed firmly, it can compress further as the pavers are laid. This leads to cracks or gaps appearing between pavers down the road. Take time to compact the base properly. Incorrect paver laying When installing pavers, use string lines as a guide and lay them in a simple repeating pattern or brick-style running bond. Leave consistent 3/16-inch gaps between pavers for sand to fill. Slight errors in spacing, alignment or curving layouts can ruin the appearance. Pavers won’t stay straight or square if not installed accurately from the start. Take care to lay each paver perfectly flush with the guidelines. Forgetting expansion joints Just like concrete sidewalks, pavers need room to expand slightly with temperature fluctuations. Leave a 1/4 to 1/2 inch wide expansion joint around the perimeter and between the patio and any fixed surfaces. Failure to do so can cause cracking or pavers to lift out of place. Properly placed expansion joints prevent stress on the pavers from movement. Neglecting drainage considerations Water that puddles or pools on a paved surface can undermine the soil base over time. Make sure to slope your paver area at least 1/4 inch per running foot away from structures. You can also add a perimeter drain system or use gravel along edges. Without the right drainage, standing water can penetrate and damage both pavers and anything below like a foundation. Careful drainage planning is necessary. Rushing the finishing touches When laying pavers, avoid the urge to rush the finishing details. After pavers are laid, sweep jointing sand over the surface and work it into joints with a rubber grout float. This helps eliminate gaps. Then mist the surface with water and allow curing before sealing. Sealing locks in the jointing sand and protects against stains. It’s worth taking a day or more after installation to complete this important step properly. Avoid common install mistakes with Pro help If any part of the paver installation process seems daunting, consider hiring a professional contractor familiar with local soil and climate conditions. Look at photos of their previous work and ask for references. An experienced contractor understands all the technical requirements to deliver results that will last. Atlantic Brick and Stone is a highly reputable hardscape contractor based in Fredericton, New Brunswick. With 15+ years in the industry, we are experts in paver installation projects of all types and sizes. We offer the best paver installation services in Fredericton, along with a comprehensive warranty. As the top rated hardscape contractor in the region, we have numerous 5-star reviews and a portfolio of impressive past jobs you can check out. Our experienced installation crews are fully equipped and trained to complete your project efficiently. Contact us for a free estimate—you can have confidence we will exceed your expectations through our quality workmanship. Summary Take time for thorough planning – Make sure to consider the size, layout and intended use of the area. Plan properly to avoid issues like running out of materials. Prepare the site with care – This means excavating properly, installing draining and compacting the subgrade and base layers

How Masonry Warranty Safeguards your Property
Uncategorized

How Masonry Warranty Safeguards your Property?

How Masonry Warranty Safeguards your Property? Have you recently purchased a new home or condominium? Perhaps you’ve had some masonry work done on your existing home, like installing a new brick facade. Masonry plays an important structural and aesthetic role in building exteriors. It’s a major investment to incorporate high-quality masonry into your home.  Properly installed masonry provides strength, durability and curb appeal. However, issues can potentially arise over time if the materials or workmanship are defective. A masonry warranty from your contractor safeguards you against future repairs from such defects. Let’s break down what masonry warranties are, their typical coverage periods and limitations.  Why masonry warranty is so important? A masonry warranty is a written guarantee provided by your local masonry contractor. It pledges to cover repairs or replacement needed if the installed masonry fails or deteriorates due to defective work or materials within the stated coverage period. There are generally two main types of coverage offered: Workmanship warranty This protects against repair costs from improper installation practices. Example issues include cracked or loose stones, uneven mortar joints or wall bowing/leaning due to poor construction methods. Material warranty This covers replacing faulty masonry units like bricks that crack or deteriorate prematurely due to low quality. It also applies if specified materials aren’t used, such as substituting concrete block for stone without consent. Warranty periods range from 1-25 years depending on the masonry application and contractor. For instance, poured concrete may receive a shorter time frame versus a brickwork. The contractor’s reputation, materials selected and work complexity influence the length offered. Make sure any warranty is clearly outlined in your contract. Benefits of masonry warranty Long-Term protection One advantage of a masonry warranty is it can safeguard your investment and home for decades. Issues sometimes don’t emerge for several years as materials are exposed to weathering. A longer warranty, accounts for this by pledging to address coverage-eligible breakdowns that crop up far in the future. Peace of mind Knowing your masonry installation has a warranty gives homeowners peace of mind. It removes worries that a future material flaw or shoddy workmanship could become an expensive repair burden down the road. With a warranty in place, you don’t need to fret over potential breakdowns or how you would afford the repairs if they did surface next year. This security allows you to fully enjoy your new masonry project. Financial security Taking advantage of a warranty’s coverage can also save you thousands in repair costs later on. For example, say your interior brick wall repair developed cracks totaling $2,500 to fix in year 10 – but you had a 25-year workmanship warranty. The contractor would be liable for covering those repairs at no charge. Out-of-pocket, that repair bill could jeopardize your finances or plans for home improvements. A warranty protects your budget from unforeseen masonry issues. What is covered under warranty? Most masonry warranties encompass two key areas of coverage: Material quality This guarantees masonry units like brick, stone blocks or tiles won’t deteriorate prematurely due to flaws. It covers replacing faulty pieces that crack, stain or show other signs of deficient materials. Workmanship Any repair costs from shoddy installation practices are covered. Common issues include crumbling mortar joints, bowed/leaning walls and cracks stemming from excessively thin or improperly laid units. The contractor pledges their work meets specified standards. Within these groups, specific examples of typical covered items include but not limited to: Cracked or loose bricks/stones Deteriorated or missing mortar Wall bowing or leaning (Not due to structural issue) Water intrusion through masonry Chimney cracking or leaning Most warranties exclude damage deemed normal “wear and tear” over the coverage period. But they protect against defects arising from subpar materials selection or construction methods. Limitations and exclusions While masonry warranties offer valuable protection, there are some standard limitations and exclusions contractors include: Common limitations and exclusions in masonry warranties include: Natural disasters like floods, hurricanes and earthquakes are usually not covered since masonry can succumb to these events regardless of quality. Accidental damage from other trades or accidents on the job-site also voids the warranty. Repeated freeze/thaw cycles from extreme weather may lead to exclusions depending on the contractor. Damage caused by excessive de-icing salt, weed killers or other corrosive substances near the masonry also makes warranties null. Modifications to the masonry after completion, like adding a wood deck leaning on a brick wall, often release the contractor’s liability for any ensuing issues. Foundation settling from soil or drainage problems typically falls outside the warranty scope. Pre-existing structural defects are also excluded. Damage arising from installing new objects penetrating the masonry, like posts or pipes. Carefully reviewing your specific warranty documentation is important to understand what exactly is and isn’t covered over the coverage period. Don’t assume – clarify any grey areas with the contractor directly. How to Secure a good warranty Choosing the Right Contractor The best way to ensure your masonry project receives strong warranty protection is selecting a trustworthy, experienced masonry contractor. Look for one with a proven track record through customer references and reviews, ideally offering 10+ years in the field. When getting estimates, don’t just focus on price – find out what type of warranty each contractor provides as part of the job. A contractor using improper installation methods may seem cheaper up front but lead to bigger repair costs later on without warranty recourse. Always have warranty terms written into your contract before work begins as well. An experienced pro takes pride in their craftsmanship and is willing to stand behind it through a good warranty. Tips for evaluating contractors include: Ask how long they’ve been in business and request to see sample past projects Inquire about the types of masonry materials and applications they specialize in Request references from recent clients and if possible, follow up by calling them Confirm the contractor carries liability insurance in case of accidents on site Establish the warranty coverage length being offered upfront With diligent contractor vetting like

restore the faded bricks
Uncategorized

How to Restore the Color of Faded Brick Exteriors?

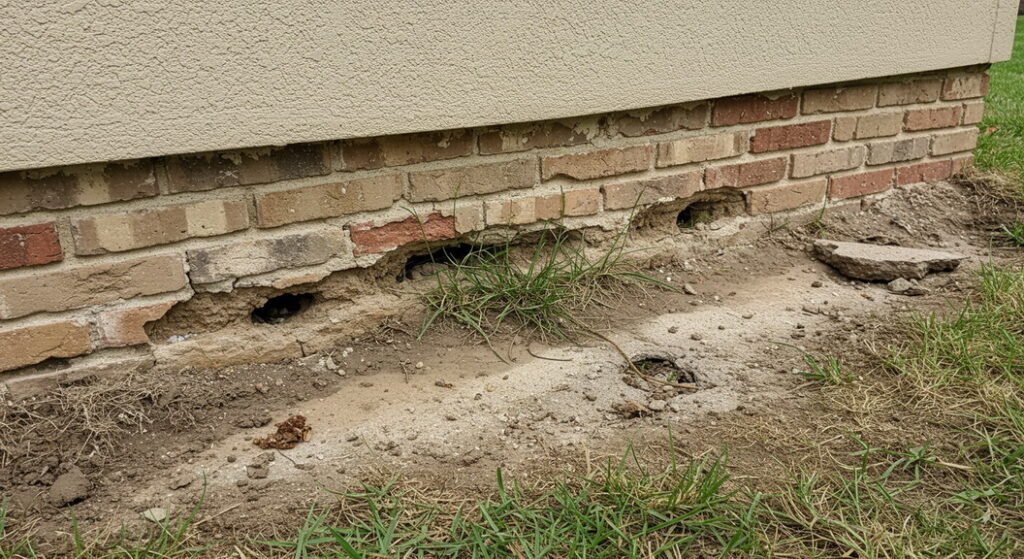
How to Restore the Color of Faded Brick Exteriors? You’ve probably noticed how the once bright red color of your brick exterior has faded over time. Brick facades frequently lose their luster due to prolonged exposure to weather elements like rain, wind, and sunlight. Pollution, improper cleaning methods, and moisture issues underground can also diminish a brick wall’s natural appeal. The good news is restoring faded brick exteriors to their original color is certainly possible. This article will walk you through understanding why brick fades and the best practices for bringing back that rich red hue through best practices! Basics of Brick Maintenance Brick and stone have long been popular choices for building homes and structures thanks to their natural beauty and resilience. These sturdy walls can withstand many weather events with proper maintenance. Over time, however, exposure to rain, wind, freezing temperatures and more can cause fading, cracking, or moisture issues in walls without regular sealant applications. Before undertaking a restoration project, take time to examine your structure’s brickwork. Check for signs of water damage or cracks in the mortar holding together each brick or stone. Crumbling or discolored mortar is a clear sign it is time for repairs. It’s also important to consider New Brunswick standards of the national building code if your home has historic designation. With gentle periodic cleaning and resealing of surfaces, masonry exteriors can stay vibrant and attractive for decades. Maintaining your brick walls helps prevent costly issues like cracks forming or moisture trapped inside. Small issues addressed today can avoid much bigger repairs tomorrow. Proper maintenance keeps water outside where it belongs, allowing masonry to withstand weathering with its natural charm intact. Why brick color fades? Sun Exposure As the most powerful weathering agent, the sun’s UV rays progressively lighten fired clay bricks’ color over many years of exposure. The sun’s beams harm brick pigments, especially reds containing iron oxide which fade more readily. Unprotected areas facing sun see most damage daily. Weather Effects Repeated wetting and drying from rain and wind slowly degrades bricks’ surface patina. Water can seep into pore spaces carrying minerals that deposit unsightly white marks called efflorescence over years of weathering. Stains formed may lighten or darken bricks’ original tones. Harsh windborne particles like sand also erode softer brick surfaces faster. Improper Cleaning Using high-pressure hoses or harsh chemicals on dirty bricks removes protective outer layers, exposing softer inner brick to further weathering effects. This accelerates fading and creates dull, patched surfaces. Avoid abrasive scrubbing which scours away exterior clays’ color pigments and weakens bricks’ structure over time. Efflorescence This whitish crystalline deposit forms on brick surfaces from moisture migration. Groundwater carries dissolved salts that are drawn to the brick-mortar interface by capillary action. On reaching the surface, water evaporates, leaving the salts behind to manifest as a faded look. How to Restore the Color? Restoring faded brick involves: Gentle Cleaning Practices Avoid abrasive scrubbing or chemicals that could damage the brick. Gentle cleaning methods like a low-pressure power wash are safest. A power wash uses water pressure equivalent to rain to dislodge dirt, grime, and efflorescence from the brick’s surface pores and crevices without harming the material. For tougher stains, a professional mason can dampen brick with water before scrubbing the area gently with a non-ionic, pH-neutral cleaning solution that won’t degrade the brick. Natural bristle brushes are ideal for manual cleaning as they are not rough enough to erode the brick over time. Always rinse cleaning agents off thoroughly with a hose or wet vacuum to remove residues. Sealant Application Sealers work by penetrating the brick to fill its pores and form a protective barrier, shielding the brick from weathering effects of water, de-icing salts, and pollution gases. Breathable sealers that still allow vapor transmission are best for brick applications. They maintain the masonry’s ability to “breathe” naturally while repelling water entry. Penetrating sealers are ideal because they become an integral part of the brick without forming a noticeable saturated surface. Minimum two or maximum three thin coats are sufficient for sealers to soak deep into the brick body. Light sanding between coats helps the sealer fully bond together for long-lasting coverage. Addressing structural issues Potential underlying problems may require diagnostic testing and repair work. For example, cracked or deteriorated mortar joints allow water inside the wall cavity, where it can become trapped. This moisture triggers brick discoloration and efflorescence blooms. Damaged base course bricks at ground level are also common entry points. Fixing any drainage or grading issues helps eliminate sources of excess moisture attack. Experienced masons can thoroughly inspect brickwork, test for wet areas, and make targeted repairs like repointing cracks or installing dampproof coatings to address issues at their root. Tuckpointing Tuckpointing renews mortar joints using reversible methods that don’t harm historic brick. Pro masons carefully chisel or saw cut loose or disintegrated mortar from the joints in sections before replacing with a softer, breathable new mortar mix slightly recessed from the brick face. This creates a reliable weather-resistant seal while allowing structural movement. Mortar formulas closely match the historic composition, texture, color and permit vapor diffusion. Tuckpointing preserves the aesthetic of walled buildings when needed to prevent moisture intrusion issues. When color restoration is not fruitful? Faded colors on an old historic building may be part of its history and charm. Improperly restoring such brick could compromise its historic integrity and value. It’s best to consult preservation guidelines and hire professionals familiar with appropriate restoration methods. Individual bricks that are extensively cracked, spalled or crumbling may require repair or rebuilding sections of the wall rather than solely restoring faded color. Professionals can properly evaluate structural stability and perform repairs like replacing severely compromised bricks to ensure safety. If bricks were previously painted with a low-quality paint that is now peeling or flaking, trying to restore the original color may be difficult or impossible without complete paint removal. Paint could be trapping moisture behind the surface, causing unseen damage over time. Contact

Questions for th Fredericton Hardscape Contractor
Uncategorized

Questions for the Fredericton Hardscape Contractor before Hiring

Questions for the Fredericton Hardscape Contractor before Hiring Hiring the right hardscape contractor can make all the difference when it comes to enhancing the outdoor living space and value of your Fredericton home. With hardscaping, you can create beautiful outdoor features like patios, walkways, retaining walls, and gardens that improve curb appeal and provide functionality. However, choosing the wrong contractor could lead to headaches, hassles, and wasted money down the road. Before signing a contract, it’s essential to ask the right questions to assess a contractor’s abilities, standards, and character. Let’s explore some of the top inquiries you should make prior to hiring a hardscape professional. Importance of Asking Questions Before Hiring As with any major home project, hiring the wrong hardscape contractor can end up costing you much more than just money. Beyond installing pavers or pouring concrete, you’re entrusting someone with enhancing your property and outdoor living area. Taking the time upfront to understand a contractor’s expertise, work standards, communication skills, and references can prevent future issues and disputes that drain your time and wallet. Asking questions demonstrates your due diligence and protects both parties’ best interests. You owe it to yourself and your investment to approach the hiring decision thoroughly. Essential Questions to Ask Background and Experience One of the first questions to ask is how long the contractor has been in business installing hardscapes. While experience isn’t everything, you’ll feel more confident working with someone who has built and sustained a reputable hardscaping business for many years. Ask them about the scope and scale of past projects to understand the types and sizes they’ve routinely handled. Find out if they specialize or have particular experience with the hardscaping elements you require, like patios, walkways, or driveways. Don’t just take their word at face value – ask for examples of similar, recently completed Fredericton projects you can drive by and inspect. License, Insurance, and Certifications Verify that any contractor you hire carries the proper licensing to perform hardscaping work according to local New Brunswick regulations. Check that their licenses are in good standing. You’ll also want to ensure they maintain active general liability insurance and workers’ compensation coverage in case of unforeseen on-site injuries or damages. Find out about any relevant professional certifications from manufacturers or trade associations that demonstrate their expertise and credentialing. Only work with fully certified, licensed, and insured hardscaping professionals. References, Previous Projects, and Warranty Obtaining direct client testimonials and viewing a contractor’s portfolio provides invaluable insights beyond just their own promotional claims. Ask anywhere from three to five recent Fredericton clients for references you can contact to discuss the contractor’s work quality, communication skills, responsiveness, and value. Inquire how the contractor handles any unexpected issues or client suggestions, and gauge their receptiveness to your input during the project planning and execution. Reputable firms should willingly provide a warranty on their workmanship and stand confidently behind their projects. Project Planning and Execution The hardscaping planning and design process dictates whether projects stay on track, on budget and meet your expectations. Ask about their procedures for on-site assessments, design consultations, material selections and approvals, utilities locating, and permits acquisition to understand their level of preparation, professionalism and attention to detail. Find out if they will be personally involved in overseeing and managing the project start to finish or if it will be assigned to crew members. For complex or extensive job scopes, you’ll want a hands-on contractor. Onsite Presence and Involvement Speaking of hands-on involvement, inquire how regularly the contractor will be on site during the hardscaping installation. Opt for those who commit to scheduled weekly or daily visits over those with cursory drop-ins. Get clarification on which company representatives you can expect to encounter. The contractor’s guidance helps ensure consistent quality, workmanship meets agreed standards, tasks stay appropriately resourced and timelines don’t slip. You also need easy ways to provide input or request alterations as the job is ongoing. Payment Schedule and Timeline Any project timeline and payment schedule should be outlined clearly in your contract. Ask how invoices will be submitted, what portions of payment are due at specific milestone completions like design, materials delivery and installation. Verify the contractor will issue lien waivers upon receiving installments to release their legal claim over your property until full completion. Make sure you understand cancellation or postponement clauses too. Trust those committed to frequent, transparent communication and fair arrangements. Meet the Pros Atlantic Brick and Stone for your Hardscaping Needs in Fredericton When it comes to outdoor living spaces, Atlantic Brick and Stone proudly serves as Fredericton’s most trusted name in hardscape landscaping. For over 15 years, the company’s professionals have completed countless projects, helping local homeowners craft beautifully functional and durable outdoor environments. Atlantic Brick and Stone has earned its stellar reputation through an unwavering commitment to quality work backed by valuable warranties and guarantees. Extensive portfolio and experience: Browse Atlantic Brick and Stone’s comprehensive online gallery to view just some of the many satisfied customers they’ve assisted. From patios and walkways to retaining walls and outdoor kitchens, their portfolio highlights an impressive breadth of completed projects. Trained experts on staff: Our team has years of hands-on experience professionally installing all types of hardscapes. You can feel confident our knowledgeable labor will expertly execute your project vision. Complete warranty protections: All of Atlantic Brick and Stone’s masonry works are protected by strong warranties. Should any issues arise, you’ll appreciate their pledge to stand behind their work. Ongoing maintenance services: Enhance your property’s value by signing up for routine cleaning, repairs and sealcoat refreshes to keep your hardscapes looking renewed year after year. Positive reviews everywhere: Browse online and you’ll discover many delighted past clients recommending Atlantic Brick and Stone for their responsiveness, aesthetic eye and quality results. With such a flawless track record of beautiful achievements, it’s no wonder Atlantic Brick and Stone consistently earns top ratings in the Fredericton region. Their proven performances and reputable customer service make them the ideal

What Thickness is Best for Your Concrete Walkway
Uncategorized

What Thickness is Best for Your Concrete Walkway?

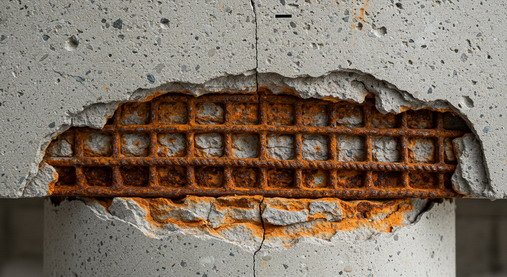
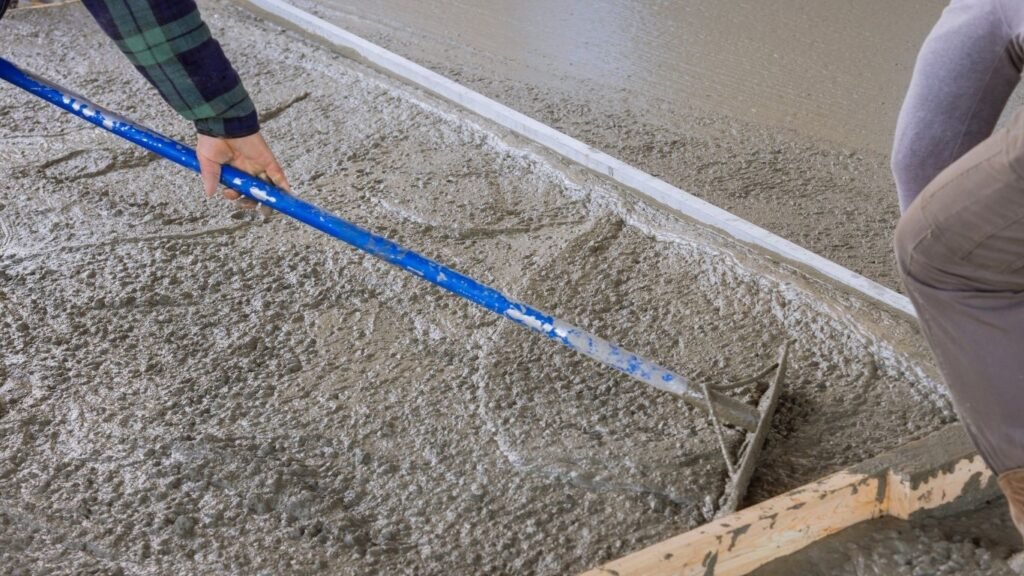
What Thickness is Best for Your Concrete Walkway? Determining the proper thickness is one of the most important decisions you’ll need to make installing a new concrete walkway. The thickness of your concrete walkway will have a significant impact on its structural integrity, durability, and overall lifespan. So, it’s crucial to choose wisely. While a standard 4-inch thickness is usually recommended for most residential applications, there are some key factors you should consider to ensure your sidewalk lasts for years. Why does thickness matter? As with any concrete slab, the thickness directly influences the structural strength and stability of your walkway. Concrete provides robust support, but only if it is thick enough. Think about it like a wooden fence—a few thin boards won’t stand up to weathering and use nearly as well as a structure with substantive beams and posts. Similarly, too thin of a concrete slab risk cracking or crumbling more easily over time. Proper thickness also plays a key role in preventing cracks and ensuring your sidewalk can support foot traffic without buckling or settling unevenly. Considering average foot traffic and climate conditions will help guarantee its long-lasting endurance. Consequences of choosing low thickness If you skimp on thickness, it can negatively impact your walkway in several ways: Cracking – Thin concrete more easily develops cracks from temperature fluctuations or applied weight. This allows moisture to penetrate and accelerate deterioration. Uneven Settling – Without an adequately supportive base, parts of a thin walkway may sag or sink over the years as sub-grade soil shifts below. Shorter Lifespan – Cracking and settling inevitably hasten damage that can render a sidewalk unsafe sooner than expected and require replacement or repairs. Higher Maintenance Costs – More regular concrete repairs cut into the initial savings from choosing a razor-thin pour and drive-up long-term costs. Drainage Issues – Standing water also causes cracks, spalling, and weakening. Proper thickness ensures water drains through rather than pooling on the surface. Recommended concrete thickness for walkways An industry standard thickness for most residential walkways is 4 inches. This allows for ample structural integrity while balancing material needs and costs for light-duty home applications. Most building codes officially stipulate this minimum. Commercial standards often recommend 5-6 inches due to heavier foot and wheeled vehicle traffic loads. Factors influencing the ideal thickness When determining your project’s ideal thickness, carefully evaluate: Load-bearing needs based on the volume and type of expected foot traffic as well as storage uses. High-traffic areas likely need more beefy concrete. Underlying soil composition and drainage—clay, sand, or gravel all settle differently and drain water variably. Stiff subbases require extra concrete thickness. Freeze-thaw exposure—harsher winter climates demand crack-resistant thickness to endure expansion/contraction cycles. Any landscaping sprinklers/direct rainfall intensity—more water penetration risks without sufficient reinforcement. Enhancing the durability of your concrete sidewalk Beyond thickness alone, some additional techniques can boost quality and service life: Proper subgrade preparation including base compaction, drainage installation, and weed/grass removal. Careful placement of expansion joints to control where cracking occurs. Proper curing procedures like wet covering after pour to harden concrete fully. Addition of reinforcing steel rebar within thicker slabs for crack resistance in extreme applications. Attention to surface finish quality like troweling and light broom textures. Installation of control joints to direct cracking along predetermined pathways. Consideration of sealers or overlays to protect outer concrete layers from deicing salts and other risks over the long haul. Making the right decision Since every site presents unique conditions, discussing your project specifics with local hardscape installation professionals can help validate thickness recommendations tailored accurately for your property’s needs and future uses. Don’t simply default to minimum standards without considering coming decades of demands. With the right thickness supported by quality materials and workmanship, your new concrete walkway can provide attractive, durable, and safe service for many years. Durable concrete walkways installation and maintenance in Fredericton When planning your new concrete walkway project in Fredericton, consider the proven professionals at Atlantic Brick and Stone. As the premier hardscape contractor serving the area for 15+ years, we have developed a well-deserved reputation for their high-quality craftsmanship. Our masons are experts in all aspects of walkway installation, from soil preparation and subbase compaction to precision concrete placement, reinforcement tactics, and aesthetic surface finishes. Atlantic Brick and Stone also stands behind our work with an industry-leading warranty. Contact us to discuss your unique property needs and schedule an on-site estimate for a durable, attractive walkway that will enhance your home’s curb appeal and function for longer time. Final words: Carefully evaluating factors like expected loads, drainage, climate risks, and subgrade issues will point you toward the optimum concrete pour thickness. While 4 inches normally suffices for light residential traffic, augmenting reinforcement or selecting an engineered thicker alternative brings greater rewards in reduced future cracking and maintenance demands, ensuring a solid long-term investment. By matching your concrete pour to your site specifics and caring for it properly thereafter, you can feel confident in a sidewalk that withstands both daily use and seasonal variability safely and attractively for its entire design lifespan. FAQ for concrete walkways Is concrete OK without rebar? For most residential walkways carrying limited loads, rebar reinforcement is usually unnecessary if following minimum thickness guidelines. However, very thick concrete, commercial applications, or extreme climates may still warrant steel reinforcement placement within the pour for added crack resistance. Is 2 inches of concrete enough for a walkway? At only 2 inches, the concrete would be too thin structurally to withstand weather fluctuations without premature cracking or structural failure. The standard minimum thickness of 4 inches provides a safe, long-lasting surface for light pedestrian traffic in most residential applications. Get Your Concrete Walkway Construction Estimate Online Now! 506-304-0771 atlanticbrickandstone@gmail.com Request an Estimate

Paver Stability
Uncategorized

Paver Stability – Sand and Gravel Base

Paver Stability – Sand and Gravel Base Creating an attractive yet durable outdoor paved space starts from the ground up. Before laying the first paver, ensuring a solid foundation is essential. This guide will take you through everything you need to know to build a long-lasting base for patios, walkways and more using sand and gravel. Learn why these versatile materials are the optimal duo when used together, and how to choose the right specifications for your unique project. Paver Foundations A well-installed foundation is truly the backbone of any paving project. It provides the necessary support and structure for withstanding loads from foot and vehicle traffic without causing costly issues like cracking or shifting over time. By taking the time to prepare your base properly, you’ll enjoy your new paver patio, walkway or driveway for its intended lifespan without needing expensive repairs. While it may be tempting to skimp on this preparatory step, a poor or absent foundation will become apparent sooner rather than later as surface-level issues emerge. Sinking, cracking, weeds growing between joints – all of these problems and more can be avoided by addressing foundation quality upfront. Think of your base much like the drywall or subfloor in a home – a critical but invisible system that enables the superior function and appearance of the final finish. Sand and Gravel – The Essential Duo When it comes to choosing the right base materials, a combination of concrete sand and gravel works best in most applications. Together they form a flexible yet long-lasting base that disperses pressure effectively. Let’s explore how each component contributes uniquely to paver stability: Gravel plays the role of the “backbone” in the system. Its larger aggregate size and angular shape lock together when compacted, forming a sturdy yet porous structure that allows for drainage. Different gravel sizes are suitable for various projects – smaller for walkways, and larger for high-traffic areas like driveways. On its own, gravel can be uneven and allow for more movement. This is where a layer of finely graded sand comes in. Its smaller particles essentially “fill in the gaps” left between gravel pieces, creating a smooth, level surface for placing pavers. The sand also acts like a cushion. Its flexibility allows for some minor settling without causing issues. Combined with the stable gravel below, your paved area now has shock-absorbing resilience to withstand impacts from foot traffic or other forces. In short – gravel provides strength and structure while sand fine-tunes the surface for precise paver alignment and a cushioned protective layer. Using both yields optimal stability and performance. Benefits of Using Sand and Gravel Together There are clear advantages to incorporating both sand and gravel as companion materials in your paver foundation: The void spaces between larger gravel pieces allow excess water to drain efficiently beneath the paved surface. Combined with compaction, this creates a highly stable base structure. Together the components effectively spread-out pressures from foot, or even light vehicle traffic to avoid surface damage to pavers over time. Gravel locks the base in place while sand’s cushioning quality helps prevent minor settling from causing cracks or gaps. Using readily available gravel and sand extracted locally makes for an affordable yet professionally installed foundation system. With their different properties working in tandem, these two materials provide the steady, resilient base any paved area needs to withstand everyday use for many years to come. Recommended Thicknesses for Foundation Layers Proper layer depths are also important to consider. Different projects require varying amounts of gravel and sand according to anticipated loads and uses. As a general guideline: For patios and walkways: 6 inches of compacted gravel – This allows for adequate drainage and weight distribution from foot traffic. 1 inch layer of sand – A thin sand layer is all that’s needed for leveling and jointing pavers at this smaller scale. For driveways: 8-10 inches of gravel base – The increased depth from larger aggregate offers sturdiness to withstand vehicular loads. 1 inch of sand – The sand layer serves the same purpose, though depth remains consistent regardless of the project size. When laying your gravel, be sure to slope it slightly away from the home or building to allow for proper water runoff. For both materials, take time to compact well in thin lifts for maximum density. This helps eliminate any voids or air pockets that could lead to shifting over time. Troubleshooting Common Paver Base Issues No project installation goes perfectly all the time, so it helps to understand potential issues and their solutions. A few common foundation-related problems include: Compaction issues lead to settling – For large, dense areas, consider re-compacting in thin layers with a plate compactor. Weed growth between pavers – Herbicides or adding a thin polymeric sand layer during installation can prevent this. Uneven settling over time – A fully compacted base and sufficient depth prevents this. If minor, topping up the jointing sand may fix it. Consulting local hardscape experts can also help remedy any foundation issues. Consulting with hardscapes professionals for your project in Fredericton If you’re hesitant about determining the right amounts or ensuring proper installation of your paver base materials, consider consulting with a hardscape contractor in Fredericton. They can evaluate your project specifics such as location, intended use, soil conditions and more to recommend foundations tailored for optimal performance and compliance with local building codes. In Fredericton, NB, Atlantic Brick and Stone offers top-rated hardscape installation services. As a full-service masonry repair contractor, we can guide you in choosing the most suitable base materials for your particular patio, walkway or driveway project. This includes recommending types and depths of gravel and sand, as well as ensuring its thoroughly compacted installation. Our team takes pride in installing pavers that last longer. Contact Atlantic Brick & Stone for a free estimate and consultation on your upcoming hardscaping needs. Things to Remember Preparing the right paver base may seem like merely a necessary step before enjoying your beautiful

Parging Guide
Uncategorized

Ultimate Parging Guide for Every Homeowner in Fredericton

Ultimate Parging Guide for Every Homeowner in Fredericton Does your home need some TLC to boost its curb appeal and weather resistance? Get the full picture on parging – a simple solution for foundation protection. This complete guide to Parging takes you through why, when, and how experts approach the process. After learning the benefits outlined here, homeowners will be equipped to care for their foundation with the ultimate parging guide’s invaluable advice. What is Parging? Parging refers to applying a thin layer of cement, lime or gypsum mortar onto a rough masonry surface like concrete block or poured concrete foundations. This smooth coating, which is usually around 1/4 inch to maximum 3/4 inch thick, is troweled onto the foundation walls to refine and cover up imperfections in the surface. Parging creates a uniform texture that improves the overall aesthetic appeal of your property. Beyond aesthetics though, it acts as an important protective barrier for your home’s basement or crawl space walls. The benefits of professional parging Durability and protection As the capital city of New Brunswick, Fredericton sees all four seasons with snowy winters and rainy springs/falls. Parging provides an extra layer of weather protection, shielding your foundation from damage caused by environmental factors like wind, rain, sun exposure and temperature fluctuations. The thin cement coating acts as a waterproof barrier, helping prevent water infiltration issues. Enhancement of curb appeal A freshly parged exterior foundation adds polish and refinement to your home’s looks. The added aesthetics boost the curb appeal and perceived value of your property. Smooth, uniform parging improves overall impressions compared to an unrefined masonry surface showing its age. Prevention of moisture damage By keeping water out, parging protects the structural integrity of your foundation. It shields the base of your home from ground movement issues and moisture penetration that can worsen existing cracks or lead to new cracks over time forming. This helps avoid costly repairs from water damage or deterioration down the road. Expert craftsmanship for optimal results Hiring professionals with experience in parging means the job will be done efficiently and with precision. Contractors know which materials and application techniques will produce the longest lasting results. They’ve seen issues that can arise and know how to remedy imperfections that a DIYer may miss. When to consider parging There are a few signs that indicate your home may need a professional parging job: Existing cracks in the foundation walls – especially if they are growing larger or new ones forming General deterioration of the masonry surface like pitting, efflorescence or damage from moisture Loose or crumbling mortar joints that need re-tuckpointing If doing renovations that require exposing foundation walls To upgrade the look of an older home’s exterior for improved curb appeal During a home sale to appeal to buyers It’s best to parge in late spring or early fall when the weather is mild and dry periods can allow proper curing. Most contractors recommend re-parging foundations every 10-15 years depending on the home and level of wear from environmental factors. The parging process Surface preparation The foundation walls are cleaned and any existing deteriorated parging or stucco is removed. Loose mortar between blocks or bricks is raked out and repointed. Material selection A cement-based parging mixture is selected, often involving portland cement, sand and a bonding agent. Some mixes add acrylic for better flexibility. Application The parging material is applied in thin 1/4-3/4 inch coats using a trowel, working the mixture into any voids or imperfections. Multiple lighter coats allow proper curing between layers. Smoothing and finishing The final coat is troweled to achieve a smooth, even texture. Too much water is avoided, and flashing is protected before it fully dries. Curing and protection Once applied, parging requires time to cure properly—typically 2-4 weeks. It’s crucial to keep the new cement damp and protected from sunlight, wind, and frost during the curing stage. Final inspection Before the contractor completes the job, they will inspect for any imperfections needing touch-ups once fully cured. The finished product should have a long-lasting, polished appearance. Maintaining your parged foundation A few minor maintenance tasks can extend the life of your parging: Inspect concrete parging annually for cracks and detachment, making repairs promptly Wash down exterior walls yearly using a pressure washer to remove dirt, mildew and airborne pollutants Seal professionally every 5-10 years using a masonry waterproofing sealer to repel water Trim back any vegetation like shrubs or bushes directly against the parging surface Contact a local masonry contractor in Fredericton if structural issues arise in the foundation requiring reparging Masonry contractors in Fredericton For high quality parging services, consider hiring a reputable contractor with experience working on Fredericton homes. Atlantic Brick & Stone is a locally owned masonry company offering parging, tuckpointing, repointing, stone veneer installation and other masonry construction and repairing services. As the largest masonry contractor in the city, our team applies the highest standards to all jobs. We can inspect your home’s exterior and foundation, then provide a free quote on any recommended parging work. Your foundation protection is in good hands with our expert craftsmanship and attention to detail. FAQ about parging How far down the foundation does parging go? Parging is generally applied to the visible portions of foundation walls above ground level. It covers the concrete or masonry surfaces that are outward facing and exposed to the weather. Underground portions below grade are not usually parged. Can stucco be used like parging? While stucco and parging serve similar protective functions, stucco may not always be suitable for foundation walls. Stucco is a strong option if applied correctly based on the material and integrity of the foundation. Homeowners should consult a professional contractor to determine the best coating for their specific walls. What should you do if the parging is flaking? If the parging has started to peel away from the foundation in small pieces, it’s important to repair it. The loose chunks should be removed, the wall cleaned, and a

Brick Chimney rebuild Fredericton
Uncategorized

How to Spot Winter Damage on Your Brick Chimney?

How to Spot Winter Damage on Your Brick Chimney? Winter weather can be harsh on your home’s brick chimney. As temperatures drop, ice, snow, and freezing rain take their toll on masonry materials. Over time, this winter damage can threaten the safety and structural integrity of your chimney if left unaddressed. However, catching problems early allows for minor, affordable repairs. Learn how to spot the key signs of winter damage before they worsen. Protecting your chimney from further decline is possible with regular inspections and maintenance. The Winter’s Impact Harsh conditions during the winter season take a toll on exposed masonry chimneys. Knowing how winter damages chimneys helps you detect and prevent the issues. As ice and freezing temperatures drop below freezing in Fredericton, water in tiny pores and cracks in bricks and mortar freezes and expands. This freeze-thaw cycling places stress on masonry and causes surface damage over time. Snow sitting on the chimney top also insulates it, prolonging frozen conditions. Each expansion from freezing puts pressure on surrounding materials. Repeated cycles cause bricks and mortar to crack, crumble, or pop out. Eventually, this spalling gets deep enough to jeopardize the chimney’s integrity. Catching it early allows sealing cracks before significant damage occurs. Winter Damage on Brick Chimneys – Key Signs Learn what to look for during inspections or periodic chimney checks for signs it needs repair. Addressing issues promptly prevents further winter damage down the line. Spalling Bricks Spalling refers to surface chunks coming loose from brick faces, which is a clear sign of freeze-thaw damage caused by winter weather. Spalling involves bricks or portions of bricks popping out from the masonry surface, leaving behind small rough spots that have cracked or crumbled away from the brick face. If left unaddressed, spalling will worsen over time as it deepens and weakens the structural integrity of the chimney. As spalling exposes brick pores, it allows moisture to enter and become trapped where it enlarges cracks during successive freeze-thaw cycles in winter months. Without needed repairs to repoint or replace loose bricks, cracks will continue growing larger until complete brick deterioration occurs. This is why catching spalling early through regular chimney inspections enables homeowners to repair loose bricks before cracks have an opportunity to spread further. Deteriorating Mortar Joints Deteriorating mortar joints from freeze-thaw damage in winter is another key sign homeowners should watch for. Mortar holding bricks together is equally as susceptible to damage over time from harsh weather. When mortar becomes weakened, it begins to crack, crumble, or separate from the bricks it joins. This allows for water penetration into the chimney if not properly addressed. Careful inspection can help identify failing mortar. Look for cracks, voids, or loose and missing material where mortar should be smoothly connecting each brick. Crumbling or cracked mortar that has pulled away from the edge of bricks indicates deterioration. Proper repointing helps seal these openings caused by damaged mortar. Repointing, known as tuckpointing, is the process of repairing failing mortar joints. It involves removing any deteriorated mortar before filling cracks and spaces between bricks with a fresh layer of mortar. Tuckpointing successfully reseals the entire chimney to prevent further water intrusion and damage from winter weather. By repairing compromised mortar joints, the long-term protection and integrity of the masonry structure is maintained. Efflorescence The appearance of a white powdery residue known as efflorescence indicates the presence of some level of unwanted moisture within the chimney system. This residue is comprised of salts that have leached from either water or chemicals naturally found within the bricks themselves. As areas of embedded moisture dry out, the salts are left behind in a deposit on the brick faces. While efflorescence itself is not damaging to the masonry, its presence implies that water is gaining access from unsealed cracks or openings in the brick or mortar. These access points pose the risk of exacerbating freeze damage issues if not addressed. As moisture enters during rain or snowmelt, it can become trapped behind porous materials where freezing temperatures enlarge any existing cracks or fissures. Homeowners should inspect for potential cracks or leaks whenever efflorescence is spotted. The powdery residue flags the need to determine how water may be accumulating. By promptly making repairs to seal openings, damage escalation can be prevented winter over winter. Catching efflorescence deposits early allows homeowners to attend to issues before deterioration increases or spreads. Chimney Leaks Water damage from leaks often first appears at the top of the chimney and works its way down over time if not addressed. Leaks allow moisture to penetrate into the porous masonry materials. Therefore, homeowners should carefully inspect the chimney crown, seams where the chimney meets the roof, and any existing flashings for cracks or crevices that could allow water to enter during heavy rains or melting snows. Evidence of leakage may also be seen further down in the form of water staining on flue tiles within the chimney or discoloration on the exterior masonry just below leak points. Being on the lookout for any indication of intrusion is important to catch problems quickly. If leakage sources are ignored, water will gradually travel deeper into the chimney structure. Repeated freezing and thawing due to harsh winter weather causes existing cracks to expand further over time. This causes gradual breakdown of the bricks from the inside out. The extensive internal damage and deterioration that results becomes progressively more extensive and costly to repair the longer the sources of moisture are left unaddressed. Promptly stopping water infiltration protects the long-term integrity of the chimney masonry. Structural Issues The weakening effects of harsh winter weather over many years can develop into larger structural problems for a brick chimney if damage goes unaddressed. Homeowners should watch carefully for any visible cracks that run all the way through bricks or mortar joints. Other signs like leaning, buckling, or displacement of the chimney crown also indicate issues taking hold below the surface. These types of structural deficiencies suggest the deterioration process

concrete walkway installation Fredericton
Uncategorized

Comparing Paver and Concrete Walkways for Your Outdoor Space

Comparing Paver and Concrete Walkways for Your Outdoor Space When planning to upgrade your outdoor living area, one of the biggest decisions you will face is choosing between installing paver walkways or poured concrete paths. Both options have pros and cons to consider for your specific needs and budget. As a homeowner in Fredericton, understanding the differences between pavers and concrete can help you select the best surface for your patio or walkway project. This article will break down the key factors to compare when choosing pavers versus concrete for your home’s outdoor spaces. By the end, you’ll have insight into cost, maintenance requirements, design options, installation process, and long-term durability of each material so you feel confident making the choice that maximizes value and functionality.  Paver Walkways Pavers come in a variety of materials like natural stone, brick, and concrete units that can be assembled into a patterned walkway or patio surface. Common pavers used for outdoor applications include: Concrete pavers: Durable and consistent rectangular or square pavers made to imitate stone or brick. Very cost-effective option. Natural stone pavers: Great visual appeal but more expensive than concrete, with potential for stains or cracking over time. Requires sealing. Brick pavers: Classic red or brown brick adds charm but absorbs more water than other options. Needs sealing in climates with freeze/thaw cycles. While individual pavers may crack over the years, the modular structure of paver installations allows for easy replacement of compromised blocks, unlike an entire slab. Pavers also allow for intricate designs and patterns that concrete slabs cannot replicate as easily. Concrete Walkways Poured-in-place concrete is durable, long-lasting, and the go-to material for walkways across New Brunswick. Concrete comes in broom-finished, stamped, and exposed aggregate options at varying price points. Decorative techniques like etching, stenciling, and surface staining can customize stamped concrete’s visual appeal. Some pros of concrete include its monolithic structure for a level, seamless surface. However, concrete slabs are prone to cracking from temperature fluctuations along their edges without proper expansion joints. Nonetheless, concrete remains affordable and low-maintenance when installed correctly by a skilled hardscape contractor in Fredericton. Cost Considerations One of the first factors any homeowner considers is the project budget. Both concrete and paver options have initial installation costs as well as long-term costs to factor into planning: Initial Installation Costs Pavers: On average, interlocking patio pavers cost between $20-40 per square foot to install depending on material, patterns, installation complexity, and regional rates. Concrete: Poured concrete often costs $10-30 per square foot, with basic broom-finished concrete around $10-15 per square foot. Stamped concrete costs between $15-30 per square foot. The upfront costs of basic concrete and pavers are competitive, though pavers offer design flexibility to justify higher costs. Long-term Costs Over a 15-20 year period, maintenance and potential repair costs become a factor. Concrete is durable but needs periodic patching and sealing. Pavers, with their modular structure, allow inexpensive repairs by replacing single compromised units, giving them a long-term cost advantage in most climates. Durability and Maintenance Durability of Materials Concrete withstands compressive forces well but is prone to cracking from soil and temperature changes. Concrete pavers are very crack-resistant due to their modular structure, where only individual units may need replacing. Natural stone like bluestone is highly durable but can absorb water, potentially leading to staining or cracking. Maintenance Requirements Both concrete and pavers need occasional sealing to prevent water absorption and staining. Concrete may need more frequent resealing every 3-5 years, while pavers need sealing every 5-7 years. Pavers have an advantage in lower long-term labor expenses, as single units are replaced instead of large concrete patches. Aesthetics and Customization Visual Appeal Concrete offers modern, clean-lined looks with smooth or simple stamped patterns. Pavers enable intricate designs and a natural worn look from brick, stone, or large concrete units. Customization Options Concrete finishes include stamped, colored, stained, and exposed aggregate variations, while pavers enable complex, curving designs and intricate patterns. Synthetic stamped concrete can mimic various stone or brick aesthetics, but pavers offer unmatched design versatility for exotic hardscaping. Installation Process Preparing for Installation Concrete or paver walkways require soil excavation, compacted gravel beds, and edging materials to ensure proper drainage and prevent long-term water issues. Installation Challenges Concrete requires skilled labor and tools for quick placement within a narrow hardening window. Pavers install more flexibly but demand skill for intricate bond patterns, especially with curves. Professional installation ensures a durable, problem-free surface. Other Factors Permeability and Drainage Concrete is impervious, increasing runoff, while pavers allow rainwater infiltration through joints, aiding drainage. Value to Your Home Attractive, low-maintenance hardscapes boost resale value. Pavers retain their value better than cracked or repaired concrete slabs. Customization Ability Over Time Pavers allow flexible reconfiguration, unlike concrete slabs that require extensive repairs. This adaptability enhances long-term value as family needs evolve. Hardscape Contractor for Concrete and Paver Walkways in Fredericton For expert patio or walkway installations using concrete or pavers in Fredericton, Atlantic Brick and Stone offers a wealth of experience. Our team handles diverse materials like interlocking concrete pavers, natural stone, and poured concrete surfaces. We provide full masonry services, including installations, repairs, restorations, and maintenance. With detailed estimates and tailored consultations, homeowners can trust that our high workmanship standards and warranty will ensure lasting results. Get Your Paver or Concrete Walkway Construction Estimate Online Now! 506-304-0771 atlanticbrickandstone@gmail.com Request an Estimate

commercial masonry contractor in Fredericton
Uncategorized

Demonstrating Different Types of Commercial Masonry Work

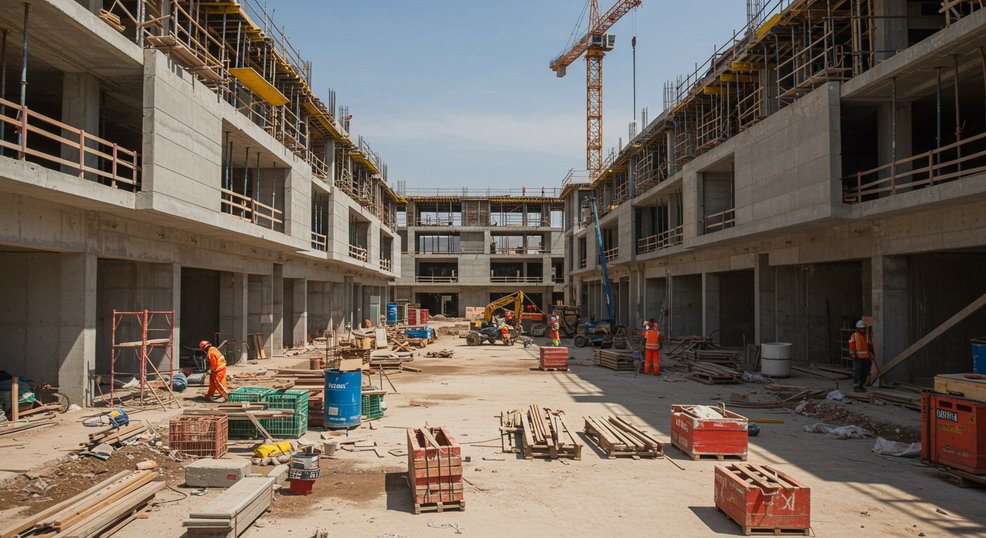
Demonstrating Different Types of Commercial Masonry Work Whether constructing a new commercial building or renovating an existing structure, the masonry work you choose will be fundamental to the building’s stability, aesthetics and durability for decades. This article explores the various types of commercial masonry services available and how skilled masonry contractors expertly execute projects using these techniques. Read on to learn about bricklaying, blockwork, stone masonry, repairs, and more. Bricklaying One of the foundational skills for any mason is bricklaying. This process involves precisely laying bricks in mortar to construct walls, facades, and partitions for commercial buildings. A skilled bricklayer understands how to run accurate bond patterns, apply the proper amount of mortar, and ensure tight joints between bricks to maximize the structure’s durability and aesthetics. For many commercial structures, the quality of the brickwork sets the tone for the entire building. Investing in experienced bricklayers pays off through a commercial building that stands strong for decades without issues like cracking or efflorescence compromising the exterior. Concrete Block Masonry For commercial construction projects requiring sturdy, economical walls like those in warehouses or industrial buildings, concrete block masonry is often ideal. Skilled masons shape and install interlocking concrete blocks, reinforcing them with mortar for optimal structural integrity. The hardened blocks resist impact, fire, and moisture better than traditional brick, and allow for embedding items like electrical lines or plumbing. Expertly installed concrete block masonry ensures your commercial structure has long-lasting durability for both load-bearing and non-load-bearing walls. Stone Masonry While more expensive initially, stone masonry enhances the aesthetic beauty and prestige of commercial buildings for decades. Crafted skillfully by stonemasons, natural stone and manufactured stone veneer facades require immense precision in layout, cutting, and attachment. Detailed stonework amplifies the curb appeal and timelessness of properties like offices, hotels, or restaurants. The sophisticated luxury and craftsmanship of stone masonry promote your commercial brand’s appeal for years. Repointing and Repair All masonry buildings require repairs and repointing over time to maintain integrity. Masons specializing in these restoration needs expertly remove deteriorated mortar and replace it with a durable, breathable mixture matching the original materials. Repointing stabilizes cracking between bricks to safeguard the structural envelope. Additional repairs for efflorescence, displaced bricks, and erosion are also completed by skilled restoration masons, protecting integrity long-term. Architectural Ornamentation For commercial projects demanding distinctive architectural flourishes, skilled ornamental masons craft one-of-a-kind details. Working in stone, precast concrete, and terracotta, their sculpting talents render elements like engraved signage, medallions, intricate cornices, columns, and arches. These creations enhance visual appeal and brand identity for commercial buildings. Beyond aesthetics, their creations often serve structural purposes, like reinforced concrete columns. Fireplace and Chimney Construction Whether constructing a lobby fireplace or shop chimneys, commercial masons build fireplaces and chimneys with care. From custom stone fireboxes to structural block stacks extending several stories, their expertise ensures durability over decades of use. Meticulous craftsmanship yields fireplaces that optimize fuel efficiency while meeting building codes. Proper chimney construction by qualified masons safely ventilates smoke and fumes, protecting commercial occupants. Paving and Hardscaping For plazas, sidewalks, patios, and driveways, expertly laid masonry pavers withstand foot and vehicle traffic. Whether using brick, block, or natural stone, hardscape specialists install interlocking units with precise sloping, compaction, and jointing to prevent shifting. Along with durability, specialized masons create hardscaping that enhances commercial properties through patterns, logos, and borders. Professional paving and sealing yield low-maintenance, long-lasting outdoor areas. Foundation Work A commercial structure’s foundation is critical, and only commercial masonry contractors can build it correctly. They expertly mix, pour, and shape structural concrete footings, walls, and pilings to foundation grade beams. Expertise includes below-grade waterproofing, drainage systems, and steel reinforcement. Masons precisely laying block or brick basement walls further strengthen foundations from within. A solid foundation by qualified professionals ensures weight-bearing capacity and longevity. Waterproofing and Sealing Beyond masonry itself, experts protect components through advanced waterproofing. Skilled applicators install membranes, coatings, or bentonite clay to block moisture at joints or cracks. They seal exposed masonry surfaces with breathable sealants to prevent weathering. Beyond new builds, sealing restoration projects safeguards fresh repairs. Certified waterproofing professionals combined with drainage systems ensure your commercial structure stays dry indefinitely. Choose the Best Commercial Masonry Contractor in Fredericton Atlantic Brick and Stone is a top choice for commercial masonry work in Fredericton. With 15+ years of experience in residential and commercial construction, we handle projects of all scopes and budgets. Our experienced masons are skilled in materials from brick and concrete block to natural stone, ensuring code compliance, timely delivery, and long-lasting finishes. We stand behind our work with a warranty. For your next commercial masonry project in Fredericton, contact Atlantic Brick and Stone. We provide free, no-obligation estimates and strive to meet every client’s needs and budget. In Summary Many notable construction projects rely on skilled masons to bring vision to life through high-quality commercial masonry work. Whether installing ornamentation or structural block walls, masonry contractors provide durability, artistry, and precision. The right materials and expert installation ensure results that stand the test of time, maintaining function and curb appeal indoors and outdoors. Choosing proven masonry companies like Atlantic Brick and Stone ensures the job is done right the first time. FAQ for Commercial Masonry Work What are the risks of working with cheaper masonry contractors? Cheaper contractors may use inferior materials and improper methods, leading to quicker cracking, leaks, and structural issues that are more costly to fix than quality work upfront. Why choose one of our masons? Our masons undergo extensive training and have decades of experience. We proactively address potential problems and stand behind our craftsmanship, returning to resolve any issues at no additional cost. Can all masons handle commercial construction? Commercial masonry requires adherence to strict codes and standards for larger buildings. Atlantic masons are experienced in commercial materials and techniques and operate equipment at heights with full certification. Get Your Commercial Masonry Project Estimate Online Now! 506-304-0771 atlanticbrickandstone@gmail.com Request an Estimate

GET STARTED

START MASONRY PROJECT THE RIGHT WAY

Create stunning structures with our residential and commercial masonry services in Fredericton. From meticulous designs to the completed build, our process is professional and rewarding, and we can’t wait to build your dream with you.

Atlantic Brick and Stone, one of the best masonry contractors in Fredericton, NB

Contact

8 Muskie Street, Lower Kingsclear, New Brunswick E3E 0E7, Canada

Scroll to Top