Author name: richardonna@rogers.com

Early Signs of Concrete Spalling
Uncategorized

How to Identify the Early Signs of Concrete Spalling?

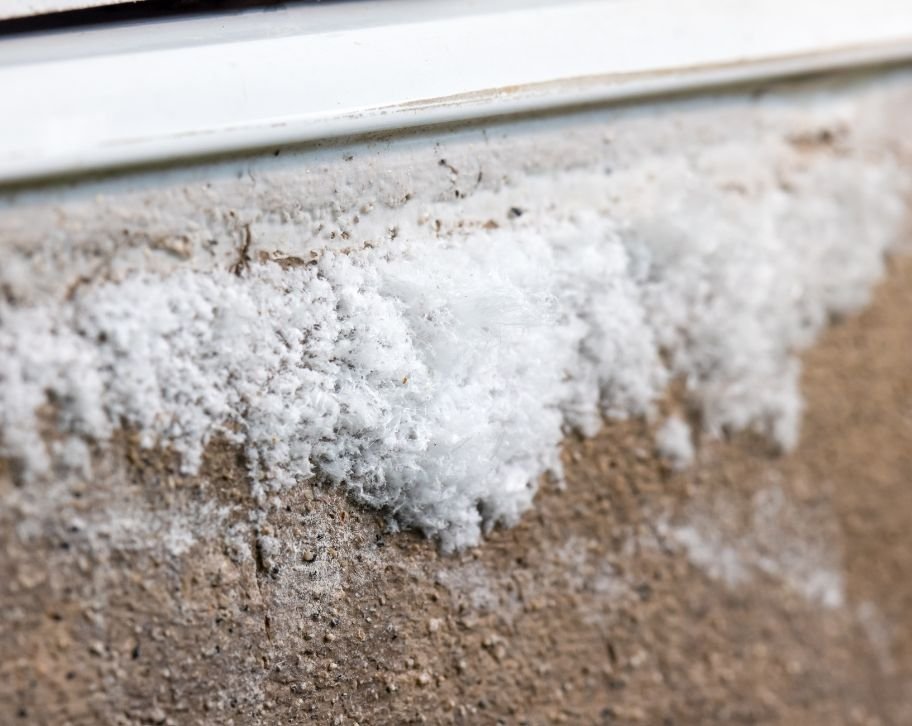
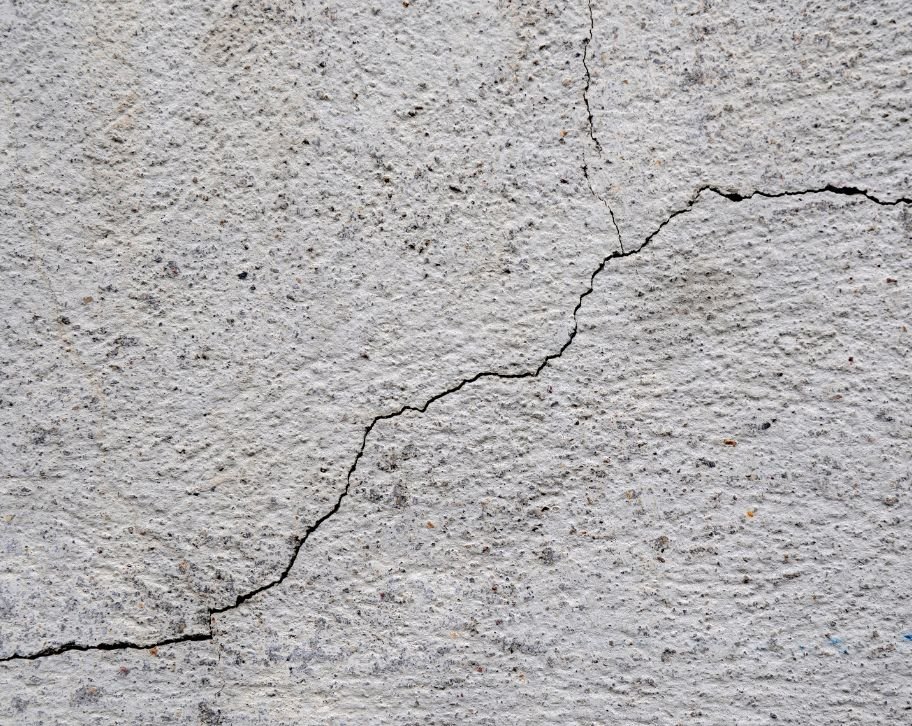
How to Identify the Early Signs of Concrete Spalling? The beauty of a concrete structure can quickly deteriorate into a worry when spalling sets in. This destructive process often begins subtly, making it easy to overlook until significant damage has already occurred, potentially leading to extensive repairs and safety concerns. We will help you become a concrete detective by teaching you to identify the early warning signs of spalling. From understanding surface patterns to recognizing dangerous developments, this guide will equip you with the knowledge to protect your concrete investments. Surface cracks and flaking You might dismiss tiny lines on your concrete slab as normal wear, but these hairline cracks often signal the beginning of spalling concrete. Walking across your walkway or patio, run your fingers over suspicious areas—does the surface feel rough where it once was smooth? That’s your concrete beginning to flake. When water seeps into concrete pores and freezes, it can expand by nearly 9%, creating internal pressure that eventually forces the surface to chip away. This expansion happens repeatedly during freeze-thaw cycles, gradually weakening the concrete structure. Look closely at these areas: Edges and corners of slabs (they’re most vulnerable) Around drains where water pools Areas exposed to heavy traffic If you notice small concrete pieces coming loose or the surface beginning to peel in layers, you’re witnessing the early stages of spalling. The concrete surface might feel sandy or rough as the cement paste deteriorates, exposing the rocky concrete aggregate underneath. Taking photos every few months helps track whether these minor issues are worsening. Early detection means simpler repairs—patching small areas costs significantly less than replacing entire sections of spalled concrete. Discoloration Walking across your driveway or patio, you might notice patches that appear darker or lighter than surrounding concrete. This discoloration isn’t just a cosmetic issue—it’s your concrete trying to tell you something important about what’s happening beneath the surface. Concrete naturally maintains a consistent color when healthy. When you spot whitish areas, this often indicates efflorescence—salt deposits rising to the surface as water evaporates from within the concrete. This suggests moisture penetration into your concrete, the primary culprit behind spalling. Darker patches typically mean moisture retention. Your concrete is absorbing and holding water like a sponge, setting the stage for damage when freeze-thaw cycles in Fredericton occur. These temperature fluctuations cause water trapped within the concrete to freeze and expand, creating pressure that leads to spalling. Pay special attention to: Streaky patterns following the slope of your concrete Concentrated dark spots that don’t dry at the same rate as surrounding areas Circular discoloration around drains or downspouts These color changes often appear months before physical damage becomes visible, giving you valuable time to apply a penetrating sealer or take other preventive measures before repair becomes necessary. Pitting When examining your concrete surface, run your hand across areas that don’t look quite right. Do you feel small depressions or craters? These pits aren’t just surface blemishes—they’re clear indicators that your concrete is breaking down from within. Pitting occurs when small sections of the concrete surface erode away, creating shallow depressions typically ranging from 1/8 to 1/4 inch deep. This deterioration happens when the cement paste weakens, allowing small pieces of aggregate to become dislodged. Common causes of pitting include: Chemical exposure (road salts, pool chemicals, fertilizers) Poor finishing techniques during installation Inadequate concrete mix proportions Improper curing after pouring The danger lies in what pitting represents—compromised concrete that will continue to deteriorate unless addressed. Water collects in these depressions, accelerating damage through freeze-thaw cycles. Think of each pit as a tiny reservoir that helps water penetrate deeper into your concrete. Monitoring whether these pits grow larger or multiply helps determine how quickly spalling is progressing and when repair becomes urgent. Rust stains Brown or orange streaks staining your concrete surface aren’t merely unsightly—they’re telling you something critical about what’s happening inside your concrete structure. These rust stains signal that moisture has reached the steel reinforcement within the concrete, causing it to corrode. Steel rebar gives concrete its tensile strength, but when water penetrates through cracks or porous concrete, it triggers a chemical reaction. The steel reinforcement begins to rust, and here’s the dangerous part—rust can expand up to four times the original volume of the steel. This expansion creates massive internal pressure, forcing the concrete to crack further and eventually spall. You’ll typically notice these stains: Following crack patterns in concrete In horizontal streaks on vertical surfaces like walls Around joints where water infiltration is common Near exposed rebar ends The appearance of rust on your concrete surface means corrective action is needed promptly. This isn’t just about aesthetics—a corroding rebar loses its strength, potentially compromising the structural integrity of your entire concrete element. Address moisture sources immediately and consult with a professional about proper concrete repair options. Ignoring rust stains today means facing much more extensive concrete repair tomorrow. Hollow sounds Grab a metal object like a coin or hammer and gently tap across your concrete surface. Listen carefully—does it make a solid, dense sound, or do certain areas produce a hollow, drum-like response? This simple test can reveal hidden problems within your concrete that aren’t yet visible to the eye. When concrete is properly bonded throughout, it produces a solid sound when tapped. A hollow sound indicates that layers within the concrete have separated (delamination) or voids have formed. This internal separation happens when water gets trapped between layers of concrete or when the surface layer begins pulling away from the substrate. Try this test: Tap in a grid pattern every few inches Mark hollow-sounding areas with chalk Compare these areas with visible surface signs like cracks or discoloration These hollow sections are particularly vulnerable during freeze-thaw cycles. Water can collect in these voids, freeze and expand, causing rapid deterioration from within the concrete. Even without freezing, these delaminated areas have less structural support and can crack under regular weight loads. Don’t ignore these sounds—they often precede visible spalling by months.

How to Inspect Chimney Mortar Joints for Damage
Uncategorized

How to Inspect Chimney Mortar Joints for Damage?

How to Inspect Chimney Mortar Joints for Damage? Winter is over, and spring is here in Fredericton. Those months of snow, ice, and freezing temperatures have been quietly attacking your chimney’s mortar joints. What looks fine from your living room could be showing serious wear and tear outside, putting your home’s safety at risk and potentially leading to costly repairs. Your chimney inspection doesn’t have to be complicated. Starting with basic ground-level checks and moving to detailed examinations of specific areas, you can effectively identify potential problems. This guide will walk you through each step of checking your chimney’s condition. Why it is important to Inspect chimney mortar joints? Your chimney’s structural integrity depends heavily on the condition of its mortar joints. These joints are like the glue that holds your chimney’s masonry together, and when they start to deteriorate, it can spell trouble for your home’s safety. Think of mortar joints as your chimney’s first line of defense against water damage. When these joints weaken or crumble, moisture can seep in, causing spalling bricks and compromising the structural integrity of the chimney. This water infiltration can lead to costly repairs if left unchecked. Regular chimney inspection helps identify signs of chimney damage early on. By checking your chimney mortar joints routinely, you can avoid expensive chimney repair services and keep your fireplace working efficiently. Professional chimney experts recommend annual inspections to maintain your chimney’s lifespan. How to prepare for chimney inspection Safety precautions first Before inspecting your chimney masonry, safety should be your top priority. When performing a chimney structural assessment, always wear appropriate gear including non-slip boots and secure yourself with a safety harness if you are heading up to the roof. Weather plays a huge role in safe chimney inspection. Skip checking your mortar joints during wet, icy, or windy conditions. These conditions make brick and mortar surfaces extra slippery and dangerous. If you are unsure about climbing ladders or accessing your roof safely, it’s best to call professional chimney repair services in Fredericton. A certified chimney expert can handle the inspection while keeping you safely on the ground. Essential tools for a thorough inspection Quality binoculars for safely examining chimney masonry and mortar joint deterioration from ground level, focusing on hard-to-spot brick joint issues. Strong flashlight and probing tools like screwdrivers to check mortar erosion and assess the extent of weathering damage. Digital camera to document signs of chimney damage, brick deterioration, and areas needing tuckpointing or exterior masonry evaluation. Protective eyewear and stable ladder when conducting close-up chimney structural assessment, especially for upper sections requiring detailed inspection. Visual inspection Ground level inspection Start your chimney inspection from the safety of the ground using binoculars. Look carefully at your chimney structure, focusing on the mortar joints between bricks and any signs of chimney damage. Pay special attention to areas where moisture damage commonly occurs. Check the chimney flashing and crown for wear and tear. These areas often show the first signs of deterioration and can lead to water leaks if not addressed. Your flue liner might also show visible damage from ground level. Watch for cracked mortar or spalling bricks forming stair-step patterns. These common signs of chimney masonry issues could indicate serious structural problems that need chimney repair services. Close up roof inspection When examining your chimney up close, focus on each mortar joint between the bricks. Fresh mortar should be firm, while deteriorating mortar joints might crumble when touched. Use a screwdriver to gently test the mortar’s strength – it shouldn’t be soft or easily scraped away. Look for damaged bricks showing signs of spalling or excess moisture. White powdery deposits on masonry surfaces often indicate water penetration within the chimney structure. The presence of moss or plant growth suggests ongoing moisture problems that could compromise your chimney’s structural integrity. Identifying specific types of mortar damage Cracks in mortar joints Your chimney’s masonry joints might show various types of cracks. Horizontal cracks are particularly concerning as they often signal serious structural problems. These types of damaged mortar joints need immediate attention from chimney experts to prevent further deterioration. Missing mortar When mortar joints deteriorate and fall out, your chimney becomes vulnerable to water damage. These gaps between bricks can quickly lead to costly repairs if not addressed. Professional tuckpointing can restore these areas before more extensive chimney masonry repair is needed. Spalling issues Spalling bricks occur when moisture gets trapped inside the masonry. You will notice pieces of brick flaking off or crumbling, a clear sign your chimney needs repair. This type of brick deterioration can seriously weaken your chimney’s structural integrity. White staining Those white, chalky deposits (efflorescence) on your chimney aren’t just unsightly – they are warning signs. This indicates water is moving through your masonry, potentially causing internal damage that requires chimney repair. Moss development Finding moss on your chimney masonry means excess moisture is present. While moss might seem harmless, it traps water against the brick and mortar, accelerating wear and tear. Regular chimney maintenance should include removing moss before it causes serious damage. Inspect critical chimney components Chimney crown assessment The chimney crown is your first line of defense against water damage. Check for signs of weathering or cracks that could let moisture seep into your masonry. A damaged chimney crown can quickly lead to deteriorating mortar joints and weakened structural integrity below. Flashing examination Your chimney’s flashing prevents water from entering where the masonry meets your roof. Inspect for any gaps or rust that might compromise its effectiveness. Poor flashing often causes serious water damage to both your chimney structure and surrounding roof area. Flue system check Don’t overlook your chimney flue during inspection. The mortar joints around flue tiles need to be intact to prevent dangerous leaks. This area is crucial for your chimney’s safety and proper function, as damaged mortar here can lead to costly repairs and potential fire hazards. Firebox and flue inspection Your firebox reveals important clues about your chimney’s health. Check the

Benefits of Choosing to Resurface Concrete Steps with Stone
Uncategorized

Benefits of Choosing to Resurface Concrete Steps with Stone

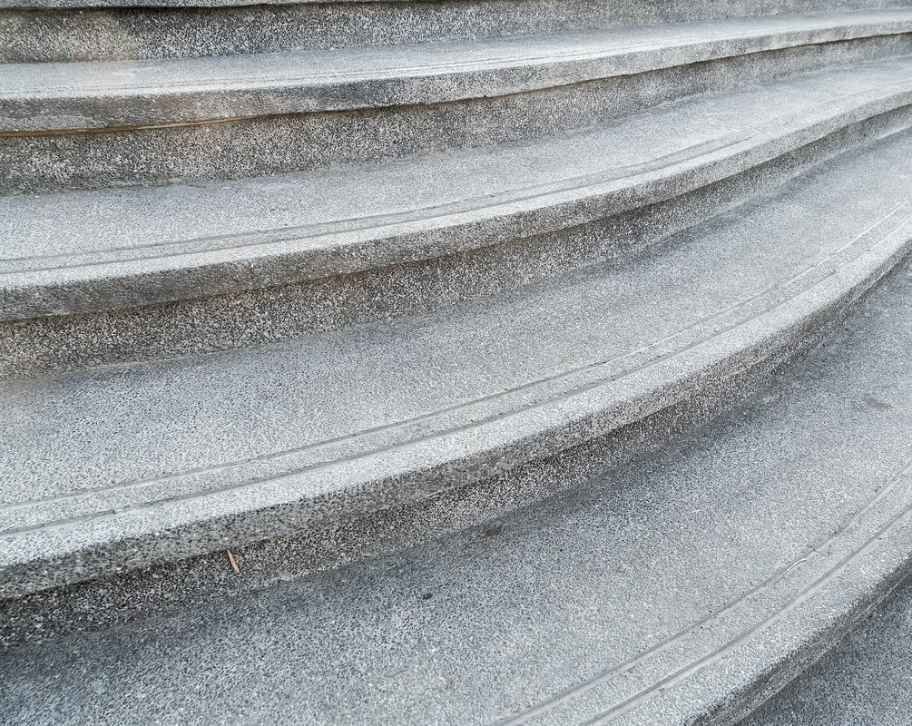
Benefits of Choosing to Resurface Concrete Steps with Stone Worn, cracked concrete steps can diminish a home’s first impression. Rather than costly replacements, stone resurfacing offers a transformative solution. This method breathes new life into tired steps, blending the enduring beauty of natural stone with the existing concrete structure. It’s a practical, aesthetically pleasing approach that elevates curb appeal and adds lasting value. Can concrete steps be resurfaced with stones? Stone resurfacing offers a beautiful and durable solution. This upgrade can breathe new life into worn-out steps while adding natural elegance to your home’s entrance. The process begins with thorough preparation. Your existing concrete steps need proper cleaning and surface roughening to ensure strong adhesion. This crucial step creates the foundation for lasting results. The installation involves applying a mortar bed and carefully placing stones. Each stone is precisely positioned to create an appealing pattern. Once set, grout fills the spaces between stones, binding everything together. Proper curing time is essential for durability. When done correctly, stone-resurfaced steps provide both aesthetic appeal and long-lasting functionality, making them a worthwhile investment for your home. Why you should resurface concrete steps with stone? Aesthetic enhancement When you resurface concrete steps with stone, you instantly upgrade your home’s curb appeal. Think about the difference between plain gray concrete and the rich, natural look of stone. It’s like switching from a basic sedan to a luxury car! Stone comes in many colors and textures that concrete simply can’t match. You can choose from warm sandstone that glows in sunset light, elegant slate in deep blues and grays, rustic flagstone with natural edges, or sophisticated travertine with subtle patterns. Each option brings unique character to your entryway. A stone overlay transforms your entryway from merely functional to truly eye-catching. Your neighbors will notice the difference immediately, and you’ll smile every time you walk up your steps. When you resurface concrete with stone, you’re not just fixing a problem—you’re making a design statement that enhances your entire property’s look. Durability and longevity When you resurface concrete steps with stone, you’re making a smart investment in durability. Stone naturally withstands harsh conditions that cause concrete to crack and chip over time. Your stone-resurfaced steps can easily last decades with minimal maintenance. Concrete often develops cracks from freezing and thawing cycles in Fredericton harsh weather. These cracks grow wider each year, creating tripping hazards and allowing water to cause further damage. Many homeowners find themselves needing to repair or resurface concrete steps every few years. Stone resists this cycle of damage. Its natural composition handles temperature changes without cracking. When properly installed, stone overlay creates a protective barrier that extends the lifespan of your existing concrete underneath. Regular concrete steps typically last 15-20 years before major repairs are needed, while stone-resurfaced steps commonly last 30+ years with basic care. This significant difference in longevity makes stone a wise long-term choice. This longevity makes stone resurfacing a cost-effective choice in the long run. You spend once and enjoy the benefits for decades, rather than facing repeated repair expenses. Improved safety When you resurface concrete steps with stone, you significantly increase safety for everyone using your entryway. This safety improvement comes from several key features that stone provides. Many natural stones have slightly textured surfaces that offer better grip than smooth concrete. This texture creates natural slip resistance, especially important during rainy or snowy conditions. Your family members and guests are less likely to slip on wet stone steps than on slick concrete surfaces. Stone overlays allow you to fix dangerous cracks in your existing concrete. These cracks often create uneven surfaces where people can trip or stumble. The resurfacing process fills and levels these problem areas, eliminating tripping hazards. You can further enhance safety by choosing stones with natural texture patterns, contrasting colors for step edges, and slightly rounded nosing (front edge) designs. These thoughtful details improve visibility and grip, reducing accident risks. For areas with heavy foot traffic, stone’s durability means the surface remains consistent and safe for years, without developing the worn, slippery patches common to aging concrete. Increased property value When you resurface concrete steps with stone, you make a smart investment that pays off if you ever sell your home. Real estate professionals consistently rank stone features among the top exterior upgrades for return on investment. Stone steps make a powerful first impression on potential buyers. They signal quality and attention to detail throughout the property. While plain or cracked concrete steps might make buyers wonder what other maintenance has been neglected, stone steps suggest a well-cared-for home. The value increase isn’t just about aesthetics. Buyers understand that stone represents reduced future maintenance costs, longer-lasting materials, and higher-end finishes. These practical benefits make your property more attractive to discerning buyers. Reduced maintenance When you resurface concrete steps with stone, you dramatically cut down on maintenance time and costs. Unlike concrete surfaces that need regular sealing and crack repairs, stone requires minimal upkeep to stay beautiful. Concrete steps often develop small cracks that, if left unaddressed, grow larger and allow water infiltration. This leads to even more damage and a cycle of repairs. Each crack needs filling, and the entire surface needs regular sealing to prevent water damage, especially in areas with freezing temperatures. With stone resurfacing, this maintenance cycle is greatly reduced. Natural stone doesn’t crack like concrete does. Most stone types only need sealing every 3-5 years, compared to annual sealing for many concrete surfaces. Daily cleaning becomes easier too. Stone naturally resists staining better than concrete. The textured surface of stone also hides dirt better between cleanings, keeping your entryway looking presentable with less effort. This means more weekend time enjoying your home rather than maintaining it. For busy homeowners, this reduced maintenance schedule is a significant benefit that continues paying off year after year. Thermal regulation When you resurface concrete steps with stone, you gain a surprising comfort benefit: better temperature regulation. Stone’s natural properties help manage heat in ways that

What Signs Indicate that my Concrete Steps need Resurfacing 
Uncategorized

What Signs Indicate that my Concrete Steps need Resurfacing?

What Signs Indicate that my Concrete Steps need Resurfacing? Most owners think concrete steps are durable so they often ignore signs of damage. Those innocent-looking cracks, chips, and uneven surfaces might seem minor now, but they’re actually warning signals of deeper problems. Between harsh weather cycles, constant foot traffic, and seasonal changes, your steps silently suffer daily wear and tear. Luckily, concrete resurfacing offers a cost-effective solution to restore and protect your steps before major repairs become necessary. This process adds a new protective layer to your existing steps, filling cracks and creating a smooth, safe surface. Learning to spot early warning signs can save you thousands in repairs and help maintain your home’s safety and value. What is concrete step resurfacing? Your concrete steps take a beating every single day. Rain, snow, foot traffic, and harsh weather can leave them looking worn and tired. But there’s good news – you don’t always need to tear them out and start fresh. Concrete resurfacing is just like giving your steps a new skin. It involves applying a thin layer of specialized cement-based material over your existing concrete steps. This process can bring back their former glory without the hefty price tag of a complete replacement. You will be amazed at how this repair method can restore the appearance of those weathered steps. Professional concrete contractors can patch small cracks, level uneven spots, and give your exterior concrete steps a fresh, smooth surface that looks as good as new. The best part? When done right, resurfacing can extend the life of your concrete steps by years. It’s like giving them a protective shield against future damage from Fredericton freeze-thaw cycles and daily wear and tear. Key signs that indicate concrete steps need resurfacing Cracks in the concrete Have you noticed those small lines running across your concrete steps? Even tiny cracks shouldn’t be ignored – they’re your steps trying to tell you something’s wrong. These small cracks often signal it’s time to consider concrete repair options. Want to know why those cracks keep showing up? Your concrete steps expand and contract with temperature changes throughout the year. Mix in some settling soil underneath, and you’ve got a recipe for crack formation in your existing concrete surfaces. Those hairline cracks might look harmless now, but they’re like tiny doorways for trouble. Water sneaks in, and when winter hits, that trapped moisture freezes and thaws repeatedly. This creates more pressure, turning those small cracks into bigger problems that need concrete step repair. Here’s why you shouldn’t wait to fix those cracks: Water damage is sneaky. As moisture works its way deeper into the concrete surface, it can cause spalling concrete and more extensive damage. Early repair can save you from costlier fixes down the road. If you are seeing cracks starting to form, it’s smart to have a concrete repair contractor take a look. They can assess the condition of your concrete and determine if resurfacing is the right solution before structural damage becomes a serious concern. The good news? Most cracking issues can be addressed through concrete resurfacing. This repair method not only fills existing cracks but also provides a protective layer to help prevent new ones from forming. Just make sure to catch these signs early! Uneven or sunken steps Does your foot catch when using your concrete steps? Uneven steps aren’t just unsightly – they’re a real safety concern that needs attention. When steps start sinking, concrete repair becomes a priority for your home’s safety. The problem often starts below the surface. Soil erosion under your concrete slab can cause the steps to shift and sink over time. This leads to uneven surfaces that need concrete leveling to fix the issue. You know you have options! While severe cases might need extensive repairs, minor unevenness can often be fixed through concrete resurfacing. A concrete contractor can level these problem areas and apply a resurfacing compound to create a smooth, safe walking surface. Chipping or crumbling edges Are pieces of your concrete steps flaking away? When you notice edges starting to chip or crumble, it’s a clear sign your steps need help. These issues often start small but can quickly turn into bigger concrete repair challenges. Mother Nature can be tough on concrete surfaces. Rain, snow, and constant freeze-thaw cycles work together to break down your steps. When water seeps in and freezes, it causes the concrete to deteriorate and chip away. Don’t let damaged concrete get worse! A timely resurfacing project can stop the deterioration in its tracks. By applying a new surface layer, you’ll protect your steps from further damage and restore their original appearance.  Flaking or scaling surface Notice your concrete steps shedding thin layers like a snake’s skin? This flaking or scaling isn’t just a cosmetic issue – it’s a sign your steps need attention. Over time, this problem can lead to more serious concrete repair needs. The root cause often traces back to how the concrete was finished during installation. Mix that with repeated exposure to moisture and harsh freeze-thaw cycles, and your steps start losing their outer layer, making the concrete surface vulnerable to damage. Professional concrete resurfacing can fix these issues by applying a thin layer of new concrete. This patch job not only repairs the existing concrete surfaces but also helps prevent water from causing further deterioration. Your steps will look better and last longer with proper repair. Discoloration Have you spotted dark patches or rust-colored stains on your concrete steps? These color changes aren’t just unsightly – they might signal deeper problems that need concrete repair attention. Poor drainage often causes water to pool on your steps, leading to those dark spots you see. Even worse, if you notice reddish-brown stains, it could mean the metal inside your concrete steps is corroding, which may require more extensive repairs. Concrete resurfacing can help restore your steps’ appearance while fixing minor slope issues. A concrete contractor can apply a new surface that not only

common mistakes made during the parging process
Uncategorized

Most Common Mistakes Made During The Parging Process

Most Common Mistakes Made During The Parging Process You have probably seen parging on buildings without even realizing it. That smooth, protective coating on concrete or masonry walls is not just for looks—it serves an important protective function.  Parging is a technique that involves applying a thin layer of mortar to concrete or masonry surfaces to enhance their appearance and provide protection against the elements. Despite its importance, you might make critical errors during the parging process that compromise its durability. Understanding these common mistakes can save you time, money, and frustration. The role of parging in masonry surfaces Parging serves as a vital protective shield for masonry surfaces, acting as the first line of defense against harsh weather conditions and moisture infiltration. This protective layer is particularly crucial for foundation walls and exterior masonry, helping prevent water damage and structural deterioration in areas prone to freeze-thaw cycles. Beyond protection, parging plays a significant role in enhancing the durability of masonry structures. By covering minor cracks and imperfections, it strengthens the overall integrity of walls and foundations. The smooth surface created by parging also provides an excellent base for waterproofing membranes and other protective coatings. Parging contributes to energy efficiency by sealing air leaks and reducing drafts. This helps maintain consistent indoor temperatures and can lead to lower heating and cooling costs. Additionally, parging serves an aesthetic purpose by creating a uniform, clean appearance that can dramatically improve a building’s curb appeal while concealing unsightly masonry work. 7 common mistakes to avoid during parging process Low-quality materials The quality of materials you use directly impacts the longevity of your parging project. Low-quality parging material is like building a house on sand—it simply won’t last. Poor-quality cement, contaminated sand, or inferior bonding agents can doom your parging project from the start. These substandard materials fail to create the strong, cohesive mixture needed for long-lasting results. Fresh materials matter tremendously for your project. Cement sitting in your garage for months has likely absorbed moisture and started to harden, making it unsuitable for parging. The quality of sand directly impacts the strength and texture of your parging. Choose coarse, washed concrete sand for best results with your mortar mixture. Using expired or incorrect bonding agents will prevent proper adhesion. This causes your parging to crack or peel away from the wall within months. Improper mixture preparation Precision matters tremendously when mixing your parging materials. Improper mixture preparation ranks among the top reasons why your parging fails. The ratio of water, sand, and cement in your parging mix must be carefully controlled. Too much water weakens the cement’s binding properties. Too little water makes the mixture hard for you to work with and prevents proper adhesion. An excess of sand creates a weak mixture that won’t stand up to weather conditions. For your standard parging mix, you typically need a proportion of 1 part Portland cement to 2-3 parts clean, coarse sand. Water should be approximately 1/5 to 1/4 the volume of dry materials. Necessary additives like air-entraining agents are important for your project. These help your cured parging resist freeze-thaw cycles—critical in colder climates. Poor surface preparation Surface preparation is absolutely essential for your parging success. Your parging material needs something clean and stable to bond with. Dust, dirt, old paint, moss, or loose material will prevent this critical bond from forming. To prepare the surface correctly, you must remove all loose material, dirt, and debris through thorough cleaning. You should repair any major cracks or damage before applying new parging. This creates a solid foundation for your parging material. Dampening the surface before application is one of the most crucial steps. A dry wall will suck the moisture out of your parging mixture too quickly, preventing proper curing. Poor installation Your installation technique can make or break your parging project. Rushing through the application or using improper techniques will lead to an uneven coat and poor adhesion. Applying the parging too thick in a single coat risks cracking. Anything over 3/8 inch per layer is asking for trouble with your masonry project. Not applying enough pressure ensures the mortar won’t bond properly with the surface. The integrity of your parging depends heavily on how you apply it. Your parging technique should involve applying the mixture with a trowel, then allowing it to set slightly. After this initial set, finish with a float or brush to achieve the desired texture. Extreme weather conditions Weather conditions significantly impact the success of your parging project. Applying your parging in harsh weather conditions is a recipe for disaster. The ideal temperature range for your parging project is between 50°F and 80°F. Moderate humidity also plays a key role in proper curing. In cold weather below 40°F, the water in your mixture may freeze before the cement fully cures. This causes expansion that creates cracks in your new surface. In hot weather above 85°F, your mixture dries too quickly on the surface while remaining wet underneath. Windy conditions accelerate drying of your parging, leading to shrinkage cracks. Application timing Your parging has a working “sweet spot”—a limited window of usability. When you mix your materials, you’ve started a clock ticking down. Your fresh parging mixture typically remains workable for 30 minutes to an hour. Using it beyond this window can significantly compromise its strength and adhesion. Adding water to “revive” partially set mortar dramatically weakens your final product. This common mistake reduces the durability of your parging. Overmixing can introduce too much air or break down the initial chemical bonds forming in your mixture. Mix small batches that you can use within the optimal time frame for best results. Lack of proper curing The curing process is often misunderstood as simply “drying.” In reality, curing is a chemical process that requires moisture to continue. Proper curing is critical for developing strength and durability in your parging. The curing time for your parging cement typically ranges from 5-7 days. During this time, you should keep the surface

causes of cracking in cinder block walls
Uncategorized

Causes of Cracking in Cinder Block Walls

Causes of Cracking in Cinder Block Walls You have been watching those cracks in your cinder block walls grow larger, and you’re ready to take action. Before reaching for your phone to call a contractor, it’s essential to understand why these cracks are forming. The visible damage might just be a sign of more serious underlying issues that need addressing. We’ll examine the most frequent causes of cinder block wall cracking, giving you the knowledge you need to make smart decisions about repairs. This understanding helps you prevent future problems and ensures any repairs you make will last. Types of cracks in cinder block walls Horizontal cracks Horizontal cracks in your block wall require immediate attention. These cracks often indicate serious structural problems caused by hydrostatic pressure from water-saturated soil pushing against your foundation walls. The pressure becomes particularly problematic during heavy rainfall or in areas with poor drainage. If your home sits on clay soil, the situation can worsen as clay expands significantly when wet, creating additional pressure against your foundation walls. If you notice your wall beginning to bow inward, this indicates significant structural stress that requires professional evaluation. Water seepage through these cracks often compounds the problem by weakening the surrounding concrete block material. Regular inspection of your foundation walls can help catch these issues early. Vertical cracks Vertical cracks in your cinder block foundation typically result from natural settlement patterns. While some vertical movement occurs in new construction, excessive or uneven settlement can lead to problematic cracking. These cracks run straight up and down your basement wall and may vary in width from hairline to several inches. You should monitor vertical cracks that appear wider at either the top or bottom, as this often indicates ongoing foundation movement. Water infiltration through these cracks can accelerate deterioration, making timely repair essential. Professional inspection becomes necessary if you notice these cracks expanding or if multiple vertical cracks appear across your foundation walls. Stair-step cracks Stair-step cracks following mortar joints signal uneven foundation settlement. These distinctive patterns emerge when one section of your foundation experiences more movement than adjacent areas. The crack usually follows the natural joints between blocks, creating a stepped appearance that can extend across significant portions of your wall. Your foundation might develop these cracks due to soil erosion beneath the structure, inadequate soil compaction during initial construction, or moisture-related soil changes. Tree roots growing near your foundation can also contribute by altering soil moisture levels and creating uneven pressure points. Reasons of cinder block wall cracking Soil Expansion and Contraction Your home’s foundation responds directly to soil movement beneath it. Seasonal changes in moisture content cause soil to expand during wet periods and contract during dry spells. This continuous cycle stresses your foundation walls, potentially leading to cracks in the cinder blocks. Clay soils pose particular challenges because they expand significantly when wet and shrink dramatically when dry. Poor drainage around your foundation exacerbates these issues by allowing water to pool near your foundation walls, increasing hydrostatic pressure and soil movement. Foundation Settlement Natural foundation settlement affects most homes, but excessive movement requires attention. You might notice doors sticking, uneven floors, or gaps between walls and ceilings accompanying foundation cracks. Settlement often occurs due to improperly compacted soil or erosion beneath your foundation. Foundation piers or other stabilization methods may become necessary if settlement continues. Regular monitoring helps identify whether settlement has stabilized or continues to progress, affecting your repair strategy. Poor Construction and Drainage Construction quality significantly impacts your cinder block wall’s resistance to cracking. Inadequate mortar application, improper block installation, or insufficient drainage systems can lead to premature cracking. Your foundation requires proper water management to prevent excessive pressure on the walls. Installing proper drainage systems, including gutters and grading away from your foundation, helps prevent water accumulation. Quality construction practices during initial building or repairs ensure your wall maintains its structural integrity over time. Repair solutions for a cinder block basement wall Here are the key repair solutions for cinder block basement wall cracks: Start with a thorough inspection to pinpoint exact crack locations and patterns – this helps identify whether cracks stem from soil pressure, foundation settling, or moisture issues Clean all crack areas using a wire brush and remove loose debris before starting any repairs to ensure proper material adhesion For hairline cracks under 1/8 inch, inject hydraulic cement or epoxy-based crack filler using a caulking gun, working from bottom to top to avoid air pockets Replace severely damaged or crumbling blocks entirely – carefully remove affected blocks without disturbing surrounding ones, clean mortar joints, and install new blocks with fresh mortar Reinforce stair-step cracks by applying epoxy injection followed by fiber mesh tape before coating with patching compound Install steel reinforcement bars in hollow cores of blocks near major cracks, filling cores with concrete mix for added structural support Seal all repaired areas with waterproof masonry sealer to prevent moisture infiltration that could lead to future cracking Address drainage issues by installing proper gutters and downspouts, grading soil away from foundation, or adding French drains if needed For bowing walls facing serious hydrostatic pressure, install wall anchors or carbon fiber straps for reinforcement Consider root barriers if nearby tree roots are causing wall pressure and movement Use professional-grade epoxy injection systems for structural cracks wider than 1/8 inch to ensure proper bonding and flexibility Monitor repaired areas regularly for signs of new movement or crack development, especially during seasonal changes Remember that while some minor repairs like hairline cracks can be DIY projects, significant structural issues must be fixed by foundation repair contractor to ensure long-term stability and safety. Contact Atlantic Brick And Stone for cinder block wall repair and installation When your cinder block wall needs professional attention, trust Fredericton expert masons at Atlantic Brick And Stone. Our team brings years of experience in diagnosing and repairing all types of foundation wall cracks in Fredericton. Your foundation deserves personalized care, which is exactly what you will receive

Signs of Corrosion in Reinforced Concrete
Uncategorized

What are the Signs of Corrosion in Reinforced Concrete? 

What are the Signs of Corrosion in Reinforced Concrete?  Your concrete structure represents a significant investment, and watching it develop mysterious marks or cracks can be deeply concerning. Each new stain or crack raises questions about structural integrity and safety, yet determining which changes warrant immediate attention and which are cosmetic can seem like an impossible task. This uncertainty often leads to either costly unnecessary repairs or dangerous neglect. Let’s clear up this confusion by examining the clear signs of concrete corrosion you need to know. There are specific indicators – from rust stains and spalling to efflorescence and delamination – that signal corrosion in reinforced concrete. Understanding these signs helps you make informed decisions about maintenance and repairs, potentially saving thousands in preventable damage. Rust stains and cracks When you spot reddish-brown streaks flowing down your concrete walls, you’re witnessing one of the earliest visible warnings of concrete corrosion. These rust stains emerge when your steel reinforcement corrodes, creating rust that travels through existing cracks. You will typically see these stains forming patterns that follow water natural path. Your concrete faces particular risk when exposed to chloride ions from sea spray or de-icing salts. By the time you notice these stains, significant corrosion damage may already exist within your concrete structure. Cracking and spalling Your reinforced concrete undergoes significant stress when corrosion occurs. The steel reinforcement expands up to six times its original size during corrosion, creating intense internal pressure. You will observe cracks developing parallel to where your rebar lies. Your concrete cover, designed to protect the steel reinforcement, starts breaking away in pieces through spalling. This deterioration process leaves more of your reinforcing steel vulnerable to moisture and oxygen, speeding up the corrosion cycle. Efflorescence and white patches You will often notice white, chalky deposits on your concrete surfaces. This efflorescence occurs as water carries dissolved calcium hydroxide from your cement paste to the surface, where it reacts with carbon dioxide. While you should not confuse efflorescence directly with corrosion, it signals moisture movement within your concrete structure. This moisture can penetrate the concrete and contact your steel reinforcement, potentially triggering or accelerating corrosion. Brown patches You will recognize brownish discoloration appearing in specific patterns on your concrete surface. These brown patches typically align with your underlying rebar layout, indicating corrosion products moving through your concrete via moisture. When you see these patches, it means your concrete’s protective properties have failed, either through carbonation or chloride attack. This failure allows moisture and oxygen to reach your steel reinforcement, promoting further corrosion. Water staining and pitting You can identify water staining as darker areas on your concrete surface, often accompanied by small holes or pits. These pits develop when corrosive substances breach your concrete cover, creating localized deterioration zones. When you find pitting, it indicates that aggressive agents like chloride ions have compromised your concrete’s protective layer. This damage reduces both your concrete durability and its capacity to shield the reinforcing steel from corrosion. Delamination When you tap your concrete surface and hear a hollow sound, you are likely dealing with delamination. This separation of concrete layers results from steel reinforcement corrosion. Your corroding steel generates pressure that destroys the bond between concrete and steel. This separation significantly weakens your reinforced concrete structure integrity and can lead to concrete failure without proper intervention. Increased crack width and frequency You will observe your existing cracks growing wider while new ones form. This progression shows active corrosion deteriorating your concrete structure. The tensile forces from your expanding corroded steel cause this multiplication and widening of cracks. 7 common causes of corrosion in reinforced concrete Here are the common causes of corrosion in reinforced concrete, explained in straightforward terms you can easily understand: When chloride ions from road salts or sea air seep through your concrete’s pores and reach the steel reinforcement, they break down its protective layer. This creates rust that expands and puts pressure on your concrete from within, leading to cracks and surface damage. Your concrete naturally contains calcium hydroxide, which reacts with carbon dioxide from the air in a process called carbonation. This reaction lowers the concrete’s pH level, making your steel reinforcement more susceptible to corrosion. The deeper this process goes, the more vulnerable your structure becomes. In certain cases, your concrete aggregates might react with alkalis in the cement paste, creating a gel that swells when it absorbs water. This internal pressure causes extensive cracking throughout your structure and compromises its strength. If your concrete is highly permeable, it acts like a sponge, allowing water, oxygen, and harmful chemicals to easily reach the steel reinforcement. The more porous your concrete, the faster corrosion can develop. Natural cracks in your concrete from shrinkage or structural loads create direct pathways for corrosive substances. Think of these cracks as shortcuts that let harmful elements bypass your concrete’s protective properties and reach the steel faster. Using substandard materials during construction puts your structure at greater risk. Poor-quality aggregates and steel reinforcement with inadequate protective properties make your concrete more vulnerable to corrosion from the start. Your environment plays a crucial role – particularly moisture and humidity levels. Each of these causes can work alone or combine to accelerate the deterioration of your reinforced concrete structure. Understanding these mechanisms helps you identify potential problems early and take appropriate preventive measures. Is corrosion in reinforced concrete repairable? You will be relieved to know that corrosion damage in your reinforced concrete can be effectively repaired. The key lies in quick action once you spot the warning signs. Your first step should be getting a professional assessment to determine how deep the corrosion extends. A qualified concrete repair contractor in Fredericton will evaluate the damage and develop a targeted repair strategy. They will remove damaged concrete, treat corroded steel reinforcement, and apply specialized repair materials that match your existing concrete’s properties. The repair process often includes installing protective measures to prevent future corrosion. This might involve applying corrosion inhibitors, waterproof coatings, or

Is Your Chimney Leak Minor or a Structural Red Flag
Uncategorized

Is Your Chimney Leak Minor or a Structural Red Flag?

Is Your Chimney Leak Minor or a Structural Red Flag? Have you noticed water dripping from your fireplace during heavy rain, or mysterious stains spreading across your ceiling near the chimney? These concerning signs of a chimney leak raise an important question many homeowners face: is this a minor issue you can address later, or an urgent structural problem requiring immediate attention? Understanding the difference between minor chimney leaks and serious structural damage can save you thousands in repairs while protecting your home’s safety and value. Minor to moderate signs Water in the firebox One of the first signs of a chimney leak often appears as water pooling in your fireplace. While finding water in your firebox might seem alarming, catching this issue early can prevent extensive damage to your chimney structure. This typically occurs during or after rainfall, indicating that water is making its way down your chimney system. Though concerning, this type of leak often points to fixable issues like a damaged chimney cap or deteriorated crown. Dampness or stains If you are noticing damp patches or water stains on walls or ceilings surrounding your chimney, you are likely dealing with a developing leak. These marks typically present as yellowish or brownish discoloration and can cause paint to peel or wallpaper to warp. This moisture infiltration suggests your chimney waterproofing may be compromised, allowing water to seep through the masonry and into your home’s interior surfaces. Musty smells An unpleasant, musty odor around your fireplace area is not just an annoyance – it’s your nose telling you there’s a moisture problem. This smell typically indicates mold growth due to persistent dampness within your chimney structure. While the odor itself might seem like a minor nuisance, it points to an ongoing chimney leak that requires professional assessment to prevent further damage to your home. White discoloration That white, powdery substance appearing on your chimney exterior bricks is not just a cosmetic issue. Known as efflorescence, this mineral deposit forms when water penetrates your chimney’s masonry, drawing out natural salts as it evaporates. Though not immediately dangerous, efflorescence serves as a clear warning sign that your masonry is regularly absorbing water, which can lead to more serious problems if left unaddressed. Serious structural & safety issues Structural damage When water repeatedly infiltrates your chimney masonry, the damage can become severe, especially in Fredericton with freeze-thaw cycles. Cracked bricks and deteriorating mortar joints are not just cosmetic flaws – they’re serious red flags indicating your chimney’s structural integrity may be compromised. When mortar crumbles at the touch or bricks begin spalling (flaking apart), you are witnessing active deterioration of your chimney structure. Most concerning is a leaning chimney, which signals that water damage has progressed to the point where your chimney stability is at risk. Interior damage Water infiltration from a leaking chimney can damage on your home interior. Water stains spreading across ceilings or walls indicate significant moisture penetration that threatens more than just surface aesthetics. Hidden within your walls, this moisture can short-circuit electrical systems and saturate insulation, reducing its effectiveness and potentially creating perfect conditions for mold growth. The cost of repairing such extensive interior damage often far exceeds what you would spend addressing the chimney leak promptly. Safety Hazards A compromised chimney liner poses serious risks to your household safety. When water corrodes this essential component, it can create pathways for dangerous gases, including carbon monoxide, to enter your living space. Metal components within your chimney system, such as dampers and chase covers, may rust and fail to function properly, creating potential fire hazards. Your chimney role in safely venting combustion gases makes these water-related deterioration issues particularly dangerous. Chimney leak causes Bad cap or crown Your chimney crown serves as the first line of defense against water intrusion, directing rainfall away from the flue. When this important component develops cracks or deteriorates, it allows water to penetrate directly into your chimney structure. Similarly, a damaged or missing chimney cap leaves your flue exposed to rain, snow, and debris. These seemingly small problems can lead to significant water damage throughout your entire chimney system. Damaged flashing The metal flashing where your chimney meets your roof plays a vital role in preventing water infiltration. Poor installation, aging materials, or physical damage can create gaps that allow water to seep between your roof and chimney structure. This intersection is particularly vulnerable to leaks, making proper flashing installation and maintenance important for protecting both your chimney and roof structure from water damage. Cracked chimney masonry Years of exposure to harsh weather conditions and temperature fluctuations can create cracks in your chimney masonry. These fissures might start small, but they provide entry points for water to penetrate your chimney structure. Once water finds its way into these cracks, the freeze-thaw cycle can expand them, gradually compromising your chimney’s structural integrity and creating larger pathways for water infiltration. What to do to fix chimney leak Annual inspections Professional chimney inspections are not just another home maintenance expense – they are an investment in your home safety and longevity. A certified chimney specialist can identify potential problems before they escalate into major issues. During these inspections, professionals examine every component of your chimney system, from the crown to the firebox, ensuring early detection of water-related issues that could threaten your chimney’s structure. Waterproofing Professional waterproofing serves as a crucial preventive measure against chimney leaks. Unlike standard sealants, proper chimney waterproofing materials create a protective barrier while allowing your masonry to breathe. This breathability is essential because trapped moisture can cause more damage than external water infiltration. A professional waterproofing treatment typically lasts several years and significantly reduces the risk of water-related chimney damage. Fix problems quickly When you discover signs of a chimney leak, immediate action can prevent minor issues from developing into major structural problems. Postponing repairs often leads to more extensive damage and higher repair costs. A small investment in addressing water infiltration today can save you from costly structural

holes around house foundation
Uncategorized

What Causes Holes Around House Foundation?

What Causes Holes Around House Foundation? You might have noticed some holes around your house foundation and worry what’s causing these. Could rodents, insects, or shifting soil be to blame? These gaps aren’t just eyesores—they might invite pests, weaken your foundation, or signal hidden water damage. How do you stop the problem before it escalates? Start by assessing the hole size, location, and surrounding damage. Solutions range from sealing entry points to regrading soil or installing French drains. Addressing the root cause early can save you from expensive repairs in future. Lets discuss the causes of these holes. Soil Erosion Water Runoff Rainwater racing uncontrollably along your foundation acts like a small river, carving into the soil like fingers through wet sand. As it flows, it whisks away loose dirt particles layer by layer. What starts as minor gullies can evolve into gaping holes over months, especially if your yard slopes toward the house. The constant “washing away” effect leaves hollow spaces beneath walkways, patios, or right against your foundation walls. Poor Drainage When water pools near your foundation, it transforms stable soil into soggy mush. Imagine stepping into mud – the ground shifts and loses its grip. This waterlogged soil becomes heavy and unstable, compressing under its own weight as the water slowly drains. Eventually, sections collapse inward, leaving crater-like depressions. The longer the water sits, the deeper these hollows become, often pulling soil away from foundation walls. Drought Extended dry periods cause soil to contract, creating gaps around your foundation. These holes may appear suddenly after prolonged drought conditions as soil moisture levels plummet. The resulting soil shrinkage can create concrete cracks and compromise your foundation’s stability. Tree Roots Growth Tree roots seeking moisture and nutrients can exert significant pressure on the soil around your foundation. As they grow and expand, they displace soil and create pressure points that may result in holes and destabilization. This issue is particularly common with older concrete slabs where root systems have had time to develop extensively. Decay The decomposition of dead tree roots leaves behind underground voids that can eventually collapse, forming holes around your foundation. While these spaces might not be immediately visible from the surface, they could indicate future foundation issues requiring professional attention. Foundation Settling Uneven Settling Imagine your house doing the limbo – if one side sinks lower than the other, it pulls away from the surrounding soil. This uneven settling creates wedges of empty space along your foundation – the “holes” you see. It’s like when a tooth’s cavity starts small but grows as decay progresses. The weight imbalance makes your foundation push or pull on the soil differently in various spots. Areas experiencing more pressure crack and crumble, while others detach entirely. Tilted chimneys or doors that scrape floors aren’t just quirks – they signal this soil-foundation separation that eventually leaves visible gaps. If left unchecked, these spaces let rainwater collect and erode more soil, turning narrow gaps into foot-deep craters. Plumbing Leaks Hidden plumbing leaks gradually saturate the soil around your foundation, leading to erosion and hole formation. These water-related issues often attract pests seeking moisture sources, creating a compound problem that requires both plumbing repairs and pest control measures. Animal Activity Holes around your foundation could be the handiwork of determined rodents seeking shelter. Mice, rats, and voles are natural diggers, creating extensive burrow systems that can span anywhere from 5 to 35 feet near your foundation. These critters aren’t just randomly digging; they’re on the hunt for food sources and safe spaces away from predators. You might notice that voles are particularly active during spring and fall, leaving distinctive signs such as small holes and runway systems throughout your yard. If you spot multiple entry points around your foundation, it’s likely that you’re dealing with a rodent infestation that requires immediate attention to prevent structural damage. But it’s not just rodents causing trouble. Insects, despite their small size, can cause significant damage over time. Ants construct intricate tunnel networks that compromise soil stability, while termites might establish colonies that create extensive underground habitats. These pests build complex nests deep within the soil, potentially weakening your foundation’s support system and creating concerning voids. And let’s not forget about snakes. Although they rarely dig their own holes, snakes often become unwelcome residents around foundations by utilizing existing burrows. They tend to repurpose abandoned rodent holes, which often signals a broader pest problem on your property. Their presence might indicate the need for comprehensive control tactics to address both the snakes and their prey, ensuring that your foundation remains intact and secure. Why professional help matters When foundation worries keep you up at night, we’re here to help. At Atlantic Brick and Stone – Fredericton’s trusted foundation repair specialists – we diagnose issues most homeowners miss. Think of us as house doctors who will hunt for hidden cracks, test soil stability, and measure settling with right tools. Our repairs dont just cover symptoms – we fix root causes. We reinforce crumbling concrete, stabilize shifting slabs, and seal gaps that invite pests. When you work with us, you will get solutions like: Custom drainage systems to redirect water Steel piers to stabilize sinking foundations Polymer injections that lift settled concrete Don’t let small holes grow into major headaches. We offer inspections with clear explanations, using tools like thermal imaging to show problem areas. Protecting your home’s value starts with acting early – that’s why our team prioritizes preventive fixes. Curious about costs? We provide transparent estimates that break down materials, labor, and timelines. No pressure, just honest advice. Reach out to schedule your inspection – your foundation deserves expert care. Summary Monitor your foundation regularly for new holes Address drainage issues promptly Control pest populations before they cause damage Maintain proper landscaping around your foundation Seek professional help for any foundation problems FAQs about holes around house foundation How do I stop animals from digging around my foundation? Creating barriers with hardware cloth or wire

commercial masonry contractor in Fredericton
Uncategorized

Why Is It Important to Choose a Masonry Contractor Familiar with Commercial Projects?

Why Is It Important to Choose a Masonry Contractor Familiar with Commercial Projects? When your commercial project needs masonry work, the stakes are high. Small mistakes can cascade into major problems, affecting everything from building safety to your bottom line. Many property owners learn this lesson the hard way by choosing contractors based solely on price. A commercial masonry specialist brings more than just basic construction knowledge to your project. They offer expertise in managing large-scale operations, coordinating with multiple trades, and ensuring compliance with complex commercial building codes. Expertise and specialization Commercial masonry requires a unique skill set that goes beyond basic construction knowledge. When you select a masonry contractor with commercial experience, you’re choosing someone who understands the complexities of large-scale projects. These professionals work with various materials, including brick, concrete blocks, and natural stones, ensuring each element serves its structural purpose while maintaining aesthetic appeal. Every commercial masonry project demands precision and expertise in handling different materials. Your contractor must understand how mortar bonds with different surfaces and how environmental factors affect various materials. This knowledge ensures your project’s longevity and structural integrity. Compliance with local regulations Building codes and regulations in commercial construction are complex and ever-changing. Your masonry contractor must stay current with Canada local building codes, safety requirements, and industry standards. This knowledge is crucial for ensuring your project meets all regulatory requirements from start to finish. An experienced commercial masonry contractor navigates permit processes, understands zoning requirements, and maintains proper documentation throughout the project. They are familiar with inspection protocols and can anticipate potential compliance issues before they become problems, saving you time and money. Energy efficiency and sustainability Modern commercial buildings must meet strict energy efficiency standards. Masonry construction plays an important role in achieving these goals. Commercial masonry contractor understands how different materials contribute to a building’s thermal performance. Brick and concrete masonry units provide excellent insulation properties, helping regulate indoor temperatures naturally. Your contractor should be able to recommend materials and construction techniques that optimize energy efficiency. This expertise translates into lower utility costs and a smaller environmental footprint for your building. They can also suggest sustainable materials that meet both environmental standards and your aesthetic preferences. Safety and fire resistance One of the most compelling reasons to hire an experienced commercial masonry contractor is safety assurance. Masonry construction offers inherent fire resistance, a critical factor in commercial buildings. Your contractor will understand how to properly install fire-resistant materials and create structures that meet fire safety codes. Professional masonry contractors ensure proper installation of non-combustible materials like brick and stone, creating natural fire barriers. This expertise not only protects your investment but can also reduce insurance premiums and provide peace of mind for building occupants. Aesthetic and functional value Commercial masonry goes beyond mere functionality – it’s about creating visually appealing structures that stand the test of time. A skilled commercial mason brings artistic vision alongside technical expertise, helping you achieve both beauty and durability in your commercial project. Your contractor can guide you through material selections that complement your building’s design while maintaining structural integrity. From decorative stone facades to intricate brickwork patterns, they understand how to create eye-catching designs that enhance your property’s value and attract potential clients or tenants. Restoration and repairs Even the most robust masonry requires maintenance over time. An experienced commercial contractor possesses the knowledge to assess existing structures and perform necessary repairs while preserving original design elements. They understand the importance of matching existing materials and maintaining historical accuracy when working on older buildings. Your contractor should be able to identify potential issues before they become major problems, saving you money on future repairs. They’ll know exactly how to tackle everything from minor mortar repairs to major structural renovations, ensuring your building maintains its integrity and appearance. Reliability and timeliness Commercial projects often operate on tight schedules where delays can be costly. A professional masonry contractor understands the importance of meeting deadlines while maintaining quality standards. They have the necessary equipment, skilled labor force, and project management experience to complete work efficiently. Your contractor should provide realistic timelines and clear communication throughout the project. They’ll coordinate with other trades, manage material deliveries, and ensure proper staffing to keep your project on track. Access to references and proven track records Your commercial masonry project represents a significant investment, making it important to verify your contractor’s capabilities through their past work. Commercial masonry contractors should readily share their portfolio, showcasing completed commercial projects that demonstrate their expertise and attention to detail. Don’t hesitate to request site visits to their completed projects. This hands-on approach lets you examine the quality of their workmanship up close and envision similar results for your project. Pay special attention to projects completed few years ago, as this reveals how well their work stands the test of time. Client testimonials provide valuable insights into a contractor’s work ethic, communication style, and problem-solving abilities. Speaking with clients helps you understand how the contractor handles challenges and maintains professional relationships throughout the project duration. A reputable mason will welcome these inquiries, understanding that their track record builds trust and confidence in their abilities. Look for consistent positive feedback about project management, timeline adherence, and quality of finished work. Get in touch with us to start your commercial masonry project in Fredericton At Atlantic Brick and Stone, we pride ourselves on delivering exceptional commercial masonry services throughout Fredericton. Our team brings 16+ years of experience in handling complex commercial projects, from historic restorations to modern construction. We understand local building codes and weather conditions that affect masonry work in our region. Our team of masons and bricklayers work closely with you to understand your vision and provide solutions that meet your specific needs. We maintain transparent communication throughout your project and guarantee our workmanship meets the highest industry standards. Summary Your choice of a commercial masonry contractor significantly impacts your project’s success. Remember these essential points: Choose a contractor with specific commercial project

GET STARTED

START MASONRY PROJECT THE RIGHT WAY

Create stunning structures with our residential and commercial masonry services in Fredericton. From meticulous designs to the completed build, our process is professional and rewarding, and we can’t wait to build your dream with you.

Atlantic Brick and Stone, one of the best masonry contractors in Fredericton, NB

Contact

8 Muskie Street, Lower Kingsclear, New Brunswick E3E 0E7, Canada

Scroll to Top