Author name: richardonna@rogers.com

How Water Sneaks Into Homes
Uncategorized

Tracing Moistures Path – How Water Sneaks Into Homes?

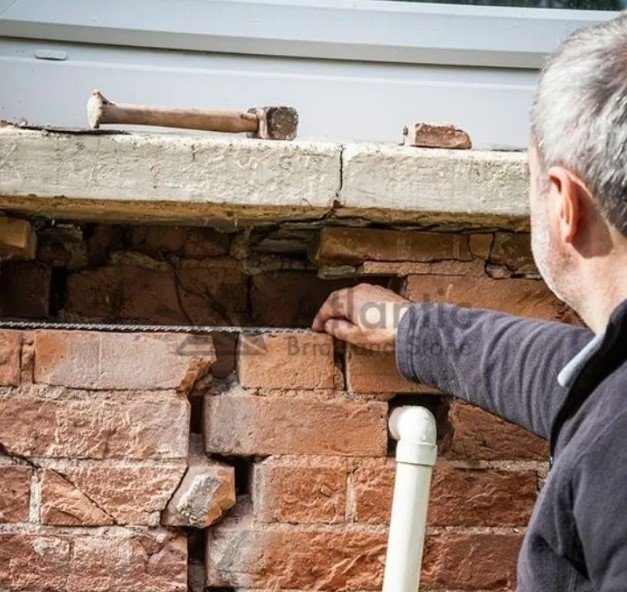
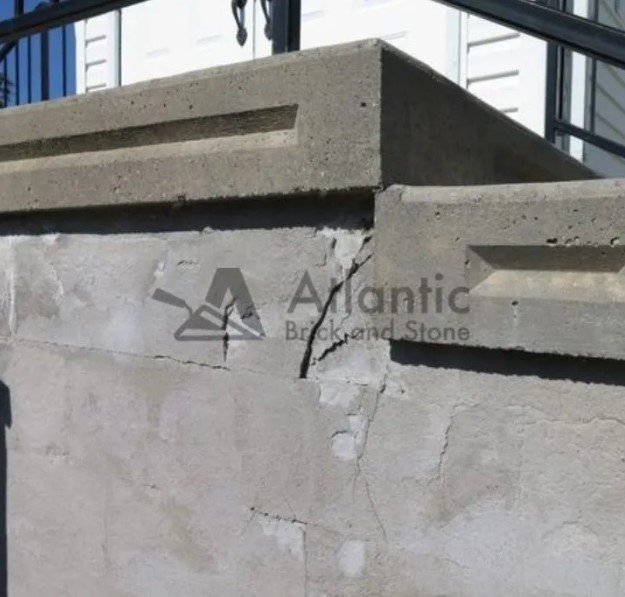
Tracing Moistures Path – How Water Sneaks Into Homes? You’ve likely noticed that damp, musty smell in the basement or seen telltale water stains on the ceiling. Figuring out where unwanted moisture is coming from can seem puzzling at first. However, understanding the typical routes water takes to infiltrate homes is key to prevention. Let’s walk through how moisture sneaks inside, common sources, and strategies to stop it in its tracks. Home’s Structure and Water Resistance Masonry buildings, constructed primarily from materials like concrete blocks, bricks, and stones, necessitate a unique approach to moisture protection, distinct from that of wood-framed structures. These porous masonry materials are naturally inclined to absorb water, making proper sealing essential to prevent water saturation behind the walls. Over time, the mortar joints that connect these masonry units can deteriorate, weakening the building’s water-resistant barrier. Special attention is required at the junctions where different masonry materials converge, such as the interface between foundation walls and floor slabs. These areas are particularly susceptible to moisture penetration and should be thoroughly sealed during construction. Regular inspections of these transitional areas are crucial to identify and address any cracks that could facilitate moisture ingress. Furthermore, parapets, which are commonly found on roofs, can accumulate standing water and should be regularly monitored to ensure they are not compromising the building’s water resistance. Sources of Moisture in Masonry Homes Natural Sources Masonry structures are particularly susceptible to moisture issues from nature due to their porous composition. Heavy rain or snow-melt saturates unprotected wall surfaces if not redirected quickly by functioning roof drainage systems. The weight of accumulating water can also stress or crack aging mortar joints over decades. Seasonal humidity fluctuations cause condensation indoors too as moisture in the air condenses on cooler stone and block surfaces. All of these natural factors require ongoing mitigation strategies. Man-made Sources Even man-made systems jeopardize masonry envelopes if not properly installed and maintained. Plumbing leaks: Corroding pipes saturate the interior of concrete block walls, and water stains may indicate an interior investigation is needed. HVAC systems: Improper air conditioner condensate line installation introduces excess moisture indoors. Poor surface drainage: Perimeter drainage that fails to direct rainfall away from the foundation causes prolonged contact with below-grade walls, wicking moisture through small cracks. All of these interior and exterior sources supply water that penetrates masonry porous materials if not rapidly shed. Mortar joint erosion and structural deterioration then manifest, requiring expensive remediation. Regular system checks prevent saturation issues before damages arise. Entryways of Moisture into Homes Chimney Leaks Chimneys provide an opening for moisture to penetrate from flashing failures or cracks in the masonry structure itself. Flashing installed between the chimney and roof is meant to direct water out and away but frequently deteriorates over time from heat exposure. Missing sealant allows water to seep into wall cavities or attics during heavy rain. Regular inspection and repointing of mortar ensure chimney structures remain intact. Window and Door Leaks Windows and doors double as entry points for moisture if not installed correctly. Faulty weather stripping permits rain to be driven into cracks around frames during strong winds. Over time, wood components like sills collect debris and lack proper sealing at mortar joints. Check caulking integrity and reapply as needed to maintain an impenetrable barrier. Cracks in Brick or Stone Walls The brick and stone in older buildings serve an aesthetic purpose but can crack under pressure. Minor fractures allow water intrusion but may worsen when left unaddressed. Settlement stresses mortar bonding to failure, and temperature fluctuations contribute annual widening. All fractures require patching to restore the weather-resistant shell. Leaking Parapet Walls Parapets at roof edges are hidden collection points for moisture. Debris and plant growth can prevent timely drainage, causing water pooling. Repoint cracks and ensure downspouts direct water away from foundations. Regularly clear parapet surfaces of organic matter to eliminate lingering puddles. Foundation Leaks No addition should alter historical drainage patterns. Soil in constant contact with concrete or block weeps moisture inward. Cracks at the juncture between foundation walls and floor slabs often form, allowing capillary action. Installing French drains intercepts infiltrating water before it damages structural elements. Plumbing Leaks Behind finished walls, plumbing leaks go unnoticed as they cause hidden damage. Check under sinks and behind washing machines for corroding lines. Hissing sounds or damp areas signal the need for a meticulous inspection to pinpoint and repair compromised plumbing. The Damaging Effects of Moisture Masonry is durable, but it is not immune to moisture-related issues over time. Initially, these problems might not be evident, but if left unaddressed, they can lead to significant repair costs. Structural Integrity at Risk: Moisture saturation weakens concrete and blocks, reducing compressive strength, especially near plumbing lines or foundations where rot can develop. Indicators of Moisture Problems: Surface efflorescence stains indicate moisture moving within walls, leading to indoor mold spore deposition. Aesthetic and Structural Compromises: Porous split-face blocks visibly absorb water, detracting from the building’s aesthetic appeal and staining tile grout. Mortar Joint Deterioration and Cracking: Freeze-thaw cycles exacerbate mortar joint deterioration, necessitating tuck-pointing to address expanding water access points. Wood Framing Damage: Wood framing within bearing masonry walls is particularly susceptible to moisture damage, often requiring complete replacement. Prompt professional evaluation of any signs of wetness is crucial. Addressing these issues early helps preserve the structure and indoor air quality, avoiding costly repairs in the future. Preventing Moisture Infiltration With masonry, catching issues early means sealing entry points before damage manifests inside. Review roofs and parapets every 5-10 years to keep up with gradual failures. Foundation professionals evaluate cracks and install drainage solutions as needed. Ensure landscaping slopes direct water away from grade-level walls; check grading after gardening changes. Monitor visible mortar joints annually and re-point sections as needed. Apply breathable sealants at brick-flashing intersections to redirect moisture outward. Consider drainage planes and coating systems over bare blocks to repel incidental water. Periodic re-coats maintain protections. Condensation mitigation through proper ventilation and dehumidification likewise shelters interior materials from

Can You Repair Concrete in Winter
Uncategorized

Can You Repair Concrete in Winter?

Can You Repair Concrete in Winter? Winter in Fredericton brings its own set of challenges, especially when it comes to masonry work. The plummeting temperatures and harsh weather conditions often raise a crucial question among homeowners and professionals alike: Can you effectively repair concrete during these cold months? The answer is a resounding yes, but it requires specific knowledge, tools, and techniques to ensure the durability and effectiveness of the repairs. Fredericton Winter and Masonry Work The capital experiences long, cold winters with average daytime high temperatures hovering around the freezing mark of 0°C from December through March. Overnight lows often dip well below freezing. Deep freeze cycles where the mercury drops to -25°C or lower are not uncommon. As one of the snowiest cities in Canada, Fredericton also receives substantial yearly snowfall that can impede outdoor work or cover fresh repairs. These cold temperatures and winter precipitation present difficulties for properly curing and finishing concrete repairs that most contractors must learn to manage. Challenges of Masonry Work in Colder Weather There are several challenges associated with masonry work in colder weather that must be addressed through careful planning and execution. Concrete does not properly cure or reach adequate strength in freezing temperatures, which can compromise the integrity and durability of a repair. The concrete hydration process that generates heat is slowed at colder air and material temperatures. Fresh concrete or new repairs are also at high risk for damage from freeze-thaw cycles as the water inside the concrete may freeze and cause cracks to form. Snow, ice, and limited access due to winter weather conditions can also obstruct worksites. Preparation for Winter Concrete Repairs Expert masonry contractors gear up for winter projects by gathering specialized tools and equipment, along with concrete mixes enhanced with additives. They opt for concrete that can set quickly and maintain strength even in lower temperatures. To preserve the necessary heat for curing, they use tarps, windbreaks, and insulated blankets. The curing process is further aided by heated mixers, accelerators to hasten hydration, and heaters. To protect the concrete, sealants are applied to create a barrier, and waxes are used to minimize water absorption. Additionally, incorporating reinforced fibers into the mix adds an extra layer of resistance against the damaging effects of freeze-thaw cycles. Safety First Professionals prioritize safety by donning appropriate winter gear, using lifting equipment suitable for icy conditions, and applying sand or salt to prevent slipping. They also deploy portable light towers to compensate for limited daylight. By consulting weather forecasts, they can schedule work around extreme temperatures and adjust work hours to coincide with sunnier periods. Communication devices are essential for maintaining contact with team members and emergency personnel. Reflective vests and barricades are used to demarcate work areas, ensuring they are visible and safe from vehicular and pedestrian traffic. Common Winter Concrete Maintenance Projects Residential Concrete Repair Needs Homeowners in Fredericton commonly require repairs to foundations, driveways, steps, and walkways during winter. Foundations may need patching or leveling after ground settling stresses cracks. Steps or walkways can become damaged from snow clearing equipment or freeze-thaw weathering. Driveway repairs fix depressions or sections damaged by plow blades. Interior flatwork like garage floors or basement slabs sometimes crack due to frost heave beneath exterior walls as well. Commercial and Public Space Repairs Larger projects also occur. Retail locations repair parking lots prior to winter traffic. Municipally owned infrastructure like sidewalks and curbs require maintenance during freeze-thaw cycles. Public institutions may repair foundations, ramps, or patios. Sporting facilities repair ice rinks or stadium floors. Transportation hubs repair platforms, retaining walls, or bridge columns impacted by freeze-thaw weathering cycles. Contractors supply the expertise to complete even large-scale repair work in winter. Tips for Successful Winter Concreting Timing and Planning Your Concrete Repairs Proper scheduling takes advantage of milder periods. Consult local forecasts to target daytime highs near 0°C for the next 2 days with no extreme dips predicted. Avoid immediate upcoming freeze advisories. Place concrete in the morning to allow maximum cure time. Schedule repairs farther apart to focus curing efforts instead of many concurrent jobs. Allow re-poured concrete 7 days minimum to fully cure before anticipated deep freeze. Professional Advice for Durable Results Contractors offer additional strategies like prepping substrates below freezing with propane torches and insulating forms. Over-designing mix content or thickness adds a margin of safety. Temporary enclosures like insulated walls and tarps maintain curing temperatures when needed. Rigorous site clean-up removes all sources of potential ground frost before imminent cold snaps arrive. Following proven cold weather techniques leads to long-lasting concrete repairs. Overcoming Specific Winter Challenges Dealing with Snow and Ice During Repairs Effective snow management is very important, with blowers often used to clear work areas. The strategic application of deicing salts on access routes enhances safety by preventing slips. Workers wear insulated suits, electric shocks, and heat packs beneath their winter clothing. Concrete trucks with extended chutes facilitate load delivery without needing to drive onto the site. Temporary wooden floors under these trucks make debris cleanup more manageable. For breaks, temporary shelters, propane torches, and hot drinks provide necessary warmth. Managing Temperature and Humidity Variations Sudden shifts from rain to extreme cold can lead to hazardous conditions with freezing rain. Applying a mist to curing concrete before a freeze can aid in strength development, preventing it from drying out. Tarps are used to shield plastic concrete from desiccating winds. For exterior patchwork, coatings, mastics, or sealants are essential to protect rebar from corrosion due to road salt. The Importance of Hiring Professional Contractors Amateur attempts at winter concrete work often end in costly repairs later due to insufficient planning, ill-prepared materials, or unsafe work habits. Professionals specialize in challenges like covering fresh pours before freezing or applying sealants properly during fluctuating weather conditions. They monitor site climate and adjust techniques on the fly. Expert contractors achieve long-lasting results through years practicing skills hard won over harsh winters. Do not risk diminishing your investment with improper repairs –

Fixing Cracks in Concrete Sidewalks
Uncategorized

The Ultimate Guide to Fixing Cracks in Concrete Sidewalks

The Ultimate Guide to Fixing Cracks in Concrete Sidewalks When you have a concrete sidewalk around your home, you likely expect it to withstand daily foot traffic and environmental conditions. However, over time concrete sidewalks can develop cracks that need to be addressed. In this guide, we’ll walk through how to properly identify, assess and repair cracks in your concrete walkway. What are Concrete Sidewalks? Concrete sidewalks are a common surface for walkways because concrete is a durable material when properly installed and maintained. A standard residential sidewalk is usually four to six inches thick and constructed of a mixture of cement, sand, and gravel or crushed stone called aggregate. This mix forms a hardened surface that can support weight while being weather resistant. Why Cracks Form in Concrete Sidewalks There are a few key reasons why cracks may develop in concrete walkways, even when installed properly: Movement and vibrations: Like foundations of buildings, concrete sidewalks are subject to the settling and minor shifting of soils over many years. This can generate cracks, especially if there is an underlying unstable base. Temperature changes: As concrete heats up and cools down from daily temperature fluctuations, it expands and contracts slightly. Over many cycles this repetitive stress can lead to cracking. Moisture intrusion: When water gets absorbed into concrete, it causes the material to expand. If water then evaporates from the surface but is still trapped deeper inside, it will try to contract more than the outer layers—causing stresses. Late-season freezing temperatures: If concrete is poured late in the year when cold weather is approaching, it may not have time to fully cure before the first freezes arrive. Ice expansion during freezing cycles can then crack uncured concrete. Material weaknesses: Issues like low cement content, too much water in the mix, or flaws in the aggregate can produce weaker areas susceptible to cracking even under minimal stresses. Identification of Concrete Cracks Properly identifying the specific crack is important for determining the best repair approach. Here are some common crack types to watch for in concrete sidewalks: Thin, hairline cracks: These very narrow cracks often indicate minor drying shrinkage or minor settling/movement. Medium cracks: Wider cracks up to 1/4 inch can signal more substantial movement, freezing, or material weaknesses at certain points. Large or wide cracks: Gaps over 1/4 inch usually mean serious issues like structural failure of all or part of the sidewalk. Replacement may be necessary. Mesh or networked cracks: A complex interconnected web of cracks points to significant foundation settling or other foundation problems beneath the sidewalk. Spalling or crumbling edges: Areas where the concrete edge crumbles indicate internal deterioration, usually from freeze/thaw or moisture damage. Types of Cracks That Can Occur in Concrete There are a few main types of cracks to be aware of: Control cracks: Intentional cracks spaced periodically to control where random cracks may form due to stresses. Shrinkage cracks: Develop as concrete cures due to drying and chemical shrinkage of the cement binder. Often narrow. Thermal cracks: Result from thermal expansion/contraction cycles as concrete heats up and cools down. May form parallel to edges. Reflective cracks: Mirror cracks appearing in new concrete above existing cracks in underlying surfaces like asphalt or concrete. Structural cracks: Indicate a serious issue caused by settlement, foundation movement or other displacement of the slab. May need partial or full replacement. Assess the Severity Once you have identified all cracks present, the next important step is to gauge the severity of each one to determine an appropriate repair approach. Here are some factors to consider when evaluating crack severity: Crack width: Narrow cracks under 1/8 inch are minor, 1/4 inch or wider indicates a significant problem. Crack pattern and location: Are cracks isolated or networked? Near or crossing a joint or edge? This shows why it cracked. Concrete spalling or crumbling: Severe moisture/freeze damage near a crack makes repair alone ineffective. Crack depth: Use a flathead screwdriver to test depth. Shallow is better than cracks extending through half the slab depth. Concrete lifting or shifting: Major movement means part or all needs replacing, not just surface crack repairs. Age of concrete: Older sidewalks show cumulative damage and may be distorted due to repeated settlement. When to Fix Cracks vs When to Replace the Entire Sidewalk? The severity of the cracks will determine whether repair or replacement of the sidewalk is necessary. Hairline cracks less than 1/8 inch deep can usually be cleaned and filled with concrete crack filler. Small shallow cracks between 1/8 to 1/4 inch may only require repair of isolated issues, while multiple or intersecting cracks in this range could mean replacement is better. Cracks wider than 1/4 inch will likely require replacing the entire section since repairs won’t be very durable. Sections with significant deterioration, crumbling, or structural issues also need replacement as do areas with extensive networked cracking patterns or major lifting and shifting of the surface. When to Seek Professional Concrete Sidewalk Repairs? For larger or complex sidewalk crack repairs, it’s often best to hire a professional contractor. Specialized tools and equipment or situations that require adherence to building codes justify bringing in experts. Professionals are needed if there are extensive cracks over large areas like more than 3-4 feet. Structural cracks pointing to foundation issues or cracks wider than 1/4 inch also warrant professional assistance. Heaved, settled or severely deteriorated sections along with repairs using specialized demolition or tooling should also be handled by contractors. Tight timelines or lack of one’s own resources and abilities also indicate the job is best left to experienced concrete pros. How Professionals Fix the Sidewalk Cracks Once a contractor has thoroughly assessed your sidewalk, they will employ standardized techniques to effectively repair cracks. Here are the typical steps: Preparation The contractor will first clean out the crack using dustless concrete saws or crack chasers to create a clean, keyed edge for materials to bond to. They may also use diamond-tipped blades or grinding wheels to widen and square

Updating Your Brick Fireplace
Uncategorized

Updating Your Brick Fireplace from Traditional to Trendy

Updating Your Brick Fireplace from Traditional to Trendy Imagine sitting in your cozy living room, the warmth of a fire crackling in the background, and your eyes resting on a beautifully modernized brick fireplace. This isn’t just a scene from a home decor magazine; it’s a possibility for your own home. Modernizing a brick fireplace can transform an ordinary room into a stylish, inviting space. It’s about more than just aesthetics; it’s about creating a focal point that reflects your personal style and the modern era. In this guide, we’ll explore various ways to bring your brick fireplace into the 21st century. Why Modernizing a Brick Fireplace? A brick fireplace can be a defining focal point in any living space, but older brick fireplaces tend to feel outdated over time. Modernizing your brick fireplace is a relatively straightforward way to refresh its aesthetic and give your room a new look and feel. Rather than a complete overhaul, modernizing allows you to work with and enhance the natural beauty of the existing brick. Complete Overhauling Vs. Modernizing When contemplating a brick fireplace makeover, it’s important to understand that modernizing does not necessarily mean a total transformation. The goal is to update certain elements like the mantel, surround, hearth or brick itself in order to promote a more contemporary style while retaining the character and integrity of the original brickwork. Common modernizing techniques include painting or whitewashing the brick, installing a new mantel, adding decorative tile and refacing the existing surround. With some inexpensive updating ideas, it’s possible to significantly change the appearance of your brick fireplace without completely rebuilding it. Benefits of Modernizing an Old Brick Fireplace Beyond preserving the historic brick, modernizing provides an affordable way to dramatically change the aesthetic of a focal living space feature. Updating the fireplace allows you to tailor its style to your desired design motif while maintaining the charm of natural materials like brick. Rather than a complete overhaul, targeted brick fireplace makeovers are generally lower in cost and less disruptive than full replacements. It allows you to maximize your living space while achieving a refreshed contemporary look suited to today’s interiors. Evaluating Your Fireplace for Resurfacing When determining if and how to modernize, carefully evaluate the condition of your existing brick fireplace. Inspect the mortar joints for cracks or crumbling which may need repair prior to beginning surface treatments. Check the structural integrity of the brickwork itself – if severely damaged or loose, refacing may be preferable to surface refinishing. Assess the surround and mantel for signs of wear. A deteriorated mantel may warrant replacement rather than incorporation into a modernized design. Understanding the existing condition will help establish a realistic scope and appropriate modernizing approach. Options for Modernizing Brick Fireplace Painting One of the simplest and most effective ways to update a brick fireplace is with a fresh coat of paint. Painting brick allows for complete customization to suit any style. Some benefits of this option include: Painted brick comes in countless color options to complement different design motifs from traditional to contemporary. White is a versatile choice but grays and creams also work well. Paint adheres directly to clean, dry brick surfaces without the need for priming in most cases for a quick and low-cost transformation. The brick’s natural details like texture remain visible under paint for a balanced customized look that retains character. Whitewashing or Limewashing There is a subtle distinction between whitewashing and limewashing when it comes to modernizing a brick fireplace. Whitewashing involves taking a water-based lime paint and diluting it with water before applying it to the brick surface with a brush. This results in a very faded, pale-colored wash that gives the brick an antique appearance. Limewashing uses hydrated lime mixed with water to create a lime plaster or wash. It leaves a more opaque, matte white appearance. However, it does not completely cover up the brick, enhancing natural tones without making it a solid white. The overall effect is a subtly whitewashed look that updates an older brick fireplace to a more modern, light-filled aesthetic. Refacing Refacing a brick fireplace is a technique that involves installing a new surface over the existing brick facade to dramatically change its aesthetics and texture. A non-permanent thin veneer of stone, brick or tile is adhered directly to the front of the fireplace. The pros and cons of refacing a brick fireplace: Pros: Allows complete design freedom, preserves the original brick, and offers easier installation than rebuilding. Cons: Permanently alters the appearance of the brick facade, and incurs additional material and installation costs. Adding or Updating Existing Mantel Adding a mantel to a brick fireplace or updating an existing one provides aesthetic and functional benefits. A mantel helps define the fireplace opening, giving it a finished look and adding a display surface. Options for materials include natural stone for an elegant accent or reclaimed wood for a rustic flair, both complementing various modernized brick finishes. Tiling Over Brick Tiling over an existing brick fireplace facade provides a sleek, contemporary look. Ceramic, porcelain or natural stone tiles transform a traditional appearance into a glossy refined surface. Pros and cons of tiling include: Pros: Durable, low-maintenance finish, highly customizable designs, and modern look. Cons: Permanent alteration, requires professional installation, and involves a semi-permanent change to the facade. Tips for Maintaining Safety While Modernizing Use only non-combustible, heat-resistant materials near the firebox. Ensure adequate clearance between any decor and the flame area as per code. Inspect fireplace operation and have the chimney cleaned/inspected prior to use. When to Call a Professional? Any work involving the firebox structure, damper or direct flame path, such as refacing or tiling, warrants consultation with a certified masonry contractor. This ensures modifications comply with fire codes and safety standards. Tips on Budgeting for the Modernization Project Compare costs of modernizing versus replacement where possible. Consider DIY options like painting to save on labor costs. Set a budget before choosing an approach and expand strategically if needed.

Dos and Donts for Successful Restoration of Old Brick Buildings
Uncategorized

Dos and Donts for Successful Restoration of Old Brick Buildings

Dos and Donts for Successful Restoration of Old Brick Buildings You’ve got to admire those old brick buildings that have stood the test of time, connecting us to architects from centuries past. However, all that history takes its toll over the years. If you’ve got an old brick home or building that needs some love, this guide is for you. We’ll go over everything you need to know to bring your masonry gem back to life while keeping its charm intact. From analyzing problems to selecting the right materials and methods, we’ll make sure you’re prepared to carefully restore your brick structure like a pro. Let’s get started! Why Invest in Brick Building Restoration? Historic masonry structures, like your old brick building, hold immense cultural value. Taking the necessary steps to properly restore and preserve the historic brickwork will help maintain its significance for decades. The benefits are: Increased Value Restoring an old brick building rather than letting it deteriorate can significantly increase its market value. Done right, a restoration can potentially add tens of thousands to the sale price if you decide to sell. Even if you keep the building, you’re making an investment in an appreciating asset. Curb Further Damage By addressing issues early before they get worse, you’re preventing expensive problems down the road. Small repairs today can save you from major reconstruction costs tomorrow if water damage or structural problems are left unchecked. A restored building needs less ongoing maintenance too. Historic Preservation If your building has architectural or historical significance, a careful restoration following preservation guidelines maintains that heritage for future generations. You’re playing an active role in protecting our shared cultural history. Communities often appreciate such stewardship efforts. So in the end, restoration pays dividends through higher property value, avoiding bigger future bills, preserving community heritage, and the pride that comes from breathing new life into historic buildings. The upfront investment is well worth it for the long-term returns. Pre-restoration Phase Before beginning any restoration project, conduct a comprehensive assessment of the building’s condition. A qualified masonry repair contractor can accurately identify issues like cracks, water damage and brick or mortar deterioration. Ignoring underlying problems will only lead to further expensive repairs in future. It’s crucial to determine the scope of necessary work by analyzing both the exterior and interior of the structure. Many issues lurk behind decorative finishes and require inspection. Substandard or failing materials may need full replacement. Structural evaluations verify load-bearing components can safely support restoration. Common problems seen in aging brick include loose or spalling bricks, damaged or missing mortar joints and moisture intrusion signs. Issues left unaddressed will progressively worsen. Investing in a detailed pre-repair evaluation saves money and hassle versus overlooking something that later demands major reconstruction costs. Only licensed masonry contractors can properly diagnose complex masonry problems and design code-compliant solutions. But before starting restoration work, you must understand the following Dos and Don’ts. Do’s for Successful Brick Building Restoration When restoring old brick buildings, certain best practices should always be followed to avoid common pitfalls. Here are some key do’s: Use appropriate and similar materials. For restoration authenticity and long-term performance, source replacement bricks closely matching the original in composition, size and color. New mortar joints must be formulated to last centuries like the original lime-based materials. Prioritize structural integrity. Assess and stabilize any foundation or load-bearing issues before aesthetic work. Reinforce weak points to avoid potential safety hazards during brickwork restoration. Employ gentle cleaning methods. Harsh chemicals or abrasives can irreparably damage fragile old bricks and mortar. Test alternative methods on sample areas first. Steam cleaning often works best for organic dirt buildup. Preserve as much original material as possible. Only replace severely deteriorated bricks and mortar as needed, filling voids with materials indistinguishable from the historic. Salvage usable bricks for future repairs. Hire professional, experienced restorers. Complex masonry restoration requires specialized skills. DIY jobs risk compromising the building’s integrity – enlist accredited local experts. Follow conservation guidelines. Seek approval from historical societies for restoration plans. Adhering to preservation standards maintains the building’s cultural heritage integrity. Don’ts To avoid restoration mistakes, certain practices should always be avoided when working on historic brick structures. Here is some key don’ts: Refrain from harmful cleaning methods. Acid washing, sandblasting or other abrasive techniques permanently scar delicate old bricks and mortar joints. Avoid unnecessary modernization. Resist updating features just for aesthetics – retain architectural authenticity and historic integrity. Never use inappropriate contemporary materials. Substitute modern bricks, mortars or coatings lack compatibility and longevity, compromising the building in the long run. Neglect safety measures. Implement fall protection, dry lay tarps and proper equipment when working at heights to avoid accidents on restoration sites. Rush the restoration process. Take time to plan details, source compatible materials, phase complex projects – quality restorations can’t be hurried. Techniques Used in Brick Building Restoration Specialized masonry restoration techniques address issues while retaining original fabric. Proper methods minimize repairs and maximize historical accuracy. Traditional cleaning involves soft natural bristle brushes and biodegradable cleaners. Low-pressure water rinsing removes grime without damaging aged brick faces. Skilled masons precisely extract deteriorated or damaged bricks using pneumatic tools. Replacement units are dry-laid for evaluation before trowel-mixing new lime mortar and installing permanently. Brickwork Repointing replaces cracked, missing or crumbling mortar joints in a process called ‘raking out.’ New mortar is hand-tooled to exactly replicate aged surrounding bonding material. Following brick restoration, coatings like waterproofing consolidate weak surfaces. Permeable formulas allow moisture evaporation to protect against spalling and freeze-thaw damage long-term. Regular maintenance prevents deterioration recurrence. Inspecting for cracks, efflorescence or other material loss every few years and addressing small problems promptly forestalls future expensive repairs. Summary Old brick buildings deserve respect for withstanding the test of time through generations of use. Home and building owners can show this reverence through diligent restoration following best practices. Upholding structural integrity with appropriate materials preserves these landmarks as tangible parts of our shared cultural heritage. Thorough planning, expertise and avoidance of

Pavers or Concrete for Your Patio
Uncategorized

Making the Right Choice – Pavers or Concrete for Your Patio

Making the Right Choice – Pavers or Concrete for Your Patio When planning to build or renovate your patio, one of the most important decisions you will need to make is whether to use patio pavers or poured concrete. Both options come with their own unique advantages and considerations. In this article, we will provide an in-depth overview of pavers and concrete, including their definitions, installation processes, pros and cons. We’ll also directly compare the two materials to help you determine which is the best choice for your specific needs and circumstances. Basics of Patio Pavers Patio pavers are individual stone or concrete units that are laid close together to form a durable, customizable patio surface. These pavers are man-made or natural stone units that are generally rectangular or square in shape. Common paver materials include concrete, clay, brick, granite, limestone and slate. The units lock together but still allow for flexibility and movement. Individual pavers typically range in size from 4 to 12 inches. Types of Pavers Brick pavers are tapered clay or concrete units that mimic the look of traditional brick. They are one of the most popular and affordable paver options. Concrete pavers are rigid interlocking pieces that come in a variety of earth tone colors and surface textures. They are very durable and cost effective. Natural stone pavers use materials like limestone, granite and slate to create a luxurious, elegant appearance. Though more expensive initially, stone pavers can gain value over time. Installation Patio pavers are installed over a prepared gravel base and edged with border materials like concrete, masonry or wood. The individual pavers are precisely laid out and fit tightly together. Joint sand is swept into the cracks and gaps to further lock the pavers in place. Benefits of Using Patio Pavers Ultimate Design Flexibility Patio pavers come in a wide variety of colors, shapes, sizes, textures and styles. This allows you to create a completely customized look for your space. You can lay out intricate patterns, logos, borders and artistic designs. Defined Drainage Joints The narrow spaces between each paver piece allow water to flow through rather than pooling on the surface. This prevents ice buildup, flooding, and other issues in wet weather. Prevent Shifting and Cracking Individual pavers do not shift together like a single poured slab. This means your patio surface will remain intact and escape the settling and cracking issues that concrete can experience over time. Modular Repairs If any paver piece becomes damaged, loose or worn out, it can be easily replaced without disturbing the entire patio. Simply remove the problem piece and insert a new matching unit. Long Lifespan When properly installed and maintained, a paver patio can outlast concrete by decades since repairs are made piece by piece rather than replacing large sections. This saves significant costs over the lifetime of your patio. Drawbacks The installation process for pavers tends to be more labor intensive than poured concrete. Initial material and labor costs are also often higher for pavers. Over time, weeds can grow in the joints if not properly sealed which requires ongoing maintenance. Cracking or settling is also possible if the base layer is not adequately compacted. Basics of Concrete Patios While patio pavers are a modular alternative, concrete is commonly poured into a continuous, seamless surface for patios and other hardscaping projects. A concrete patio also called cement patio consists of a cement mixture that is combined with coarse and fine aggregates like sand and gravel. It is traditionally poured and finished as a solid, flat-grey slab. Concrete dries to form a very hard, durable surface. Concrete Patio Types Stamped concrete patios are imprinted with a textural pattern or design while wet using molds and stamps. Exposed aggregate concrete reveals stones within the mixture after the slab is finished, creating a textured, natural appearance. Colored concrete involves adding mineral oxide pigments that permanently dye plain concrete in numerous shades. Installation The installation process for concrete typically involves excavating and grading the base, installing reinforcement mesh, pouring the concrete mixture, smoothing and finishing, then allowing it to fully cure. Edge materials like masonry or concrete curbs are also added. Benefits of Using Concrete Patios Extreme Durability Concrete forms an incredibly strong and hardened surface that can withstand decades of use with minimal deterioration. Low Maintenance Once installed, concrete requires little ongoing care. It won’t shift, crack or pull away like other materials so there’s no repair costs over time. Retains its Flatness The uniform slab structure prevents dipping, rolling or doming over the years. The surface will stay smooth and level. Less Preparation than Pavers Laying concrete eliminates the need for a complex gravel base layer, instead the material is simply poured directly over a compacted soil layer. Faster Installation There’s no measuring, cutting or placing of individual pieces. Concrete contractors can pour an entire patio in just one day after site preparation. Simplicity As a single poured slab, concrete provides an easy, seamless solution without the intricacies of cutting and fitting together paving stones. Drawbacks Over years, concrete cracks as it expands and contracts with temperature changes. Cracks allow weeds to take root and compromise the structural integrity. Repairs can involve replacing entire sections rather than individual pieces. The unyielding nature of concrete also restricts design possibilities compared to pavers. Pavers vs. Concrete Cost In terms of initial material costs, concrete is generally cheaper due to requiring less individual pieces. However, when including labor costs, pavers installations often have a competitive price point. Maintenance costs tend to even out between the options over time. Durability and Maintenance Both concrete and pavers create solid, durable patio surfaces. However, concrete is prone to cracking while defined paver joints better resist shifting. Weeds grow in cracks but pavers allow for replacement of damaged units. Proper sealing reduces ongoing upkeep of pavers’ sand-filled joints. Flexibility in Design While a monolithic concrete slab is uniform, pavers enable intricate patterns, custom borders and artistic flair. Their modular nature facilitates

Paver Driveway Benefits vs Asphalt
Uncategorized

Paver Driveway Benefits vs Asphalt – Which Provides More Value?

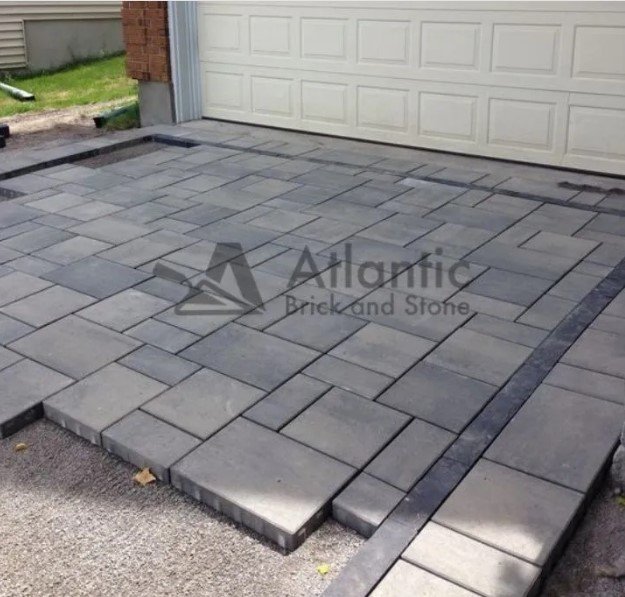
Paver Driveway Benefits vs Asphalt – Which Provides More Value? Imagine pulling up to your home, where the entrance is not just a driveway but a statement of elegance and durability. This is the promise of a paver driveway, a choice that reflects not only your style but also a wise investment in your home’s future. As we navigate the path between paver driveways and their asphalt counterparts, let’s discover why opting for pavers could be the best decision for your home’s aesthetics and value. Paver Driveways Paver driveways are the quintessence of curb appeal, a blend of beauty and resilience. They are composed of individual pieces—be it clay, concrete, or natural stone—each contributing to a driveway that’s as unique as your home. The choice of material in paver driveways is a testament to their versatility. Concrete Pavers Offers a spectrum of hues for every palette. Shapes and sizes to fit any design scheme. Clay Pavers Classic charm for a timeless appearance. Natural color that endures through the years. Natural Stone Pavers Brings the beauty of nature to your home’s entrance. Unique textures that elevate curb appeal. Each material choice is more than just a practical surface; it’s an integral component that contributes to the overall character and aesthetic of your home. Design and Aesthetic Value The design possibilities with paver driveways are endless. From intricate interlocking patterns that speak of modern sophistication to rustic cobblestone designs that whisper tales of old-world charm, paver driveways are a canvas for personal expression. Advantages of Paver Driveways Durability and Strength Paver driveways are renowned for their endurance. They are designed to withstand not just the weight of your vehicle but the test of time. The interlocking nature of pavers allows them to flex with the earth’s movements, resisting cracks that asphalt driveways often succumb to. Easy Repairs The modular design of paver driveways is a boon when it comes to repairs. A cracked or damaged paver can be easily replaced without leaving a trace, ensuring that your driveway always looks impeccably maintained. Design Flexibility Paver driveways are the chameleons of the driveway world. They can adapt to any home style, from victorian elegance to contemporary chic, making them the perfect choice for those who view their driveway as an extension of their home’s personality. Disadvantages Cost Factor The initial investment for a paver driveway is higher than that of an asphalt driveway. However, this cost is mitigated by the longevity and reduced maintenance needs of pavers, making them a cost-effective choice in the long run. Maintenance Requirement Paver driveways do require some upkeep to maintain their beauty. Regular cleaning and re-sanding of joints are necessary, but these tasks are minimal compared to the extensive resurfacing required by asphalt driveways. Asphalt Driveways Asphalt driveways are the traditional choice for many homeowners. They are known for their quick installation and cost-effectiveness, offering a straightforward, no-frills approach to driveway design. Asphalt is a composite material made of aggregates bound together with bitumen. It’s laid in layers and compacted to create a solid, flexible surface that can withstand temperature fluctuations and heavy use. Design and Aesthetic Value While asphalt provides a smooth, uniform surface that has its own sleek appeal, it lacks the variety and customization options that paver driveways boast. Asphalt is the canvas of choice for those who prefer simplicity over statement. Advantages of Asphalt Driveways Cost Beneficial Asphalt is the budget-friendly option for driveway paving. It’s a practical choice for anyone who prioritize initial savings over long-term value. Rapid Installation The quick installation process of asphalt driveways is a significant advantage, reducing the inconvenience and getting your driveway ready for use almost immediately. Weather Resistant Asphalt’s ability to expand and contract without cracking makes it a reliable option for areas with fluctuating weather conditions, ensuring a durable surface year-round. Disadvantages Regular Resurfacing Asphalt driveways require regular maintenance. Sealing and resurfacing need to be applied every few years to keep the driveway in good condition, which can add up in terms of cost and effort. Vulnerable to Extreme Heat Asphalt can soften in high temperatures, leading to ruts and grooves. This vulnerability means that in hotter climates, asphalt driveways may need more frequent repairs to maintain a smooth surface. Paver Vs. Asphalt Driveways Cost While asphalt may seem like the economical choice initially, the long-term benefits of paver driveways—with their minimal maintenance and longer lifespan—often present a more value-packed proposition. Lifespan Paver driveways are champions of longevity. Properly installed, they can grace your home for generations, while asphalt driveways, despite their resilience, tend to have a shorter lifespan and higher maintenance demands. Looks Battle Paver driveways take the lead in aesthetics and design versatility, offering homeowners the chance to elevate their property’s curb appeal and potentially its market value. Maintenance and Repair The ease of maintenance and repair of paver driveways is unmatched. Unlike asphalt, which requires periodic resurfacing, pavers need only occasional cleaning and joint re-sanding, simplifying upkeep. Which Provides More Value? Initial Investment vs Long Term Benefit The upfront cost of a paver driveway is an investment in your home’s future. The long-term benefits—durability, ease of repair, aesthetic appeal—far outweigh the initial expense, especially when compared to the ongoing maintenance costs associated with asphalt driveways. Impact on Property Value A paver driveway can significantly enhance your home’s curb appeal and, by extension, its resale value. It’s a tangible upgrade that can pay dividends if you decide to sell your home. What to Look When Choosing the Type of Driveway? Climate Condition In regions with severe weather like Fredericton NB, the resilience of paver driveways makes them a superior choice, capable of withstanding the rigors of both frost and heat without losing their integrity. Use and Anticipated Wear and Tear For areas that will see a lot of traffic or heavy loads, the robustness of pavers makes them the ideal candidate, ensuring a driveway that remains unflappable in the face of daily use. Personal Taste and Design Preference For those who view

Issues with Brick Fireplaces
Uncategorized

Common Issues with Brick Fireplaces and How to Fix Them

Common Issues with Brick Fireplaces and How to Fix Them Brick fireplaces are a classic aspect of home design and can add grandeur and warmth to any living space. However, as fireplaces age over time, they can begin to develop problems that negatively impact function and aesthetics if not properly addressed. This article will discuss some of the most common issues brick fireplaces face such as cracking, leaking, creosote buildup and flue problems. We will explore the underlying causes for these issues and provide solutions for repairing or preventing them. Whether you have a newly built fireplace or one that has stood for decades, the following information will help you keep your masonry fireplace in top operational and visual condition for longer time. Why Brick Fireplace Maintenance is Important? Maintaining your brick fireplace is important for several reasons. Firstly, it ensures the safety of your home and family. Cracks or damage in the bricks or mortar can lead to dangerous situations, such as fire hazards or carbon monoxide leaks. Regular maintenance also helps to prolong the lifespan of your fireplace, saving you money in the long run. A well-maintained fireplace also contributes to the overall aesthetic appeal of your home, making it a welcoming space for family and friends. Ignoring small problems can lead to bigger, more costly issues in the future. For example, minor cracks in the mortar can quickly expand, leading to loose bricks and structural instability. This not only increases the risk of a hazardous situation but also makes the repair process more complex and expensive. Addressing issues as soon as they arise is crucial in preventing further damage and ensuring the longevity of your brick fireplace. Common Problems with Masonry Fireplaces Brick fireplaces are susceptible to a range of issues, from mortar damage and creosote buildup to smoke drafting problems and heat damage. Each of these issues requires a specific approach to repair and prevent future occurrences. Let’s take a closer look at each of these common problems and explore how to address them effectively. 1. Brick Mortar Damage Mortar damage is a prevalent issue in brick fireplaces. It can occur due to various factors, including age, weather exposure, and regular use. When the mortar starts to crack or crumble, it can lead to loose bricks and compromise the structural integrity of the fireplace. 2. Creosote Buildup Creosote is a byproduct of wood burning and can accumulate on the inner walls of your chimney. Over time, this buildup can become a significant fire hazard and affect the performance of your fireplace. 3. Smoke Drafting Problems Proper smoke drafting is crucial for the efficient operation of your brick fireplace. Issues such as blockages or structural problems can lead to smoke entering your home, creating a health hazard and an unpleasant living environment. 4. Loose Bricks Loose bricks in your fireplace can be a result of mortar damage or external impact. They pose a safety risk and can also affect the appearance of your fireplace. 5. Staining and Discoloration Stains and discoloration on your fireplace bricks can be caused by smoke, soot, or water damage. These issues can detract from the overall look of your fireplace and require specific cleaning methods to address. 6. Heat Damage Excessive heat from your fireplace can lead to damage in the bricks and mortar, causing them to crack or deteriorate over time. This not only affects the appearance of your fireplace but also its functionality. Brick Mortar Damage – A Major Issue Brick mortar damage is a common issue that can lead to a range of problems if not addressed promptly. The mortar acts as a binding agent between the bricks, providing stability and support. Over time, exposure to the elements and regular use can cause the mortar to deteriorate, leading to cracks and gaps. Signs of Mortar Damage Visible Cracks or Gaps in the Mortar: One of the most apparent signs of mortar damage is the presence of cracks or gaps. Over time, exposure to the elements and the natural settling of your home can cause the mortar to crack. Loose Bricks: If the mortar is significantly damaged, it may no longer hold the bricks in place securely. Loose bricks can be a safety hazard and may also affect the structural integrity of your fireplace. Crumbling Mortar: The mortar may start to crumble and deteriorate due to age, weather exposure, or poor installation. How Professionals Fix Mortar Damage Repairing brick mortar damage is a delicate process that requires precision and care. Here’s a step-by-step guide on how professionals tackle this issue: Remove Damaged Mortar: Carefully remove the damaged mortar from the joints using a masonry chisel and hammer. Clean the Joints: Clean out the joints to remove any remaining debris. Mix New Mortar: Prepare a batch of new mortar, ensuring it matches the existing mortar in color and consistency. Apply New Mortar: Use a pointing trowel to apply the new mortar to the joints, pressing it in firmly for a secure bond. Smooth the Joints: Smooth out the joints to create a uniform finish. Clean Excess Mortar: Remove any excess mortar from the bricks for a clean finish. Cure the Mortar: Allow the mortar to cure properly. Tips on Maintaining Brick Mortar Regular Inspections: Conduct regular inspections of your brick fireplace, looking out for signs of damage or wear. Prompt Repairs: Address any issues as soon as they arise to prevent further damage. Proper Cleaning: Clean your brick fireplace regularly with appropriate cleaning products. Seal the Bricks: Consider applying a sealer to the bricks and mortar to protect them from the elements. Dealing with Creosote Buildup Creosote is a tar-like substance that forms when wood is burned incompletely. It can build up on the inner walls of your chimney and fireplace, creating a significant fire hazard. The buildup of creosote requires regular cleaning to prevent. How to Clean Creosote Buildup? Cleaning creosote buildup is best left to professionals who use specialized equipment and techniques to ensure safety and thoroughness. Remedying

Maintaining Brickwork When to Consider Acid Washing
Uncategorized

Maintaining Brickwork – When to Consider Acid Washing

Maintaining Brickwork – When to Consider Acid Washing Brick is a classic building material prized for its durability and aesthetic appeal. However, over decades of exposure to the elements, brick facades can accumulate stubborn deposits that resist routine cleaning methods. One powerful technique to restore bricks to like-new condition is acid washing, but when is it truly necessary and how can it be done safely? This article will explore the ins and outs of acid washing brickwork, including tips to determine whether it’s the right approach and professional best practices for application. Brickwork Explained Brick has been used in construction for centuries due to its durability and aesthetic appeal. However, over time brick can become damaged if not properly maintained. Let’s start with understanding the unique characteristics of brick to better appreciate why maintenance is important. Brick is made by shaping clay and firing it at extremely high temperatures, resulting in a hardened ceramic material. This process gives brick several qualities that make it suitable for structures. It is strong yet lightweight, resistant to fire and insects, and lasts for decades with minimal upkeep if cared for properly. The faces of brick are smooth while the cores contain spaces, making brick porous but not in a way that allows moisture penetration. Brick varies slightly in color, size, and texture, contributing to the natural aesthetics that many property owners find attractive. However, this porous characteristic also requires diligent maintenance to prevent damage over the years from elements like weather and pollution. When left unchecked, issues like cracks, spalling, and efflorescence can diminish a brick facade’s curb appeal and structural integrity. Making the effort to identify early warning signs and address problems proactively helps preserve brickwork investment. Causes of Brick Damage There are various common issues that can arise with brickwork if not maintained properly: Efflorescence Efflorescence involves a white powdery residue that surfaces on the masonry and mortar joints when moisture passes through the brick, dissolving soluble salts. It is usually caused by excess absorbed moisture but is easily removed. Spalling Spalling means the surface or face of the brick starts to crumble or flake off. This is often due to freezing and thawing of moisture that has penetrated cracks or pores in the brick over time. Cracking Cracking is inevitable with age but could indicate structural concerns if severe or spreading. Both spalling and cracking leave the underlying brick unprotected if not addressed promptly. While natural causes like weather play a role, pollution from auto and factory emissions can also negatively impact brick over the long run. Acid rain accelerates the chemical breakdown of brick surfaces and mortar. Misconceptions about the durability of brick can also lead some to neglect routine cleaning and maintenance, hastening deterioration. Regular inspection helps avoid this. What is Acid Washing? Acid washing is an effective method for deep-cleaning brick to remove stubborn stains and restore its pristine condition. It involves applying a weak acid solution, usually 10 parts water to 1 part muriatic acid. Muriatic acid or hydrochloric acid is recommended for masonry cleaning as it safely dissolves mineral deposits, mortar smears, and other buildup that regular soap and water cannot break down. The diluted acid is applied with a brush and allowed to dwell briefly before thoroughly rinsing off with a garden hose or pressure washer. This process dissolves years of dirt and residue by reacting with and neutralizing alkaline minerals deposited on the surface. After several rinses, the area should be completely clean with no lasting acid damage if done properly. What is the Right Time for Acid Washing? Acid washing may be necessary in scenarios such as: Heavy accumulation of stubborn stains, particulates, or mineral deposits that resist basic soap and water cleaning methods. Unsatisfactory results after multiple attempts with non-acidic masonry cleaners. Prior to applying a waterproofing brick sealer or restorative coating to ensure proper surface preparation. However, it is crucial not to over-apply acid washes, as too frequent use can eventually etch away some of the protective glazed surface on fired brick. It should also be avoided if there are visible cracks or defects in the brick, as acid penetration could worsen structural issues. Hiring a Professional for Brickwork Acid Wash While DIY attempts can work in some cases, professional masonry contractor have advantages. They have extensive experience prepping, applying, and rinsing acid solutions, minimizing safety risks. Professionals also use commercial strength acids and equipment for faster, deeper cleaning and are skilled in disposal of corrosive rinse water according to EPA guidelines. The Acid Washing Process Here are the typical steps professionals follow to safely acid wash brickwork: Cover surrounding landscape, windows, and other surfaces with tarps or drop cloths for protection from splashes. Saturate the brick surface with clean water from a pressure washer or hose to prevent the acid from being absorbed too deeply. Mix acid solution of 1-part muriatic acid to 10 parts water in a bucket according to surface area to be cleaned. Apply solution generously using a medium psi pressure washer, acid brush, or pump sprayer. Allow to dwell for 5-10 minutes. Scrub stubborn spots with an acid brush and rinse thoroughly until water runs clear. Repeat if needed. Rinse the entire surface fully 2-3 times with clean water at pressure over 2000 psi. Inspect for any remaining acid residues and rinse again if needed before removing tarps. Professional Help vs DIY For some low-risk cleaning jobs, a DIY approach may seem appealing to save costs. However, there are also advantages to leaving acid washing in professional hands: Safety is the number one concern with acids and pressure equipment. Even with protective gear, DIY risks exposure due to inexperience. Professionals achieve better results with agitation and high-pressure rinsing, using commercial tools unavailable to homeowners. Liability issues arise if property damage or health issues occur from improper handling, storage, or disposal of hazardous chemicals at home. Time – pros complete jobs more efficiently without multiple tries. In some mild cases, DIY could work if following

Hardscape vs Landscape
Uncategorized

Hardscape vs Landscape – Key Differences Explained

Hardscape vs Landscape – Key Differences Explained Creating beautiful and functional outdoor spaces requires balancing various elements for optimal form and function. Hardscapes provide enduring structures while landscapes integrate living plants into designs. But what exactly distinguishes these elements and how can they best complement one another? This article explores the key differences between hardscape and landscape components. It provides best practice tips on thoughtfully combining the two for maximum enjoyment and curb appeal of any exterior area. Read on to learn how to skillfully blend hardscapes with landscapes. What is Hardscape Construction? Hardscape refers to the non-living elements in your outdoor space that are used to enhance the design and function. Some of the most common hardscape elements you will come across include patios, walkways, driveways, and retaining walls. These man-made structures are usually made from durable materials like concrete, brick, stone, or interlock that won’t change or evolve over time. Some key benefits of using hardscaping are increased living space outside the home, drainage and runoff control, and curb appeal that can boost property values. Choosing high-quality materials and proper installation are important for hardscaping elements to withstand the test of time. Types of Hardscaping Elements Patios A patio is a flat surface that is commonly found in the backyard and used for outdoor living and entertainment areas. It can be a focal point and create an oasis within your yard. Materials like concrete or paver stones are often used for patios to withstand weathering from the elements. Walkways Also called pathways that connect different areas of the landscape to the front door or the patio to the garden. Interlocking stone is a very popular material for building walkways because of its flexibility to be installed around curves or uneven surfaces. Driveways They are sloped surfaces located in the front or backyard that provide vehicular access from the road to the garage. Asphalt and pavers are the most common materials used for hard, durable driveways that can withstand the weight of cars. Retaining Walls These are structural elements installed to hold or prevent earth from sliding on an inclined area. Common retaining wall materials are concrete, stone, or wood, and they add architectural design elements to the landscape. Pro-Tips for Hardscaping When planning hardscaping projects, use high-quality, long-lasting materials installed by professionals for optimal results. Consider the landscape design, natural grading, and water drainage. Quality compaction and foundations are important as well. Regular maintenance keeps hardscapes looking their best. What is a Landscape Project? Landscape, also called softscape, refers to the living and soft elements that form the natural setting surrounding a home. This includes plants, trees, flowers, shrubs, and ground covers. A quality landscape consists of the thoughtful placement of different shrubs, perennials, trees, and other greenery. Unlike hardscapes, landscapes are living elements that change colors and appearances with the seasons. Different Elements of Landscaping Grass A living ground cover providing an open lawn area. Needs regular mowing and watering. Trees Organic elements adding shade and scale. Come in many varieties. Flowers Colorful seasonal plants boosting garden appeal. Require weeding and pruning. Bushes Woody greenery offering privacy or edging beds. May need trimming and pest control. Key Tips for Good Landscaping Consider the landscape design and placements for optimal functionality and visual balance. Incorporate a mix of flowering, foliage, coniferous and deciduous plant varieties. Choose species suitable for your climate and sunlight conditions. Proper irrigation, weeding, pruning, and pest control help maintain landscapes. Landscape and Hardscape Combo for a Balanced Outdoor Space By thoughtfully incorporating both hardscaping and landscaping elements, homeowners can create cohesive outdoor spaces that are both functional and beautifully designed. Hardscaping serves to define areas for activities through elements like patios, firepits, and seating areas. Meanwhile, landscaping brings natural depth, visual interest, and seasonal colors. Some inspiring design examples show hardscape pathways deliberately placed to guide movement between landscape vignettes featuring different groupings of trees, shrubs, and planting beds. Well-designed water features like ponds or fountains become focal points enveloped by billowing greenery. Privacy and definition are established through purposeful juxtaposition of hardscape borders complemented by softscape infill like hedges and groundcover. Benefits of Combining Hardscape and Landscape Creates Cohesive Outdoor Spaces – Thoughtfully incorporating both elements results in aesthetically pleasing and functionally balanced outdoor areas. Defines Space While Adding Natural Beauty – Hardscapes provide structure and pathways between activity areas, complemented by lush vegetation in landscapes. Maximizes Outdoor Enjoyment – The mix encourages exploration and appreciation of the space with smooth transitions between areas. Enhances Curb Appeal and Property Value – An integrated design optimizes usable space and blends permanent fixtures with living plants. Provides Functionality and Low Maintenance – Hardscapes ensure longevity while gardens thrive, balanced by maintenance between surfaces and planting beds. Guidelines for Achieving a Good Balance Consider flow and focal points in design. Choose complementary materials. Allow sufficient room for landscape growth. Address maintenance needs. Install high-quality hardscapes befitting the environment. Have a professional design and install for optimal form and function over time. Hiring Professionals to Design Your Outdoor Space in Fredericton For homeowners looking to install high-quality hardscaping fixtures like interlocking paver patios, granite walkways, or paver driveways, hiring experienced professionals is a wise investment. Those based in Fredericton, New Brunswick bring experience designing and building durable, low-maintenance systems tailored for our climate. Atlantic Brick and Stone is a highly trusted hardscaping company with decades serving the Fredericton area. Specializing in patio, walkway, and paver driveway installations, our team expertly guides projects from concept to completion. We are proficient at installing top brands of concrete pavers and stone materials in both traditional and custom patterns. When you hire Atlantic Brick and Stone’s professional hardscapers, your hardscape installation gains the advantage of precise excavation, compaction, and leveling techniques perfected through experience in Fredericton’s unique soil conditions. Contact us today to discuss creating your dream patio, walkway, or driveway – Our services are renowned as the best for projects in Fredericton. In Summary Hardscaping refers to non-living elements

GET STARTED

START MASONRY PROJECT THE RIGHT WAY

Create stunning structures with our residential and commercial masonry services in Fredericton. From meticulous designs to the completed build, our process is professional and rewarding, and we can’t wait to build your dream with you.

Atlantic Brick and Stone, one of the best masonry contractors in Fredericton, NB

Contact

8 Muskie Street, Lower Kingsclear, New Brunswick E3E 0E7, Canada

Scroll to Top